
Size
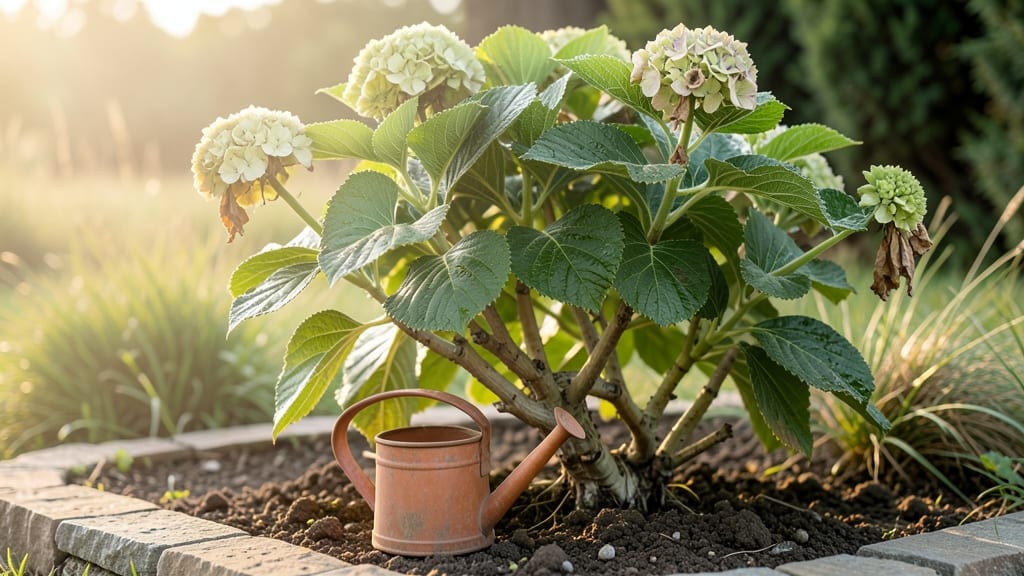
Hydrangeas can absolutely come back to life—even when they look completely done for. 💚 I’ve nursed back more than my fair share of drooping, brown-stemmed bushes, and the secret usually comes down to two things: consistent water and a little strategic pruning.
Most people assume it’s too late when they see those sad, wilted blooms, but with the right approach, you’ll see fresh green leaves within days and flowers returning in weeks.
The problem usually starts with either too much sun, too little water, or both. Hydrangeas hate drying out, and their roots need moisture to stay strong. I’ve seen bushes revive after just one deep watering session—sometimes even after being bone dry for weeks.
The key is to water deeply (about 1-2 inches per week) and check the soil before you water again. Stick your finger in the top inch: if it’s dry, it’s time to water.
Once you’ve got the watering right, focus on the stems. Cut back any dead or brown branches completely, and trim back others by about one-third to encourage new growth.
Within 7-10 days, you’ll start seeing fresh shoots pushing through, and by summer, those hydrangeas will be back to their showstopping best. The best part? This method works for both bigleaf and panicle varieties.
Prevention is even simpler: mulch around the base to keep moisture in, plant them where they get morning sun and afternoon shade, and fertilize lightly in spring. Trust me, your hydrangeas will bounce back—sometimes even more dramatically than before. Here’s how to keep them thriving long-term.
Root Causes Of Hydrangea Decline
Before you toss that drooping hydrangea bush into the compost, let’s uncover why it might still have a fighting chance. Hydrangeas are surprisingly resilient, but they need the right conditions to bounce back.
Here’s a breakdown of the most common reasons your hydrangeas might look lifeless—and what’s really going on beneath the soil.
---
Hydrangeas love moisture, but too much water suffocates their roots, leading to root rot—a fungal infection that cuts off oxygen and nutrients.
This is especially common in: - Clay-heavy or compacted soil (water pools instead of draining). - Plastic or non-porous containers (trapping excess moisture). - Frequent heavy rains without proper soil aeration.
Science behind it: When roots sit in soggy conditions for days, aerobic bacteria (which help break down organic matter) die off, while anaerobic fungi thrive—producing toxins that weaken the plant. The leaves turn yellow or brown, stems soften, and the plant may wilt despite soil appearing wet.
Actionable fix: Amend soil with perlite, sand, or compost to improve drainage. If planted in the ground, create a raised bed or swale to redirect water away from the roots.
---
Hydrangeas are not drought-proof—they’re adapted to consistent moisture. When temperatures soar above 90°F (32°C), their large leaves transpire rapidly, leading to: - Wilting (leaves curl inward to reduce water loss). - Leaf scorch (brown, crispy edges). - Bud drop (flower buds dry out before blooming).
Science behind it: Under drought stress, hydrangeas trigger abscisic acid (ABA), a plant hormone that closes stomata (pores) to conserve water. While this helps short-term, prolonged stress forces the plant into a survival mode—prioritizing root health over foliage, making it appear "dead" when it’s actually conserving energy.
Actionable fix: Mulch heavily (3–4 inches of wood chips or straw) to retain soil moisture. Water deeply 2–3 times per week (early morning) rather than shallow daily sprinkles. For container hydrangeas, use self-watering pots or moisture-retentive gels.
--- Even hardy hydrangeas (like Hydrangea macrophylla) can suffer if winter hits too early or temperatures drop below their chill tolerance (typically 10–15°F / -12 to -9°C).
Signs include: - Blackened stems (frost crack). - Mushy, discolored centers (ice expansion rupturing cells). - No new growth in spring (dormant buds failed to survive).
Science behind it: Ice crystals form in plant cells during rapid freezing, piercing cell walls and disrupting water transport. Evergreens (like Oakleaf Hydrangea) are especially vulnerable because they retain leaves year-round, increasing surface area for heat loss.
Actionable fix: Mulch in late fall (after ground freezes) with straw or leaves (6+ inches). Wrap young plants in burlap or use frost blankets. For container hydrangeas, move to a sheltered spot or bury pots in straw before winter.
--- If your hydrangea’s stems ooze gummy sap, leaves have dark spots with yellow halos, or the plant smells rotten, it’s likely battling: - Botrytis blight (gray mold on buds/leaves). - Phytophthora root rot (waterlogged soil + fungus). - Bacterial leaf spot (angular brown lesions).
Science behind it: Fungi like Botrytis thrive in humid, stagnant air (e.g., dense foliage without airflow). Bacteria (Xanthomonas) enter through wounds (pruning cuts, insect bites) and clog xylem vessels, preventing water uptake—hence the wilted appearance.
Actionable fix: - Prune infected parts immediately with sterilized shears (rubbing alcohol). - Space plants for airflow (3–4 feet apart). - Apply copper fungicide (preventative) or neem oil (natural antibacterial).
--- Hydrangeas are heavy feeders and sensitive to soil chemistry. Common deficiencies: - Yellow leaves (iron/chlorosis) → High pH (alkaline soil) locks out iron. - Purple stems/leaves → Phosphorus deficiency (critical for blooms). - Stunted growth → Nitrogen deficiency (pale, sparse leaves).
Science behind it: Hydrangeas prefer acidic soil (pH 5.2–6.2). In alkaline conditions, iron becomes insoluble, so roots can’t absorb it—leading to interveinal chlorosis (yellowing between veins). Over time, the plant weakens, appearing "dead" when it’s actually starving.
Actionable fix: - Test soil pH (home kits cost $10) and amend with sulfur (lowers pH) or lime (raises pH). - Fertilize in spring with balanced 10-10-10 or hydrangea-specific food (high in micronutrients). - Mulch with pine needles (naturally acidic) to adjust pH gradually.
--- Hidden pests like scale insects, aphids, or slugs can drain a hydrangea’s vitality overnight. Signs: - Sticky residue (honeydew) on leaves. - Chewed leaves/holes in buds. - Wilting despite moist soil (pests disrupt water transport).
Science behind it: Scale insects pierce plant cells to suck sap, injecting toxins that trigger wilting. Slugs eat young leaves, while Japanese beetles defoliate entire plants—all reducing the plant’s ability to photosynthesize.
Actionable fix: - Spray with soapy water (1 tbsp mild soap per gallon) for soft-bodied pests. - Set beer traps for slugs or use diatomaceous earth (food-grade). - Introduce beneficial insects (ladybugs, lacewings) to control aphids naturally.
--- Aggressive pruning (especially after blooming for mophead types) or mechanical injury (lawnmower cuts) can sever critical vascular bundles, starving parts of the plant. Signs: - Sudden wilting in one branch. - Blackened, shriveled stems at cuts. - No new growth after pruning.
Science behind it: Hydrangeas rely on vascular cambium (a thin layer under bark) to transport water and nutrients. A deep or jagged cut damages this layer, causing girdling—where the plant can’t circulate resources above or below the wound.
Actionable fix: - Prune only in late winter/early spring (before new growth). - Use sharp, sterilized shears and make 45° cuts just above a bud or leaf node. - Avoid "topping" (cutting back more than 1/3 of the plant).
Reviving Your Hydrangeas Step By Step
Hydrangeas may look wilted or lifeless, but with the right care, they can often bounce back to their stunning, blooming glory! 🌸 The key is identifying the root cause and taking targeted action.
Below, we’ve mapped out practical solutions for each common issue, plus tips to keep your hydrangeas thriving long-term.
---
Symptoms: Yellowing leaves, soggy soil, wilting despite water, or mushrooms near the base.
How to Fix It: 🔥 Step 1: Pause Watering Immediately - Let the soil dry out for 3–5 days to prevent root rot. Stick your finger 2 inches deep—if it’s damp, wait longer.
🍳 Step 2: Improve Drainage - Amend heavy or clay soil with compost, perlite, or coarse sand (50/50 mix). For potted hydrangeas, repot into a container with drainage holes and fresh, well-draining potting mix.
👨🍳 Step 3: Prune Damaged Roots (If Needed) - Gently dig around the base (carefully!) and trim mushy, black roots with sterilized scissors. Replant with a fungicide treatment (like copper fungicide) to prevent future rot.
⏰ Step 4: Adjust Your Watering Routine - Water deeply but infrequently—aim for 1–1.5 inches per week (including rain). Use a soaker hose to deliver water directly to the roots.
💡 Pro Tip: Mulch with wood chips or pine bark (2–3 inches thick) to regulate moisture and protect roots from temperature swings.
---
Symptoms: Crispy leaf edges, drooping blooms, dry soil pulling away from the pot, or leaves curling inward.
How to Fix It: 🔥 Step 1: Give Them a Deep Drink - Water until it flows out the drainage holes (for pots) or seeps 6 inches deep into the soil (for in-ground plants). Repeat every 2–3 days in extreme heat.
🍳 Step 2: Provide Afternoon Shade - Move potted hydrangeas to a shadier spot (morning sun is ideal). For in-ground plants, use a lightweight shade cloth (30–50%) during peak sun (11 AM–4 PM).
👨🍳 Step 3: Boost Humidity - Place pots on a tray of pebbles and water (evaporation increases humidity). For garden hydrangeas, mist leaves in the morning or install a drip irrigation system.
🌡️ Pro Tip: Avoid wetting foliage at night—this encourages fungal diseases like powdery mildew. Water early in the day instead.
---
Symptoms: Stunted growth, sparse blooms, yellowing leaves (even with proper watering), or roots circling the pot.
How to Fix It: 🔥 Step 1: Check the Roots - Gently remove the plant from its pot. If roots are crowded or circling, it’s time to repot. For in-ground plants, loosen compacted soil around the roots with a fork.
🍳 Step 2: Upgrade the Pot or Soil - Potted hydrangeas: Move to a container 2–3 inches larger with fresh, acidic potting mix (pH 5.5–6.2). Add a slow-release fertilizer (like Osmocote) or hydrangea-specific food. - In-ground plants: Mix compost or aged manure into the top 6 inches of soil.
Top-dress with pine needles or sulfur to lower pH if needed.
👨🍳 Step 3: Fertilize for a Blooming Boost - Use a balanced fertilizer (10-10-10) in early spring and a high-phosphorus formula (like 5-10-5) when buds form. Avoid high-nitrogen feeds—they promote leaves over blooms!
✨ Pro Tip: Epsom salt trick (1 tbsp per gallon of water) can help with magnesium deficiency (yellow patches between leaf veins). Apply every 4–6 weeks during growing season.
---
Symptoms: Blackened stems, mushy leaves, or no new growth after winter.
How to Fix It: 🔥 Step 1: Trim Dead Tissue - Cut back blackened or mushy stems to healthy green tissue (use sterilized pruners). Avoid pruning until late winter/early spring to assess damage.
🍳 Step 2: Mulch Heavily for Next Year - Apply a 4–6 inch layer of straw or leaves around the base (but keep it away from the stem). Remove mulch in early spring to prevent rot.
👨🍳 Step 3: Wait for New Growth - Hydrangeas are hardy—they may look dead but often regrow from the roots. Be patient! If no new shoots appear by mid-spring, the plant may not recover.
🌡️ Pro Tip: Group hydrangeas with other plants to create a microclimate that traps heat. Avoid planting in low-lying areas where cold air settles.
--- Symptoms: Holes in leaves, sticky residue (aphids), white powder (mildew), or wilting despite care.
How to Fix It: 🔥 Step 1: Identify the Culprit - Aphids/Scale: Spray with soapy water (1 tsp mild soap per quart of water). - Powdery Mildew: Apply neem oil or baking soda spray (1 tbsp baking soda + 1 quart water + drop of soap). - Slugs/Snails: Set out beer traps or use iron phosphate bait.
🍳 Step 2: Prune Infected Parts - Remove heavily damaged leaves or stems and dispose of them (don’t compost!). Sterilize pruners with rubbing alcohol between cuts.
👨🍳 Step 3: Strengthen the Plant - Boost immunity with compost tea or fish emulsion (diluted to 1 tbsp per gallon). Ensure the plant gets 6+ hours of sunlight and consistent moisture.
🎯 Pro Tip: Prevent future pests by mulching with cedar chips (natural repellent) and encouraging beneficial insects (like ladybugs) with dill or fennel nearby.
--- | Action | When to Do It | How Often | |--------------------------|----------------------------|-----------------------------| | Deep watering | Morning (avoid evening) | Every 2–3 days in heat | | Mulching | Spring & fall | Renew annually | | Fertilizing | Early spring & bud stage | Every 4–6 weeks | | Pruning dead growth | Late winter/early spring | Once per year | | Soil pH test | Early spring | Every 2–3 years |
--- Remember: Hydrangeas are resilient—even if they look beyond saving, 90% of the time, they’ll surprise you with new growth. 🌿 Stay consistent with care, and your blooms will thank you!
Frequently asked questions
How long does it take for a hydrangea to show signs of revival?
With proper care, you’ll typically see new growth within 7-14 days—sometimes just 3-5 days after deep watering. Look for fresh green leaves emerging from the stems or buds swelling at the tips. If you don’t see any improvement after 3 weeks of consistent care, the plant may need more aggressive treatment or could be beyond saving.
Can I revive a hydrangea that’s completely brown and leafless?
Many hydrangeas appear dead when they’re actually dormant or suffering from root rot. Cut back all brown stems to healthy green tissue and focus on deep watering and improved drainage. If the roots are still firm and white underneath, new shoots will emerge from the base within 2-4 weeks. For severe cases, check roots for rot—if they’re mushy, you’ll need to repot with fresh soil.
What’s the best way to test if my hydrangea is still alive?
Perform the scratch test: Gently scrape a small section of bark from a stem. If you see green tissue underneath, the plant is alive. For stubborn cases, check the roots—dig carefully around the base. Healthy roots are white or tan; rotten roots are black and mushy. Even if stems look dead, roots may still be viable and capable of regrowth.
Will my hydrangea bloom again if I revive it now?
Yes! Hydrangeas are perennial and will bloom again if the roots are healthy. For mophead varieties, blooms form on old wood (last year’s stems), so prune carefully. For panicle types, you can trim more aggressively since they bloom on new growth. Focus on spring feeding (high-phosphorus fertilizer) to encourage robust blooms—you’ll see buds forming by mid-summer.
Can I save a hydrangea that’s been underwatered for months?
Yes, but act quickly! Start by giving it a deep soak (water until it drains from the bottom of the pot or seeps 6 inches deep into the ground). For severe cases, submerge the pot in water for 10-15 minutes to fully rehydrate the roots. After revival, adjust your routine to 1-2 inches of water per week (including rain) and mulch heavily to retain moisture. Expect new growth in 2-3 weeks if roots are still intact.