
Propagation
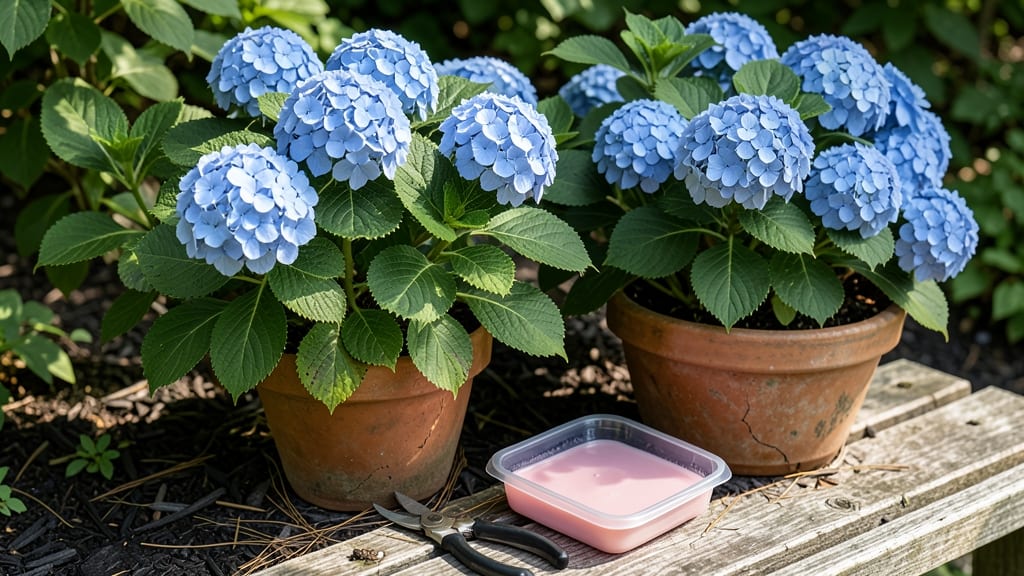
Propagating blue hydrangea from stem cuttings is the easiest way to multiply your favorite blooms without spending a dime. 🌿 I’ve turned a single plant into a small shrub patch just by following these four simple steps—no green thumb required.
The magic happens in late spring or early summer when new growth is firm but still pliable. You’ll need sharp pruners, rooting hormone (optional but helpful), and a mix of perlite and peat moss for the perfect rooting environment.
Most people skip the hormone, but it cuts rooting time from weeks to just 10-14 days. Once rooted, your new cuttings will push fresh growth in about 6 weeks, and by next season, they’ll be flowering just like the mother plant. The key to keeping those blooms blue?
Test your soil pH—aim for 5.2-5.5 to lock in that stunning color. This method works for Hydrangea macrophylla varieties like ‘Nikko Blue’ or ‘Endless Summer,’ and even stubborn cuttings usually root if you keep them consistently moist. Let’s get growing!
📚 In This Guide
- What you need
- Instructions
- Tips and common mistakes
- Wrapping up and next steps
What you need
- ● Healthy blue hydrangea stem cuttings: 4–6 inches long (about the size of a pencil)
- ● Mature wood (from current year’s growth, not woody stems)
- ● 3–5 leaf nodes per cutting
- ● Sharp pruning shears or clean knife: Sterilized to prevent disease (rubbing alcohol wipe works!).
- ○ Rooting hormone (optional but recommended): A gel or powder to boost root growth (e.g., Rootone or Clonex).
- ● Well-draining propagation medium: Option 1: Perlite or vermiculite (sterilized)
- ● Option 2: 50/50 mix of perlite + peat moss or coconut coir
- ● Option 3: Water (for water propagation)
- ● Small pots or containers: 4–6 inches deep with drainage holes (or a clean glass jar for water propagation).
- ● Plastic bag or humidity dome: To retain moisture (e.g., a clear plastic bag with holes or a propagator lid).
- ● Spray bottle: For misting cuttings (filled with room-temperature water).
- ● Heat mat: Keeps soil warm (70–75°F) to speed up rooting.
- ● Fogging system: For consistent humidity in larger setups.
- ● Label markers: To track cutting dates and varieties.
- ● Grow lights: If propagating indoors with low light.
How to propagate blue hydrangea: Step-by-Step stem-cutting guide
Here's the straightforward method I've used to successfully root blue hydrangeas every season.
🌿 Step 1: Select Healthy Mature Stems
Choose 4-6 inch long stems from this year's growth—look for wood that's slightly woody but still green, not last year's brown stems. These semi-hardwood cuttings root best. Use clean, sharp pruners to make a 45-degree angle cut just below a leaf node where buds form. This angled cut increases surface area for root development.
Remove all but the top 2-3 sets of leaves—too many leaves compete for the cutting's limited energy. Trim remaining leaves in half to reduce moisture loss. I like to work in the early morning when plants are hydrated; the stems will feel firm but bend slightly, not brittle.
💧 Step 2: Prepare the Root Hormone and Water
Fill a small container with room-temperature water and add 1 teaspoon of rooting hormone powder to it. Stir until completely dissolved—this creates a gentle hormone bath that stimulates root growth. Dip the bottom inch of each cutting into the solution, coating the cut end thoroughly. Tap off excess to prevent clumping.
While the cuttings soak, prepare your propagation medium. I use a mix of 50% perlite and 50% peat moss in small pots—this provides both aeration and moisture retention. Moisten the mix until it feels like a wrung-out sponge, not dripping. The right moisture level means water runs out cleanly when squeezed, with no puddles.
☀️ Step 3: Plant and Create Humidity Dome
Make a 1-inch deep hole in your prepared medium with your finger, then insert each cutting about ½ inch deeper than the hormone-coated portion. Gently firm the soil around the stem to eliminate air pockets. Space cuttings 2 inches apart in the same pot or individual containers.
Create a humidity dome by placing a clear plastic bag over the pot or using a propagation box with a lid. This traps moisture at 70-80% humidity, which mimics the tropical conditions hydrangeas love. Place the cuttings in bright, indirect light—direct sun will scorch the leaves before roots form. A north-facing window works well, or use a grow light 6-8 inches away for consistent results.
🪴 Step 4: Monitor and Transplant When Ready
Check the cuttings every 2-3 days—mist lightly if the soil surface feels dry to touch. Roots typically form in 4-8 weeks, but don't rush this process. You'll know they're ready when you see new growth at the top and can gently tug on the stem—light resistance means roots have formed.
Once roots establish, gradually acclimate the new plants by removing the humidity dome for 1 hour daily, increasing time over 7-10 days. After two weeks of full exposure, transplant to individual 6-inch pots with regular potting mix. Keep them in partial shade for another week before moving to their permanent location—this prevents transplant shock and encourages strong establishment.
Tips & tricks for propagating blue hydrangeas
Here's what I've learned after years of trial and error with blue hydrangea cuttings—these tricks make all the difference.
Selection Tip: When choosing your 4-6 inch stems in Step 1, look for ones that bend slightly but don't snap—this indicates perfect semi-hardwood maturity. Avoid stems with flowers or buds already forming, as they'll focus energy on blooming rather than rooting. I've found that stems with 2-3 leaf nodes (where leaves grow) produce the most reliable roots. Confession: I skipped this detail early on and wasted cuttings that never rooted!
Hormone Application: In Step 2, don't just dip the cut ends—roll them gently in the rooting hormone powder after the water bath. This creates a thicker coating that sticks better to the stem. I learned this the hard way after cuttings kept falling out of the water solution. Also, use a clean container for each hormone batch to prevent bacterial buildup between uses.
Lighting Secret: For Step 3, if you're using artificial grow lights, position them just 4-6 inches above the humidity dome. Too far away and the cuttings won't get enough light; too close and they'll burn before roots form. I use a simple LED grow bulb on a timer for 12 hours daily—this consistency is what produces strong, healthy roots in 4-8 weeks. Natural light works too, but watch for temperature fluctuations that can stress the cuttings.
Transplant Timing: In Step 4, when you're ready to transplant after the 2-week acclimation period, do it on an overcast day or in the late afternoon. This gives the cuttings time to adjust before nightfall. I've seen cuttings wilt dramatically when transplanted midday in hot sun—something I only learned after losing my first batch this way. Water thoroughly after transplanting to help settle the roots in their new home.
Pro Tips for Propagate Blue Hydrangea
- Here's what I've learned after years of trial and error with blue hydrangea cuttings—these tricks make all the differ...
- Selection Tip: When choosing your 4-6 inch stems in Step 1, look for ones that bend slightly but don't snap—this indi...
- Hormone Application: In Step 2, don't just dip the cut ends—roll them gently in the rooting hormone powder after the ...
Frequently asked questions
Got questions about propagating your blue hydrangea? You’re not alone! Here are answers to the most common concerns—so you can grow those stunning blooms with confidence.
When is the best time to take cuttings for propagation?
The ideal window is late spring to early summer (May–June), when new growth is firm but still flexible. Avoid cutting after flowering or during extreme heat—soft, woody stems root poorly. Pro tip: Morning cuttings yield the best results because stems are hydrated from overnight moisture.
How do I know if my cutting is healthy enough to root?
Look for green, non-flowering stems (4–6 inches long) with at least 2–3 sets of leaves. Avoid stems with yellowing, spots, or mushy areas—these signal disease or stress. Healthy cuttings should snap (not bend) when tested, and the base should be just below a leaf node.
Why aren’t my cuttings rooting? Troubleshooting tips?
Common culprits include:
- Low humidity: Cover cuttings with a plastic bag or use a humidity dome.
- Overwatering: Keep soil moist but not soggy—root rot kills cuttings.
- Poor light: Place in bright, indirect light (no direct sun).
- Old stems: Use current season’s growth—woody stems root poorly.
If cuttings yellow or wilt, trim damaged leaves and adjust care. Patience is key—rooting can take 4–8 weeks!
Can I propagate blue hydrangeas from store-bought flowers?
Nope! Store-bought hydrangeas are often grafted or treated to bloom early, making propagation unreliable. For success, use cuttings from a healthy, thriving plant in your garden. If you’re buying for propagation, seek out bare-root or potted hydrangeas labeled for propagation.
What’s the fastest way to propagate blue hydrangeas?
For speed, try water propagation (place cuttings in a jar of water) or use a rooting hormone (dip stems before planting). Both methods can double rooting success. However, the soil method (with perlite/peat mix) often yields stronger, more resilient plants. Test small batches with different methods to see what works best for your climate!
Wrapping up and next steps
Propagating blue hydrangeas through stem cuttings is a rewarding way to expand your garden—and you’ve got all the tools to succeed! 🌱 With the right timing, sharp tools, and a little patience, you’ll soon be watching those vibrant blooms multiply.
Now that you’re equipped with the know-how, roll up your sleeves and give it a try!
Ready to take the next step? Start by selecting the healthiest stems from your existing plants this spring or early summer. Happy propagating—and enjoy your blooming future! 🌸