
Landscaping
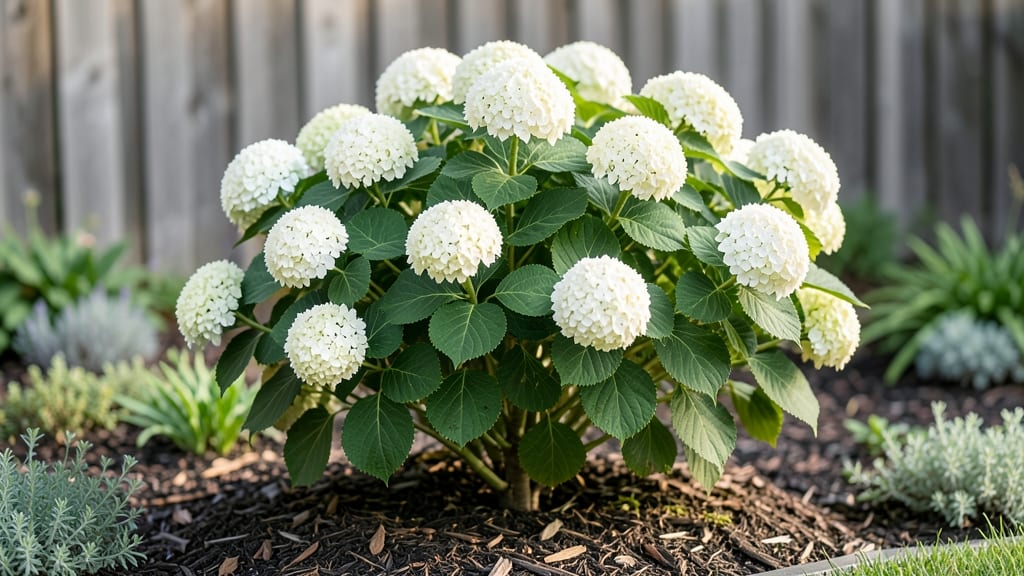
The dreamy, cloud-like blooms of white hydrangeas in front of my house turned my yard into a high-end landscape with almost no effort. 🌸 I planted mine last spring, and neighbors now stop to admire the lush flowers that brighten the entire street—no fancy design degree required.
The secret lies in their versatility: pair them with evergreen shrubs for year-round structure, or let them stand alone as a bold statement. They thrive in partial shade, so even small front yards with dappled sunlight work.
Just keep the soil consistently moist, and you’ll get blooms from early summer through frost. You’ll end up with a front yard that looks like a magazine spread but requires less maintenance than most lawns.
The flowers age beautifully, turning blush or sage green for seasonal interest, and they attract pollinators without the fuss of annuals. Works for any home style—modern, cottage, or traditional—and scales from a single specimen to a dramatic border. Here’s how to make them the star of your curb appeal.
📚 In This Guide
- What you need
- Instructions
- Tips and common mistakes
- Wrapping up and next steps
What you need
- ● White hydrangea plants: Choose between Hydrangea macrophylla (mophead or lacecap varieties) or Hydrangea arborescens (smooth hydrangea). Buy 3–5 mature plants (3–5 gallons each) for a full, lush look.
- ● High-quality potting soil: 5–10 bags (2–3 cubic feet each) of well-draining, acidic soil (pH 5.0–6.0). Mix with 20% perlite or compost for drainage.
- ● Mulch: 2–3 bags of pine bark or shredded leaves to retain moisture and regulate soil temperature.
- ● Fertilizer: Slow-release granular fertilizer: 1 bag (10–12 lb) with a 10-10-10 or 12-4-8 NPK ratio for balanced growth.
- ● Acid-loving plant fertilizer: 1 bottle (e.g., Miracid or Holly-tone) for blooms.
- ○ Organic matter (optional but helpful): 1–2 bags of composted manure or worm castings to enrich soil.
- ● Garden trowel or spade: For digging holes (12–18 inches wide/deep).
- ● Pruning shears: Sharp, sterilized shears for trimming.
- ● Garden hose with spray nozzle: For watering.
- ● Wheelbarrow or bucket: 1–2 for mixing soil/fertilizer.
- ● Gloves & knee pads: Comfort is key!
- ● Sunlight assessment: Confirm your yard gets partial shade (morning sun, afternoon shade)—ideal for most white hydrangeas.
- ● Drainage check: Ensure no standing water after rain (hydrangeas hate soggy roots!).
- ● Spacing plan: Space plants 3–5 feet apart for mature growth.
- ● Water source nearby: Hydrangeas need 1–1.5 inches of water weekly (more in heatwaves!).
- ● Soil test kit: To check pH/nutrients ($10–$20).
- ● Plant stakes or trellis: For support if growing Hydrangea paniculata (larger varieties).
- ● Drip irrigation system: Automates watering for busy homeowners.
- ● Decorative stones/mulch: For a polished, low-maintenance look.
Step-by-step guide to planting white hydrangeas for maximum curb appeal
Here's how I create a showstopping front-yard display with these classic blooms—minimal fuss, maximum impact.
🪴 Step 1: Choose the Perfect Planting Location
White hydrangeas thrive in partial shade—think morning sun with afternoon shade. I always measure the spot: 4-6 hours of sunlight maximum, with dappled light ideal. Too much sun bleaches petals, while too little reduces blooms. Look for areas where other plants already look healthy but not sunburned.
Check the soil pH with a simple test kit—hydrangeas love acidic soil (pH 5.5-6.2). If your soil is neutral or alkaline, you'll need to amend it later. I plant mine where existing mulch or leaf litter accumulates naturally—that's your clue the soil stays moist and cool.
☀️ Step 2: Prepare the Soil and Planting Hole
Dig a hole twice as wide as the root ball but only as deep as the container's drainage holes. This prevents settling that buries the plant too deep. Loosen the soil around the edges with a garden fork—hydrangeas hate compacted roots. I always mix in 2-3 inches of compost with the native soil to give them a nutrient boost right away.
For the first planting, I use 1 bag of peat moss mixed with the soil to maintain acidity. Water the hole thoroughly before planting—this helps roots establish contact with moist soil immediately. The hole should hold about 1 gallon of water when full, which tells me it's the right size.
🌱 Step 3: Plant and Stake for Support
Remove the hydrangea from its container and gently loosen the roots if they're circling. Place it in the hole so the top of the root ball sits 1 inch above ground level—this prevents rot when watering. I use 1 bamboo stake per plant inserted 3 inches from the center to support stems without restricting growth.
Fill the hole with soil, pressing lightly to eliminate air pockets. Water immediately with 2 gallons to settle the roots. The soil should look evenly moist but not soggy. I always add 2 inches of mulch (pine bark or shredded leaves) around the base, keeping it 3 inches away from the stem to prevent rot.
💧 Step 4: Water and Fertilize for First-Year Blooms
Water deeply twice weekly for the first month, then once weekly once established. I check by sticking my finger 2 inches into soil—if it's dry, water; if damp, wait. Overwatering is the fastest way to kill hydrangeas, so I always let the top inch dry between waterings.
Fertilize in early spring with 1 tablespoon of acid-loving plant food mixed into the soil around the base. I avoid high-nitrogen fertilizers—they produce lush leaves but fewer blooms. The key is low nitrogen, high phosphorus (look for a 10-20-10 ratio). Repeat in mid-summer for fall blooms.
✂️ Step 5: Prune and Maintain for Long-Term Beauty
Prune in late winter or early spring before new growth appears. I cut back last year's blooms to 2-3 inches above the base—this encourages strong new stems. Never prune in fall, as you'll remove next year's flower buds. For large shrubs, I remove 1/3 of the oldest stems completely to rejuvenate growth.
Watch for yellowing leaves—this signals overwatering or alkaline soil. If you see it, add vinegar (1 cup per gallon of water) to the soil monthly to maintain acidity. I also check for aphids on new growth and blast them off with water if I see sticky residue on leaves.
Tips & tricks for perfect white hydrangea planting
These simple tricks will help you create a stunning front-yard display that lasts all season.
Location Scouting: Scout your planting spot during different times of day to gauge actual sunlight exposure. I've learned the hard way that what looks like partial shade in winter can turn into full sun by summer. Look for areas where other shade-loving plants thrive—this is your best indicator. The 4-6 hours of sunlight should be gentle morning rays, not harsh afternoon heat that bleaches those beautiful white blooms.
Soil Prep Strategy: When mixing your 2-3 inches of compost with native soil, I recommend adding a handful of sulfur granules (about 1 tablespoon per square foot) to help maintain that crucial acidic pH. This is especially important if your soil test shows pH above 6.2. The peat moss you're using already helps, but sulfur gives an extra insurance policy against pH creep over time.
Planting Depth Secret: The 1-inch elevation above ground level is critical for preventing rot—never bury the root ball deeper than this. I use a small garden stake to mark the original soil line on the root ball before planting, so I always know exactly where to place it. This simple trick saves me from over-planting mistakes that can kill hydrangeas within weeks.
Watering Wisdom: Those first two gallons of water after planting are your best friend for root establishment. I like to water slowly over 10-15 minutes to let the soil absorb moisture evenly. For the twice-weekly watering schedule, I set a reminder on my phone for Tuesdays and Fridays—consistency is key with hydrangeas. The 2-inch soil check is perfect for determining when to water, but I also look for wilting leaves as a visual cue.
Pro Tips for White Hydrangeas In Front Of House
- These simple tricks will help you create a stunning front-yard display that lasts all season.
- Location Scouting: Scout your planting spot during different times of day to gauge actual sunlight exposure. I've lea...
- Soil Prep Strategy: When mixing your 2-3 inches of compost with native soil, I recommend adding a handful of sulfur g...
Frequently asked questions
Got questions about adding white hydrangeas to your front yard? We’ve got answers! Whether you’re curious about care, timing, or alternatives, here’s what you need to know to make your curb appeal bloom with confidence.
When is the best time to plant white hydrangeas for year-round curb appeal?
Plant them in early spring or fall (4–6 weeks before the first frost) for the best root establishment. Spring gives them time to grow before summer heat, while fall allows roots to settle before winter dormancy. Avoid planting in extreme heat or cold—hydrangeas hate stress!
How do I keep my white hydrangeas looking full and healthy?
Prune in late winter or early spring (before new growth appears) to shape them and encourage blooms. Remove dead or crossing branches first, then trim back 1/3 of the oldest stems (look for woody, non-flowering growth). Fertilize lightly in spring with acid-loving plant food for vibrant blooms.
Do white hydrangeas need special watering?
Yes! They thrive with 1–1.5 inches of water per week, especially during the first year. Water deeply at the base of the plant (avoid wetting leaves to prevent fungal issues). Mulch around the base to retain moisture and regulate soil temperature. Drought stress can cause drooping or sparse blooms, so don’t skip this step!
Are there low-maintenance alternatives to white hydrangeas?
Try these easy-care, white-blooming shrubs:
- Spiraea (Spiraea japonica): Drought-tolerant, blooms repeatedly, and thrives in sun.
- Dwarf Lilac (Syringa meyeri): Fragrant, compact, and blooms in early spring.
- Abelia (Abelia x grandiflora): Evergreen, heat-resistant, and flowers summer to fall.
Why aren’t my white hydrangeas blooming?
Check these common culprits:
- Over-pruning: If you cut back old wood (where blooms form), you’ll delay flowers. Prune new growth only if it’s leggy.
- Poor soil: Hydrangeas need acidic, well-draining soil (pH 5.5–6.2). Test your soil and amend with peat moss or sulfur if needed.
- Too much shade: They need partial sun (4–6 hours/day) for optimal blooms.
Wrapping up and next steps
White hydrangeas are the perfect way to elevate your home’s curb appeal with timeless beauty and minimal effort! Their lush blooms and adaptability make them a dream for both beginners and seasoned gardeners.
Whether you’re drawn to their romantic charm or practical ease, these plants deliver big impact with low fuss—just plant, water, and enjoy.
Ready to transform your front yard? Start by choosing your favorite variety (like Annabelle or Grandiflora), then grab your gardening tools and get planting! Your future guests—and your future self—will thank you. 🌸✨