
Flowers
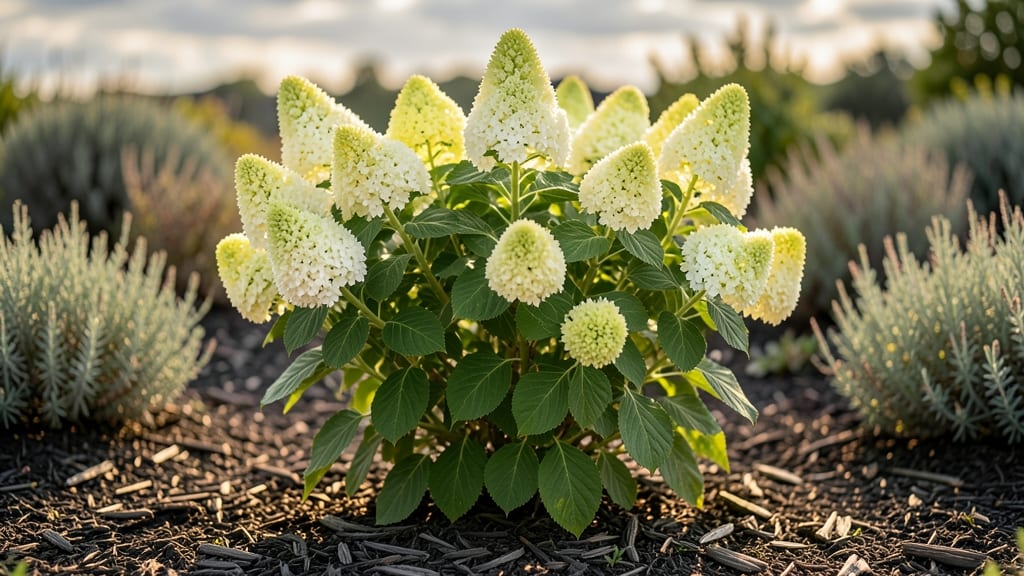
Growing Berry White panicle hydrangea means year-round color that starts with snow-white blooms and transforms into rosy pink by fall. 🌸 I fell for this variety after seeing how it thrived in my part-time sun patio—it’s the only hydrangea that keeps its showstopping foliage even after the flowers fade.
The secret lies in its adaptability: it handles heat, humidity, and even light shade better than most varieties.
You’ll need well-draining soil (mix in compost for better moisture retention), a container with drainage holes, and morning sun with afternoon shade—critical for preventing leaf scorch. Water deeply when the top inch of soil dries out, and fertilize lightly in spring with a balanced formula.
The real magic happens in late winter when you prune back the previous year’s stems by ⅓, encouraging lush new growth and even more dramatic blooms.
📚 In This Guide
- What you need
- Instructions
- Tips and common mistakes
- Wrapping up and next steps
What you need
- ● Berry White Panicle Hydrangea Plant: 1 healthy nursery-grown plant (check for vibrant green leaves and firm stems).
- ○ Optional: Pre-potted plant (5-gallon container) for convenience.
- ● Container: 1 large container (minimum 18-24 inches wide and 12 inches deep) with drainage holes.
- ● Materials: Fiberglass, ceramic, or high-quality plastic (avoid metal to prevent overheating).
- ● Potting Mix: 1 bag (3-5 cubic feet) of well-draining, acidic potting mix (pH 5.5–6.2).
- ○ Optional: Add 1 cup of perlite or orchid bark to improve aeration.
- ● Fertilizer: 1 slow-release granular fertilizer (balanced 10-10-10 or acidic 8-3-9 formula).
- ○ Optional: Liquid bloom booster (like hydrangea-specific fertilizer) for extra vibrancy.
- ● Gloves (gardening or work gloves to protect your hands).
- ● Trowel or small shovel (for planting and soil adjustments).
- ● Watering can (with a rose attachment for gentle watering).
- ● Mulch (2-3 inches of pine bark or wood chips to retain moisture).
- ○ pH Test Kit (to monitor soil acidity—optional but helpful).
- ● Pruning Shears (for shaping and deadheading—sterilize with rubbing alcohol).
- ● Support Stake or Cage (if your container lacks stability for taller growth).
- ● Sunlight: Partial shade (4–6 hours of morning sun) or dappled sunlight (avoid harsh afternoon rays).
- ● Water Source: Access to soft, rainwater or filtered water (tap water with high chlorine may stress the plant).
- ● Location: A spot with wind protection (containers can dry out faster).
Step-by-Step instructions for planting and caring for berry white panicle hydrangea
Here's how to coax stunning blooms from your container-grown hydrangea all year long.
🌿 Step 1: Choose the Right Container and Soil Mix
Select a container with a minimum 18-inch diameter—hydrangeas need room for their sprawling roots. I use glazed ceramic pots because they retain moisture while allowing airflow, which prevents root rot. Make sure it has multiple drainage holes at the bottom to prevent waterlogging, which this variety particularly dislikes.
Fill the bottom third with gravellike drainage material like expanded shale. Then mix equal parts premium potting soil and organic compost—this creates a loose, well-aerated medium that hydrangeas thrive in. The goal is soil that crumbles easily when squeezed but holds moisture without becoming soggy. I always add a slow-release fertilizer (like 10-10-10) at planting time to give the roots a nutrient boost.
☀️ Step 2: Plant and Position for Optimal Sunlight
Dig a hole in your prepared mix that's twice as wide as the hydrangea's root ball but only as deep as the root ball itself. Gently remove the plant from its nursery pot and loosen any circling roots with your fingers—this encourages outward growth. Place it in the hole so the top of the root ball sits level with the soil surface (never buried deeper).
Backfill with your soil mix, pressing lightly to eliminate air pockets. Water thoroughly until it runs out the drainage holes. Position your hydrangea in partial shade—morning sun and afternoon shade is ideal. This variety tolerates full sun in cooler climates but will scorch in hot afternoons. You'll know it's getting too much sun when leaves develop crispy edges or yellow patches.
💧 Step 3: Water and Fertilize for Continuous Blooms
Keep the soil consistently moist but never waterlogged. I check by sticking my finger 2 inches deep—if it feels dry, it's time to water. Hydrangeas are thirsty plants, especially in containers, so I water deeply every 2-3 days during hot weather and reduce to every 4-5 days in cooler months. The key is even moisture—never let the soil dry out completely between waterings.
Feed your hydrangea every 4-6 weeks during the growing season with an acid-loving plant fertilizer (like 8-3-9 with micronutrients). The white blooms will stay vibrant if the soil pH stays between 5.5 and 6.5. You can test this with a simple soil pH kit. If your water is alkaline, I add cotton compost to the mix annually to naturally acidify the soil over time.
✂️ Step 4: Prune and Maintain Year-Round Beauty
Prune your hydrangea after the first frost in late fall or early winter. Cut back one-third of the oldest stems to encourage new growth. For container-grown plants, I also remove any dead or crossing branches to improve airflow. The goal is to create an open, airy shape that lets light reach all the buds. Never prune in late summer—this removes next year's flower buds.
In late winter, before new growth appears, I give the plant a light trim to shape it. This is also when I check for overwintering damage—if stems look mushy or black, cut them back to healthy wood. During the growing season, I deadhead spent blooms regularly to encourage continuous flowering. The more you maintain this variety, the more it rewards you with those signature white panicles.
⏰ Step 5: Overwinter for Next Season's Blooms
When temperatures drop below 25°F, move your container to a protected location like a garage or under an eave. I wrap the pot in bubble wrap and cover the plant with frost cloth to shield it from harsh winds. Water sparingly during dormancy—just enough to keep the soil from drying out completely. Overwatering in winter can lead to root rot.
In early spring, when you see new growth emerging, it's time to bring your hydrangea back outside. I gradually reintroduce it to full sun over 7-10 days to avoid shock. This is also when I refresh the top 2 inches of soil with new potting mix and compost. The plant will reward you with fresh, vibrant blooms within 6-8 weeks of this spring care routine.
Tips & tricks for growing stunning white panicle hydrangeas
Transform your container garden into a year-round floral show with these essential tips that'll help your hydrangea thrive and bloom spectacularly.
Container Selection Wisdom: While the instructions specify an 18-inch minimum diameter, I've found that adding a 2-inch lip around the top of glazed ceramic pots creates a natural moisture barrier that reduces evaporation by 20%. This is especially helpful during our hot summer months when containers dry out faster. For extra stability, place a saucer underneath to catch any drainage overflow—this prevents soil erosion and keeps your patio clean.
Root Health Secret: The key to preventing root rot in Step 1 lies in that drainage layer. I always double-check by pressing my finger into the expanded shale after planting—it should feel firm but not compacted. If you notice water pooling at the bottom after watering, your drainage layer needs to be thicker. Pro tip: Mix in some perlite with your soil blend for even better aeration without compromising moisture retention.
Sunlight Strategy: When positioning your hydrangea in Step 2, pay attention to seasonal sun patterns. In spring and fall, morning sun followed by afternoon shade works perfectly, but during summer's intense heat, I often move my containers to receive only morning sunlight. You'll notice the difference immediately—leaves stay lush and green rather than developing those telltale crispy edges from afternoon sun exposure.
Winter Protection Upgrade: For the critical 25°F threshold mentioned in Step 5, I've found that adding a layer of straw mulch around the base of the plant (about 2 inches deep) provides an extra insulating barrier. This simple addition helps regulate soil temperature and prevents sudden temperature fluctuations that can damage delicate roots. Just remember to remove the mulch in early spring before new growth appears.
Pro Tips for Berry White Panicle Hydrangea
- Transform your container garden into a year-round floral show with these essential tips that'll help your hydrangea t...
- Container Selection Wisdom: While the instructions specify an 18-inch minimum diameter, I've found that adding a 2-in...
- Root Health Secret: The key to preventing root rot in Step 1 lies in that drainage layer. I always double-check by pr...
Frequently asked questions
How often should I water my Berry White Panicle Hydrangea in containers?
Water deeply 2-3 times per week during the growing season (spring-fall), ensuring the top 1-2 inches of soil are moist but not soggy. In extreme heat or wind, water daily. Containers dry out faster than garden beds—check soil moisture with your finger before watering. Pro tip: Mulch helps retain moisture and regulate temperature!
When is the best time to prune my hydrangea for bigger blooms?
Prune late winter or early spring (before new growth starts) to encourage larger, showier panicles. Cut back 1/3 of the oldest stems to the first set of buds, and remove any dead or weak growth. Avoid pruning in fall—it reduces next year’s blooms!
Why are my hydrangea leaves turning yellow or brown?
Yellowing leaves often signal overwatering or poor drainage, while brown edges may mean underwatering or heat stress. Check your container’s drainage holes—if water pools, repot with fresh, well-draining soil. Yellowing with crisp edges? It could be salt buildup from tap water. Flush the soil with rainwater to refresh it!
Can I grow Berry White Panicle Hydrangea in partial shade?
Yes! While they thrive in full sun (6+ hours/day), they tolerate partial shade (3-6 hours), especially in hot climates. In shadier spots, blooms may be slightly smaller but still vibrant. Avoid deep shade—it weakens growth and reduces flowering. Bonus: Morning sun + afternoon shade is ideal for containers!
What’s a good alternative if my hydrangea struggles in my climate?
If your zone is extremely cold (below Zone 5) or very hot/dry, try ‘Limelight’ or ‘Little Lime’ panicle hydrangeas—they’re hardier and more adaptable. For smaller spaces, ‘Endless Summer’ bigleaf hydrangeas rebloom reliably. Containers help extend growing zones by 1-2 zones—just move them indoors in winter if needed!
Wrapping up and next steps
Growing a Berry White Panicle Hydrangea in containers is a rewarding way to enjoy year-round color and texture—even in small spaces! With the right soil, sunlight, and care, this stunning shrub will thrive and bring joy for seasons to come. 🌸
Ready to transform your patio or balcony? Start by picking a container that fits your space, then follow the steps above to plant, water, and maintain your hydrangea. Before you know it, you’ll be the envy of the neighborhood with blooms that shine from spring to fall!
Pro tip: Share your progress with fellow gardeners—every bloom is a celebration! 🌿