
Blooming
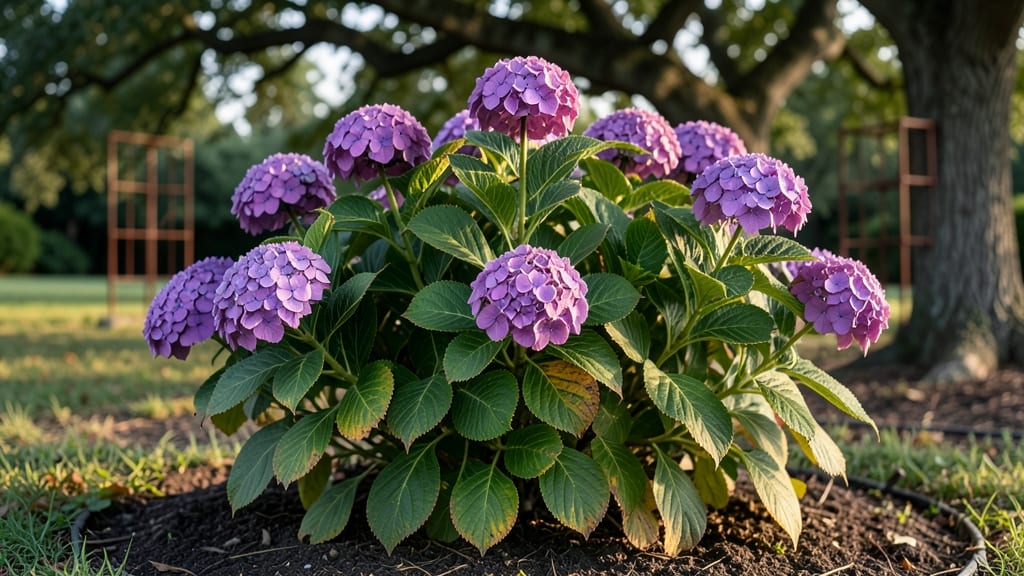
Fall-blooming hydrangeas like 'Limelight' and 'Autumn Bride' turn your containers into late-season showstoppers when trained on poles. 🌿 I learned the hard way that proper pole placement and seasonal care are the secrets to keeping those blooms vibrant well past summer—no more sad, wilted heads by October.
The key starts with well-draining soil mixed with compost, paired with morning sun and afternoon shade to prevent scorching. Most gardeners overwater in fall, but hydrangeas actually need less as temperatures drop. Aim for 1-2 inches per week and let the top inch dry between waterings.
By late September, you’ll see clusters of jewel-toned blooms that last until frost, with foliage turning shades of burgundy and gold. The pole training keeps stems sturdy, preventing flopping under heavy blooms—a game-changer for small spaces or balconies. Works for any container size, from 5-gallon pots to large half barrels.
Here’s how to set it up for maximum fall impact.
📚 In This Guide
- What you need
- Instructions
- Tips and common mistakes
- Wrapping up and next steps
What you need
- ● Fall-blooming hydrangea varieties: Choose from Hydrangea paniculata (e.g., 'Limelight,' 'Little Lime,' or 'Tardiva') or Hydrangea arborescens (e.g., 'Annabelle' or 'Grandiflora'). Quantity: 1-3 plants per container (depending on size).
- ● Large containers: At least 15-20 gallons per plant (e.g., fabric grow bags, ceramic pots, or half whiskey barrels). Ensure drainage holes are present.
- ● High-quality potting mix: Use a well-draining, peat-free blend (e.g., Miracle-Gro Premium Potting Mix or a 50/50 mix of potting soil and perlite). Quantity: 1-2 bags per container.
- ● Slow-release fertilizer: A balanced, organic option (e.g., Osmocote Smart-Release Flower & Vegetable or fish emulsion). Quantity: 1 cup per container.
- ● Pole or trellis: A 5-6 ft tall bamboo stake, metal trellis, or decorative obelisk (e.g., Bamboo Garden Stakes or Copper Wire Trellis).
- ● Soft plant ties: Jute or Velcro plant ties (avoid plastic) to secure stems. Quantity: 3-5 per plant.
- ● Pruning shears: Clean, sharp bypass pruners for shaping and training.
- ● Mulch: Organic mulch (e.g., shredded bark or pine straw) to retain moisture. Quantity: 1-2 inches per container.
- ● Container cache: Decorative stones, moss, or paint to personalize your pots.
- ● Liquid fertilizer: A balanced liquid feed (e.g., Miracle-Gro All-Purpose) for mid-season boosts.
- ● Plant supports: Copper wire or spiral plant ties for extra sturdy training.
- ● Soil amendments: Compost or worm castings to enrich the potting mix.
- ● Rainwater collector: A watering can or drip irrigation system for consistent moisture.
How to train fall-blooming hydrangeas vertically in containers
Here's the technique I've used for years to turn sprawling hydrangeas into dramatic vertical displays.
🪴 Step 1: Select the Right Container and Support Structure
Choose a large container with drainage—at least 18 inches deep and wide—to accommodate the hydrangea's extensive root system. I prefer glazed ceramic because it retains moisture while allowing airflow; terracotta works too but requires more frequent watering. The container must be heavy enough to stay upright when laden with blooms.
For support, install a 6-foot tall bamboo stake or metal trellis in the center of the container. Drive it 12 inches deep into the soil mix to ensure stability. The structure should be wide enough to accommodate the hydrangea's natural spread—18-24 inches at the base—and taper slightly as it rises. This mimics the plant's growth habit and prevents leaning.
🌱 Step 2: Prepare the Soil Mix for Moisture Retention
Fill the container with a custom soil blend designed to hold moisture while preventing root rot. Mix equal parts of high-quality potting soil, orchid bark, and perlite—this creates a light yet moisture-retentive medium. I add 2 cups of compost and 1 tablespoon of slow-release fertilizer to provide nutrients without burning the roots.
Moisten the mix thoroughly until it feels like a well-wrung sponge—damp but not soggy. Press it down gently to eliminate air pockets, then create a small mound in the center where the hydrangea's root ball will sit. This slight elevation improves drainage and prevents waterlogging at the base of the plant.
☀️ Step 3: Plant and Secure the Hydrangea to the Support
Remove the hydrangea from its nursery pot and loosen the roots gently with your fingers—this encourages outward growth rather than circling. Place the root ball on the soil mound, ensuring the top of the root ball sits just below the container's rim. Backfill with the prepared soil mix, pressing lightly as you go to eliminate air gaps.
Immediately after planting, tie the main stem to the support structure using soft plant ties or strips of old fabric. Space the ties 6 inches apart vertically, guiding the stem upward in a gentle spiral. Avoid wrapping the ties too tightly—they should hold the stem without constricting it as it thickens. This early training prevents the plant from developing a weak, floppy habit.
💧 Step 4: Water and Fertilize for Consistent Blooms
Water the container deeply until water runs freely from the drainage holes, then allow it to drain completely. Hydrangeas are thirsty plants, especially in containers, so I water every 2-3 days during the growing season—more frequently in hot, dry weather. Check the soil 1 inch below the surface; if it feels dry, it's time to water again.
Feed the hydrangea every 4-6 weeks with a balanced liquid fertilizer (10-10-10) diluted to half strength. For blue blooms, add 1 tablespoon of aluminum sulfate to the soil mix at planting and again in early summer. For pink blooms, avoid aluminum and use lime instead. Mulch the surface with 2 inches of shredded bark to retain moisture and regulate soil temperature.
✂️ Step 5: Prune and Train for Maximum Vertical Impact
In early spring, prune back one-third of the previous year's growth to encourage new, vigorous shoots. Remove any dead, diseased, or crossing branches at the base. For fall-blooming varieties, avoid heavy pruning in late summer—this removes the buds that will flower next season.
As the plant grows, guide new shoots along the support structure, tying them loosely every 4-6 inches. Pinch back the tips of side branches to encourage bushier growth. By mid-summer, your hydrangea should be a trained vertical masterpiece, with blooms cascading down the sides of the container. Deadhead spent blooms in late fall to keep the plant tidy and redirect energy to next year's growth.
Tips & tricks for pole-trained hydrangeas in containers
Transforming sprawling hydrangeas into elegant vertical displays takes a few strategic moves. Here's how to elevate your container garden game with these battle-tested techniques.
Container Weight Matters: The 18-inch deep container specified in Step 1 isn't just about size—it's about stability. I've learned the hard way that lightweight ceramic containers can tip over when laden with blooms. For extra security, place your container on a sturdy saucer or add a layer of pebbles at the bottom to increase weight. If you're using terracotta, consider adding a small weight like a decorative stone at the base to prevent toppling during windy conditions.
Root Loosening Technique: When loosening those roots in Step 3, don't just pull them apart—think of it like untangling headphones. Work your fingers gently between the roots to separate them without causing damage. This encourages outward growth rather than that dreaded circling pattern. I like to use a chopstick or small garden tool to carefully pry apart any particularly tight clusters. The goal is to create a loose, open root ball that can establish quickly in its new container.
Support Structure Stability: That 6-foot tall bamboo stake in Step 1 needs to be more than just tall—it needs to be unshakable. Before planting, test your support structure by gently pushing and pulling it. If it wobbles, drive it deeper or add a second stake at a 45-degree angle for extra support. I've seen stakes lean dramatically after just a few weeks of growth, so take the time to secure it properly now. For extra insurance, you can even wrap the base with a piece of chicken wire to create a wider support base.
Watering Strategy: The every 2-3 days guideline in Step 4 is perfect for average conditions, but here's the real secret: water in the morning. This gives the plant all day to absorb moisture before evening temperatures drop. I've noticed that hydrangeas trained vertically actually need slightly more frequent watering than ground plants because their roots can't spread as widely. If you notice the leaves wilting slightly by midday, it's time to water—don't wait until the soil is bone dry. A self-watering container with a reservoir can be a game-changer for busy gardeners.
Pro Tips for Fall Blooming Hydrangea
- Transforming sprawling hydrangeas into elegant vertical displays takes a few strategic moves.
- Container Weight Matters: The 18-inch deep container specified in Step 1 isn't just about size—it's about stability.
- Root Loosening Technique: When loosening those roots in Step 3, don't just pull them apart—think of it like untangling headphones.
Frequently asked questions
Got questions about fall-blooming hydrangeas?
Whether you're a newbie or a seasoned gardener, these answers will help you grow stunning, late-season blooms with ease!
When do fall-blooming hydrangeas actually bloom?
Fall-blooming varieties like Hydrangea paniculata (e.g., 'Limelight,' 'Little Lime') typically flower from late summer through frost—peaking in September–October! Unlike spring bloomers, these beauties thrive on new wood (current season’s growth), so they keep giving even after summer’s heat. Prune in late winter or early spring to encourage next year’s flowers.
Can I grow fall hydrangeas in containers?
Pole-trained hydrangeas in containers are perfect for small spaces. Use a large pot (15+ gallons) with drainage holes, a well-draining potting mix, and stake them for support. Move containers to partial shade in hot afternoons to prevent stress. Just remember: water consistently—containers dry out faster than garden beds!
Why aren’t my hydrangeas blooming in fall?
No flowers? Check these fixes:
- Pruning too late: If you pruned in fall or winter, you may have cut off next year’s blooms. Prune only in late winter (just before buds swell).
- Not enough sun: Fall bloomers need 4–6 hours of sunlight. Too much shade = fewer flowers.
- Over- or under-watering: Wilting or yellow leaves signal stress. Keep soil evenly moist but not soggy.
- Nutrient deficiency: Feed with balanced fertilizer (10-10-10) in early spring and mid-summer.
What’s the best fall hydrangea for small spaces?
For containers or tight spots, try:
- 'Little Lime' (H. paniculata): Compact (3–4 ft tall), lime-green blooms, and heat-tolerant.
- 'Limelight': Slightly taller (4–6 ft) but disease-resistant and long-lasting.
- 'Endless Summer' (if you can stretch to 3–5 ft): Reblooms all season with proper care!
Do fall hydrangeas survive winter in pots?
Yes, but they need protection! Before frost:
- Wrap the pot in bubble wrap or frost cloth.
- Move to a sheltered spot (e.g., against a wall or under an eave).
- Avoid freezing ground—use pot feet or a wooden board to elevate.
- Water sparingly in winter (only if soil is dry).
Wrapping up and next steps
Fall-blooming hydrangeas like Hydrangea paniculata bring late-season color and structure to your containers with minimal fuss—proof that beauty thrives even as summer fades! 🌿 With the right training, pruning, and care, you’ll enjoy bold blooms and a lush, pole-supported display that elevates any patio or balcony.
Ready to transform your space? Grab your tools, follow the steps, and let your hydrangeas steal the show—your future self (and neighbors!) will thank you.
🌟 Next Step:
Start small! Pick one container this season, train your hydrangea, and experiment with colors. Snap a photo of your progress—we’d love to see your pole-trained masterpiece! 📸