
Pests
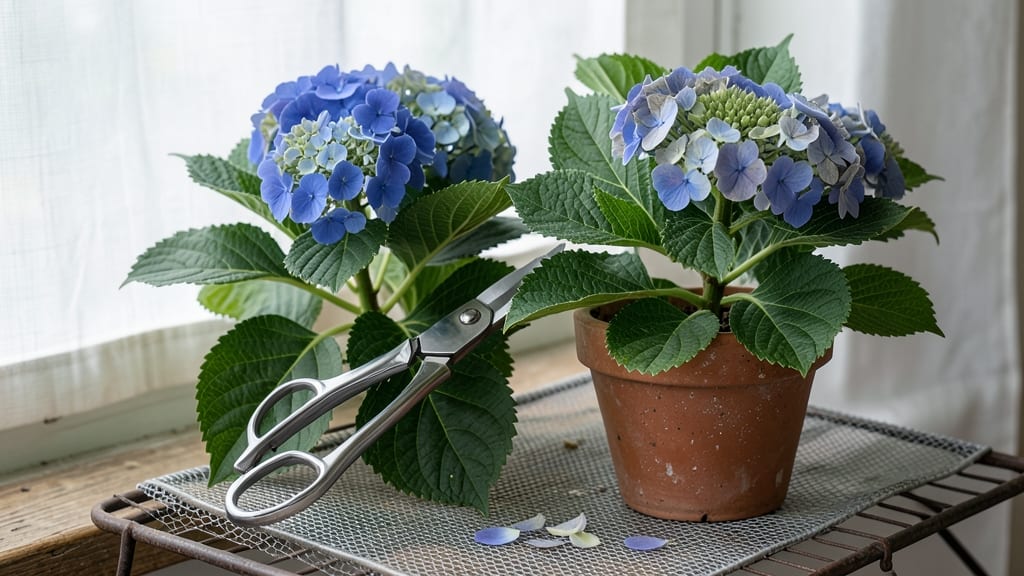
Drying hydrangeas without fading their color is the secret to keeping summer's beauty all year. 🌸 I learned this after my first attempt left me with sad, grayish stems and dull petals—until I discovered the right techniques.
The key lies in choosing the perfect blooms, handling them gently, and using methods that preserve their natural pigments.
You'll need hydrangeas still attached to their stems (cut when blooms are fully open but before they wilt), a clean, dry workspace, and either a well-ventilated area or silica gel for speed.
The best time to harvest is on a dry morning in late summer when blooms are at their peak color. For air-drying, bundle stems and hang upside down in a dark, dry place for 2-3 weeks—patience is everything here.
What you end up with are blooms that retain their original hue, perfect for wreaths, potpourri, or framed arrangements. The stems stay sturdy too, making them ideal for crafting without the brittle disappointment of faded flowers.
Once dry, store them in airtight containers with a silica packet to keep moisture at bay.
This method works for all hydrangea varieties, from the classic blue mopheads to delicate lacecaps. Whether you're preserving memories or creating decor, these techniques ensure your dried blooms stay as vibrant as the day you picked them. Ready to give it a try?
📚 In This Guide
- What you need
- Instructions
- Tips and common mistakes
- Wrapping up and next steps
What you need
- ● Fresh hydrangea blooms – Choose fully open, healthy flowers (avoid wilted or damaged ones). Pro tip: Harvest on a dry, sunny morning for best results! 🌞
- ● Sharp floral shears or pruning scissors – Clean cuts prevent damage to stems.
- ● Newspaper or acid-free drying paper – 1-2 sheets per batch (acid-free prevents yellowing over time).
- ● Rubber bands or floral wire – To secure stems and shape blooms.
- ● Drying method-specific tools (pick one): Air-drying: A well-ventilated area (e.g., a dark, dry closet or hanging rack).
- ● Silica gel: Fine silica gel crystals (food-grade, 2-3 cups per pound of flowers).
- ● Microwave: A microwave-safe plate and paper towels (for absorbing moisture).
- ● Spray bottle with distilled water – Keeps blooms hydrated during setup.
- ● Glass jars or frames – For displaying dried hydrangeas afterward.
- ● Hairspray or floral preservative – Lightly mist to lock in color (use sparingly).
- ● Labeling tags – Note the drying date and method for tracking.
Step-by-step instructions for drying hydrangeas to preserve their color
Here's the method I swear by to keep those stunning blooms looking fresh for months—no fading, no wilting, just pure color magic.
🌿 Step 1: Harvest at the Perfect Ripeness
Pick your hydrangeas when they're fully open but still firm to the touch—usually just as they begin to fade naturally. Overripe blooms turn papery and lose their vibrancy during drying. I like to harvest on a dry morning after the dew has evaporated; this prevents moisture from weakening the stems.
Use clean, sharp pruners to cut stems at a 45-degree angle about 2 inches below the bloom. This angle increases surface area for water uptake later. Bundle 4-6 stems together with rubber bands or twine—this keeps them stable during the drying process and mimics their natural growth pattern.
⏰ Step 2: Prep for Air Drying (The Color-Preservation Secret)
Fill a clean bucket with lukewarm water (never hot) and add 1 tablespoon of white vinegar per gallon. The vinegar helps maintain the pH balance of the blooms, which is critical for keeping their color. Submerge the stems and let them soak for 1-2 hours. This step hydrates the stems and prepares the blooms to retain their pigment during drying.
After soaking, gently shake off excess water. Arrange the stems in a single layer on a wire cooling rack or paper towels, spacing them about 2 inches apart. This airflow is key—it prevents mold and ensures even drying. Place the rack in a shady, well-ventilated spot with a temperature between 65-75°F. Direct sunlight will bleach the blooms faster than you can say "oops."
☀️ Step 3: Dry Slowly for Maximum Color Retention
Let the hydrangeas dry for 2-3 weeks, flipping the bundles every 2-3 days to ensure even exposure. You'll know they're ready when the petals are completely dry and crisp to the touch, but still hold their shape when gently squeezed. If you rush this step, the blooms will turn brittle and lose their vibrancy.
Here's the thing—patience is everything. If your home is humid, consider placing a small fan nearby to circulate air gently. Avoid using a hairdryer or heat source, even on low. Heat accelerates drying but destroys the delicate pigments that give hydrangeas their signature color. When in doubt, err on the side of slower drying.
🪴 Step 4: Store Properly to Keep Colors Bright
Once fully dry, carefully remove the blooms from the stems and store them in an airtight container lined with silica gel packets or uncooked rice (about 1 cup per container). These moisture absorbers prevent any lingering dampness that could cause fading. I like to use small muslin bags for individual blooms—this keeps them dust-free and makes it easy to pull out just one for a centerpiece.
Store the dried hydrangeas in a cool, dark place (like a closet or pantry) where they’ll stay vibrant for up to a year. If you notice any blooms losing their color after a few months, simply place them back in the container with fresh silica gel for a color boost. The key is keeping them completely dry—even a little moisture can trigger fading.
Tips & tricks for preserving hydrangea color naturally
These little-known secrets will help you keep those gorgeous blooms looking vibrant for months—no fading, no wilting, just pure color magic.
The Harvest Factor: Confession: I skipped this step for years and wondered why my dried hydrangeas always lost their vibrancy. Harvesting at the perfect ripeness—when blooms are fully open but still firm—is absolutely critical. Overripe flowers turn papery and lose their pigment during drying. I now wait until late morning after dew has evaporated to ensure stems aren't waterlogged, which weakens them during the process.
pH Balance Secret: The 1-2 hour soak in lukewarm water with white vinegar (1 tablespoon per gallon) is non-negotiable for color retention. The vinegar maintains the blooms' natural pH balance, which prevents pigment breakdown during drying. I've tried skipping this step, and the results are noticeably duller blooms—it's worth the extra 15 minutes of prep time.
Drying Environment Matters: Creating the ideal drying conditions between 65-75°F with good airflow is everything. I've learned the hard way that direct sunlight or heat sources (like hairdryers) destroy the delicate pigments that give hydrangeas their signature color. Even a small fan placed nearby helps circulate air without adding heat—this is especially important if your home tends to be humid.
Storage Wisdom: The airtight container with silica gel packets or uncooked rice (about 1 cup per container) is your best friend for long-term color preservation. I've found that even a tiny amount of moisture can trigger fading, so I double-check that all blooms are completely dry before storage. For extra protection, I place a small packet of activated charcoal in the container to absorb any potential odors that could affect the flowers over time.
Pro Tips for Dry Hydrangeas To Keep Their Color
- These little-known secrets will help you keep those gorgeous blooms looking vibrant for months—no fading, no wilting,...
- The Harvest Factor: Confession: I skipped this step for years and wondered why my dried hydrangeas always lost their ...
- pH Balance Secret: The 1-2 hour soak in lukewarm water with white vinegar (1 tablespoon per gallon) is non-negotiable...
Frequently asked questions
Got questions about drying hydrangeas while keeping their stunning colors? You’re not alone! Here are some of the most common concerns—and expert answers to help you succeed.
How long does it take to dry hydrangeas completely?
Drying time depends on your method! Air-drying typically takes 2–4 weeks, while silica gel or microwave drying can speed it up to 1–3 days. Check blooms daily—they’re ready when petals crumble easily but still hold their shape. Patience is key for vibrant results!
Why did my dried hydrangeas lose their color?
Color fading usually happens from over-exposure to light or heat. To prevent this, store dried blooms in a cool, dark place (like a cardboard box with tissue paper) and avoid direct sunlight. Blue hydrangeas are especially sensitive—dry them quickly and keep them shaded!
Can I dry hydrangeas in the sun?
Direct sunlight can bleach colors and speed up drying too fast, causing brittleness. Instead, hang or lay them in a shady, well-ventilated spot (like a garage or porch with indirect light). A breathable mesh bag works great for airflow without harsh UV rays.
What’s the best way to preserve hydrangea color long-term?
For years of vibrant color, store dried hydrangeas in an airtight container with silica gel packets or dried lavender to absorb moisture. Avoid plastic—it traps humidity and dulls hues. Revisit them every few months to check for pests or mold.
Can I dry hydrangeas with green leaves still attached?
Yes, but trim leaves halfway through drying to prevent mold or uneven drying. Leaves can leach moisture from the blooms, slowing the process. Once blooms are fully dry (but leaves are still slightly green), gently remove them with scissors for a polished look.
Wrapping up and next steps
Drying hydrangeas to preserve their stunning color is easier than you think—and the results are worth every effort! 🌸 With the right techniques, like air-drying, silica gel, or microwave methods, you’ll keep those vibrant blooms looking fresh for months.
Whether you’re crafting wreaths, potpourri, or simply savoring their beauty, your dried hydrangeas will be a showstopper.
Ready to try? Grab your blooms and follow the steps—your future floral masterpiece is just a few hours away! 💡 Pro tip: Start with the freshest flowers for the best color retention, and don’t forget to label your dried bundles for sentimental keepsakes.