
Propagation
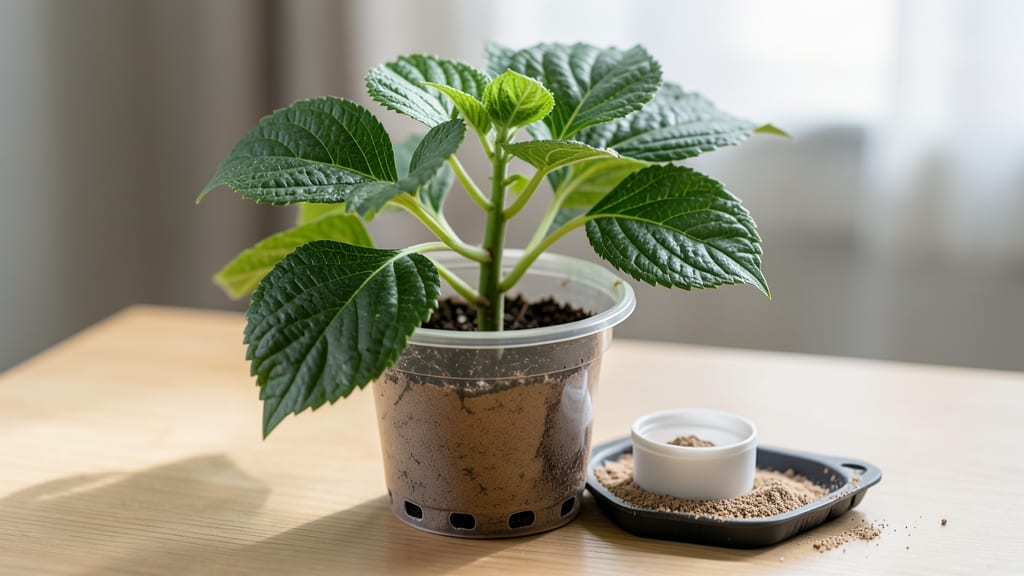
Starting hydrangeas from cuttings guarantees you free plants that'll bloom next year—if you time it right. 🌿 I've rooted dozens of cuttings, and the difference between success and failure comes down to three things: when you cut, how you prep the stems, and the rooting method you choose.
Summer's the magic window, but don't worry if you miss it—I'll show you how to work around the season.
The secret weapon is a clean, sharp pair of pruners and a healthy stem with at least three sets of leaves. You'll need rooting hormone (optional but helpful), small pots with drainage, and either water or a well-draining soil mix.
Most people overthink this—it's just about keeping cuttings moist and warm until roots form, which takes about 4-8 weeks depending on your method.
By late fall, you'll be transplanting rooted cuttings into the ground or larger pots, ready to establish themselves for next season's spectacular blooms. The best part? These new plants will have the exact same vibrant colors and bushy growth as their parent, just without the nursery price tag.
Whether you're propagating mophead, panicle, or oakleaf hydrangeas, this method works for all varieties. The key is patience—rooting takes time, but the payoff of watching your cuttings grow into full-size plants is worth every week of waiting.
📚 In This Guide
- What you need
- Instructions
- Tips and common mistakes
- Wrapping up and next steps
What you need
- ● Hydrangea cuttings: 4–6 healthy, non-flowering stems (4–6 inches long) from this year’s growth (softwood or semi-hardwood).
- ● Sharp pruning shears or clean knife: Sterilized to avoid disease (rubbing alcohol wipe works!).
- ○ Rooting hormone (optional but recommended): A powder or gel like Rootone or Clonex to boost root growth.
- ● Well-draining potting mix: 50% perlite or sand + 50% peat moss or coco coir (sterilized). No garden soil!
- ● Small pots or trays: 4–6 individual 3–4 inch pots or a shallow tray with drainage holes.
- ● Clear plastic bag or humidity dome: To create a mini greenhouse effect (a ziplock bag with holes punched in works!).
- ● Spray bottle: For misting cuttings (fill with room-temperature water).
- ● Twist ties or rubber bands: To secure plastic bags around cuttings.
- ● Labeling tags: To track varieties (e.g., ‘Endless Summer’ or ‘Nikko Blue’).
- ● Heat mat: Keeps soil warm (70–75°F) for faster rooting.
- ● Grow lights: If natural light is weak (12–16 hours/day).
- ● Fungicide: Like Mycorrhizal inoculant to prevent rot.
- ● Journal: To log progress (rooting dates, humidity adjustments, etc.).
Step-by-step instructions for propagating hydrangeas from cuttings
Here's how I turn a single cutting into a thriving hydrangea plant ready for blooming next season.
🌱 Step 1: Choose the Right Cutting and Prepare It
Select a healthy stem from this year's growth that's about 4-6 inches long with at least 3-4 leaf nodes. Cut just below a node with clean, sharp shears—this is where roots will form. Remove all but the top 2 sets of leaves to reduce moisture loss, and trim the remaining leaves in half for better airflow.
I always dip the cut end in rooting hormone (optional but helpful for faster rooting). This sticky powder creates a protective barrier that encourages root growth. Tap off any excess so it doesn't clump on the cutting—you want a light, even coating only.
💧 Step 2: Set Up Your Rooting Medium
Fill a small pot with moistened perlite or sand—these materials stay loose and allow roots to penetrate easily. I use a 4-inch container for each cutting to give roots plenty of room to establish. Water the medium until it's damp but not soggy—you should see moisture beads form on the surface when squeezed gently.
Make a small hole about 1-2 inches deep with your finger or a pencil. Insert the cutting so that 2 leaf nodes are buried below the surface. Firm the medium lightly around the stem to hold it in place without compacting it too tightly.
☀️ Step 3: Create Ideal Conditions for Root Growth
Place the pot in a location with bright, indirect light—think of it as morning sun with afternoon shade. Too much direct sun will dry out the cutting, while too little light slows root development. I cover the pot with a clear plastic bag secured loosely with a rubber band to maintain humidity, but leave it slightly open for airflow.
Keep the medium consistently moist by misting lightly every 2-3 days until you see new growth. Roots typically form in 4-8 weeks, but don't rush it—patience here prevents rot. You'll know it's working when tiny leaves appear at the top, signaling the plant has started photosynthesizing on its own.
✂️ Step 4: Transition to Independent Growth
Once the cutting has developed 2-3 sets of new leaves (usually after 8-12 weeks), it's ready to graduate from the humidity tent. Remove the plastic bag gradually over 3-5 days to acclimate the plant to normal air circulation. This prevents shock from sudden environmental changes.
Water when the top inch of soil feels dry, but avoid letting the plant sit in waterlogged conditions. After another 4-6 weeks of strong growth, you can transplant it into a 6-inch pot with regular potting mix. This gives the roots more space to establish before winter.
🪴 Step 5: Overwinter and Prepare for Blooming
Bring your new hydrangea indoors before the first frost, placing it in a cool (40-50°F) spot with bright light. Reduce watering slightly during dormancy but keep the soil from drying out completely. In early spring, move it back to indirect light and resume regular watering when you see new growth.
Here's the thing—hydrangeas need time to build a strong root system before they'll produce abundant blooms. Don't expect flowers the first year, but with proper care, your cutting will reward you with vibrant blooms next season. I always fertilize lightly in spring with a balanced formula to encourage healthy growth.
Tips & tricks for propagating hydrangeas from cuttings
These simple secrets will help your hydrangea cuttings thrive and reward you with blooms next season.
Selection Tip: When choosing your cutting, look for stems that are pencil-thick with vibrant green leaves—these are the healthiest candidates. Avoid woody stems from last year's growth, as they're less likely to root successfully. The best time to take cuttings is in early summer when the plant is actively growing and full of energy. I've found that morning cuttings work best because the stems are fully hydrated from overnight dew.
Rooting Hormone Hack: While rooting hormone is optional, it dramatically increases your success rate. If you don't have it, you can make a simple substitute by crushing a few aspirin tablets into powder and dipping the cut end. The salicylic acid in aspirin stimulates root growth naturally. Just be sure to use the freshest hormone powder you can find—old powder loses its potency over time.
Lighting Strategy: That bright, indirect light requirement is crucial—direct sun will scorch your cutting while too little light slows root development. I place my cuttings near an east-facing window where they get morning sunlight but are shaded from the intense afternoon rays. If you don't have ideal window space, a grow light on a timer (12-14 hours per day) works beautifully for consistent results. The key is mimicking natural daylight patterns without the harshness.
Humidity Management: The plastic bag creates a mini greenhouse effect, but proper airflow is essential to prevent mold. I poke small holes in the bag with a toothpick if I notice condensation buildup—this maintains humidity while allowing fresh air circulation. You'll know your humidity levels are perfect when you see tiny water droplets forming on the inside of the bag during the day, but they evaporate by evening.
Pro Tips for Start A Hydrangea From A Cutting
- These simple secrets will help your hydrangea cuttings thrive and reward you with blooms next season.
- Selection Tip: When choosing your cutting, look for stems that are pencil-thick with vibrant green leaves—these are t...
- Rooting Hormone Hack: While rooting hormone is optional, it dramatically increases your success rate. If you don't ha...
Frequently asked questions
Got questions about propagating hydrangeas from cuttings? You’re not alone! Here are answers to the most common concerns—so you can grow confidently and troubleshoot like a pro.
When is the best time to take hydrangea cuttings?
The ideal window is late spring to early summer, when new growth is firm but still flexible (about pencil-thick). Avoid taking cuttings after the first frost or when flowers are already blooming—timing matters for rooting success! For tropical hydrangeas (like Hydrangea macrophylla), early summer is perfect. If you miss the season, store cuttings in a damp paper towel in the fridge until spring.
Can I root a hydrangea cutting in water instead of soil?
Yes! Water propagation works for hydrangeas, but soil often yields stronger roots faster. If using water, change it every 2–3 days and keep the cutting in bright, indirect light. Roots may take 4–8 weeks to appear. Once roots are 2–3 inches long, transplant to a well-draining potting mix. Pro tip: Add a rooting hormone to boost success rates!
Why aren’t my hydrangea cuttings rooting? Troubleshooting tips.
Common culprits include low humidity, overwatering, or poor light. Check these fixes:
- Humidity: Cover cuttings with a plastic bag or dome to trap moisture.
- Water: Keep soil lightly moist (not soggy)—hydrangeas hate “wet feet.”
- Light: Provide bright, indirect light (no harsh sun). A north-facing window or grow light works best.
- Temperature: Aim for 65–75°F; avoid drafts or cold spots.
How long until my hydrangea cutting grows into a full plant?
Patience is key! With proper care, cuttings will develop roots in 4–12 weeks, and you can transplant them to a pot. It may take 1–2 years for your new hydrangea to bloom, depending on the variety and growing conditions. Feed it with a balanced fertilizer (like 10-10-10) in spring to encourage lush growth and future flowers.
Will my propagated hydrangea have the same flowers as the parent plant?
Yes! Hydrangeas grown from cuttings are genetically identical to the parent plant, so you’ll get the same color, size, and flower type. However, if the parent plant was a hybrid or grafted variety, its offspring may not match perfectly. To ensure consistency, choose healthy, mature stems from a well-established hydrangea.
Wrapping up and next steps
Starting a hydrangea from a cutting is a rewarding way to expand your garden—and with patience and care, you’ll soon be admiring those lush blooms next season! 🌸 Just remember: the right timing, tools, and rooting hormone are your best friends.
Once your cuttings take root, transplant them into pots or directly into the garden soil, giving them the love they need to thrive.
Now that you’re armed with these root-bonding secrets, why not try it today? Grab those snips, follow the steps, and soon you’ll be sharing your new hydrangea babies with fellow plant enthusiasts! 🌱