
Pests and Diseases
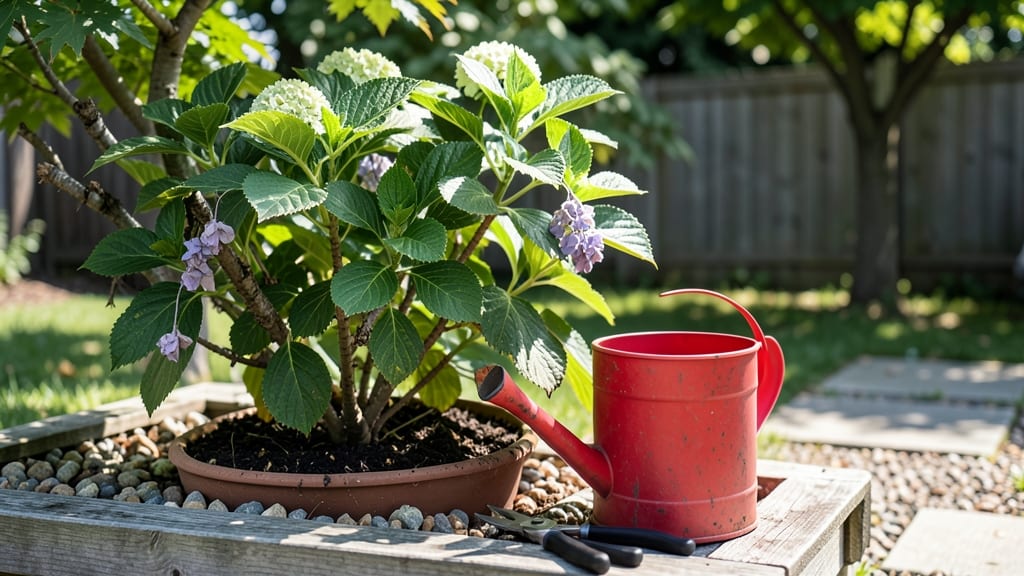
Your hydrangea might look dead, but don’t prune those branches just yet—some signs of death are actually signs of life waiting to happen. 🌿 I’ve watched my own hydrangeas go from crispy brown stems to lush green regrowth in a single season, and the key is knowing which clues to trust.
Before you declare it a loss, check for these visual cues that reveal whether your plant is truly gone or just taking a long nap.
First, scratch-test the stems: if the bark peels away easily to reveal green underneath, your hydrangea’s still alive. Brown, dry stems that snap like twigs? That’s a different story. Then look at the buds—if you see even a single swollen bud in spring, there’s hope.
And don’t forget the roots: dig carefully (just a few inches down) to check for white, firm roots. If they’re mushy or smell rotten, that’s your answer.
Reviving a struggling hydrangea often comes down to pruning at the right time and giving it fresh, well-draining soil. Cut back dead stems in late winter or early spring, and if the roots are healthy, you’ll see new shoots within weeks.
The payoff? A plant that bounces back with vibrant blooms by summer, proving that what looked like death was just dormancy in disguise.
Winter dormancy, root rot, or pest damage—each scenario needs a different approach. The good news? Most hydrangeas are tougher than they look. With the right checks, you’ll know exactly how to nurse yours back to health (or say goodbye with confidence).
Let’s break down what to look for and what to do next.
Root Causes Behind Dying Hydrangeas
Hydrangeas are resilient, but they can quickly decline when environmental or biological stressors overwhelm them. Understanding why your hydrangea might be struggling is the first step to reviving it. Below, we break down the most common culprits—backed by science—and what triggers each issue.
---
Hydrangeas thrive in USDA Zones 3–9, but sudden temperature swings—especially freezing winters or scorching heat—can kill them. Here’s how it happens:
- Cold Damage (Winter Kill): - Hydrangeas enter dormancy in fall, but unpredictable late frosts (below 20°F/-7°C) can rupture cell walls, causing brown, mushy stems or blackened buds. - Evergreen varieties (like Hydrangea quercifolia) are especially vulnerable—their leaves act as insulation, but if snow melts and refreezes, ice crystals form inside foliage, crushing cells. - Actionable fix: Mulch 6–12 inches deep with straw or shredded leaves in late fall to insulate roots.
Wrap young plants in burlap for extra protection.
- Heat Stress (Summer Burn): - Prolonged temperatures above 90°F (32°C) dehydrate hydrangeas, causing wilting, crispy edges, or bleached leaves. - Root zone overheating (especially in black plastic mulch) can cook roots, leading to sudden collapse. - Pro tip: 💡 Drip irrigation at soil level (not overhead) keeps roots cool. Morning watering reduces evaporation.
---
Hydrangeas are thirsty but hate soggy feet—water stress is a top killer.
- Underwatering (Drought Stress): - Hydrangeas need 1–1.5 inches of water weekly (more in pots). Wilting, dry soil, or leaf curl signal thirst. - Root desiccation occurs when roots shrink and pull away from soil, cutting off nutrient flow. Leaves turn brown and crispy from the edges inward. - Fix: Deep watering 2x/week (soak until water drains 6 inches down). Mulch retains moisture and regulates soil temp.
- Overwatering (Root Rot): - Poor drainage + excess moisture = fungal root rot (Phytophthora or Pythium).
Roots turn black, mushy, and smell rank. - Yellowing leaves (chlorosis) and stunted growth follow as roots suffocate. - Critical step: 🔪 Check drainage—amend clay soil with perlite or sand. Elevate pots to prevent waterlogging.
---
Fungi thrive in humid, shady conditions—hydrangeas’ ideal habitat. Common culprits:
| Disease | Symptoms | Cause | Fix | |----------------------|---------------------------------------|----------------------------------------|------------------------------------------| | Powdery Mildew | White, powdery coating on leaves | High humidity + poor airflow | Spray neem oil or baking soda mix (1 tsp/L water).
Prune for airflow. | | Leaf Spot | Brown spots with yellow halos | Fungal spores (Septoria) in wet foliage | Remove infected leaves. Copper fungicide as preventative. | | Botrytis Blight | Gray mold on buds/flowers | Damp, crowded stems | Space plants 3–4 ft apart. Prune dead blooms promptly. |
🌡️ Warning: Fungi spread faster in temperatures 60–80°F (15–27°C) with high humidity. Morning watering (not evening) reduces nighttime dampness.
---
Insects like aphids, lace bugs, and scale drain hydrangeas’ energy, leading to weakened stems and premature death.
- Aphids & Lace Bugs: - Sticky honeydew (on leaves/stems) + yellow stippling (lace bugs) signal infestation. - They inject toxins, causing curlled, distorted leaves and stunted growth. - Solution: Blast off with water (aphids hate it!). Use insecticidal soap for lace bugs.
- Scale Insects: - Bumpy, brown crusts on stems/leaves = scale. They smother buds and block nutrient flow. - Emergency fix: 🔥 Scrape off with a toothbrush + rubbing alcohol. Apply horticultural oil in fall/winter (when pests are dormant).
--- Hydrangeas are heavy feeders, especially for iron, nitrogen, and phosphorus.
- Yellow Leaves (Chlorosis): - Iron deficiency (common in alkaline soil pH >7.0) turns new leaves yellow while veins stay green. - Fix: Lower pH with sulfur or chelated iron. Mulch with pine needles (acidic).
- Purple Stems (Phosphorus Deficiency): - Dark purple stems/leaves = phosphorus starvation, often from overwatering or poor soil. - Boost phosphorus: Use a balanced 10-10-10 fertilizer in spring or bone meal.
--- - Over-Pruning: Cutting old wood (where buds form) in late winter/early spring removes next year’s blooms. - Animal Chewing: Deer, rabbits, or slugs can strip leaves/buds. Sharp-toothed marks on stems are a dead giveaway. - Transplant Shock: Moving hydrangeas without root balls or in extreme heat causes wilting within days.
Revive Your Hydrangea Now
If your hydrangea looks lifeless, don’t panic—many issues are fixable with the right care. Below are targeted solutions for common problems, paired with prevention tips to keep your plant thriving. Follow these steps to diagnose and treat your hydrangea’s woes before they worsen.
---
Signs: Yellowing leaves, mushy stems, foul-smelling soil, or wilting despite damp soil.
How to Fix It: 🔥 Step 1: Stop Watering Immediately - Let the soil dry out completely. Overwatering suffocates roots, leading to rot.
🍳 Step 2: Check the Roots - Gently remove the plant from its pot (or dig around the base if in the ground). Healthy roots are firm and white; rotten roots are brown, mushy, or smell bad. - Trim away diseased roots with sterilized scissors.
👨🍳 Step 3: Repot or Rethink Planting - If in a pot: Move to a well-draining container with fresh, moisture-wicking soil (mix in perlite or sand). Ensure the pot has drainage holes. - If in the ground: Amend the soil with compost and perlite, then replant.
Avoid compacted or clay-heavy soil.
🥘 Step 4: Adjust Watering Habits - Water only when the top 1–2 inches of soil are dry. Stick your finger in—if it’s damp, wait. - Pro Tip: 💡 Use a moisture meter or the "squeeze test" (grab a handful of soil; if it clumps, it’s too wet).
🌡️ Prevention Tips: - Choose pots with drainage holes and avoid saucers that trap water. - Mulch around the base (but not touching the stem) to regulate moisture. - In rainy seasons, cover pots temporarily to prevent excess water.
---
Signs: Crispy, brown leaf edges, drooping despite dry soil, or leaves curling inward.
How to Fix It: 🔥 Step 1: Deep Watering Session - Soak the soil until water drains from the bottom. Repeat every 2–3 days until leaves perk up.
🍳 Step 2: Mulch Like a Pro - Apply 2–3 inches of mulch (wood chips or straw) around the base to retain moisture and cool roots.
👨🍳 Step 3: Move to Shade (Temporarily) - If under direct sun, relocate your hydrangea to partial shade (morning sun + afternoon shade works best). - Use a shade cloth (30–50% coverage) if moving isn’t an option.
🥘 Step 4: Boost Humidity - Mist leaves daily in dry climates or place the pot on a pebble tray with water. - Group plants together to create a microclimate.
🌡️ Prevention Tips: - Water early in the morning to reduce evaporation. - Avoid plastic pots—they dry out faster than terracotta or fabric pots. - Avoid fertilizing during heatwaves; it stresses the plant further.
---
Signs: Sticky residue (aphids), chewed leaves (slugs/snails), or tiny webs (spider mites).
How to Fix It: 🔥 Step 1: Identify the Culprit - Aphids/Mealybugs: Tiny, soft-bodied insects on undersides of leaves. - Spider Mites: Tiny dots + fine webbing. - Slugs/Snails: Slimy trails and ragged holes in leaves.
🍳 Step 2: Manual Removal (For Light Infestations) - Aphids/Mealybugs: Wipe off with a soapy water spray (1 tsp mild soap per gallon of water). - Spider Mites: Blast off with a strong stream of water. - Slugs/Snails: Handpick at night (they’re most active then) or set beer traps (bury a shallow dish filled with beer).
👨🍳 Step 3: Organic Sprays for Stubborn Pests - Neem oil spray (1 tbsp neem oil + 1 tsp soap per quart of water; spray every 5–7 days). - Diatomaceous earth (food-grade powder) for crawling pests—reapply after rain.
🥘 Step 4: Encourage Beneficial Insects - Plant marigolds or basil nearby to attract ladybugs (aphid predators). - Install a small bird feeder to deter slugs naturally.
🌡️ Prevention Tips: - Inspect new plants before bringing them home. - Prune regularly to improve airflow and reduce hiding spots for pests. - Avoid over-fertilizing—weak plants attract pests.
---
Signs: White/pink powdery spots (powdery mildew), black spots (leaf spot), or moldy stems.
How to Fix It: 🔥 Step 1: Remove Infected Parts - Prune away diseased leaves/stems with sterilized shears. Dispose of them in the trash (not compost).
🍳 Step 2: Improve Airflow - Space plants 2–3 feet apart and avoid overcrowding. - Thin out foliage to let sunlight and air circulate.
👨🍳 Step 3: Apply Fungicide - Baking soda spray (1 tsp baking soda + 1 quart water + few drops of soap) for mild cases. - Copper fungicide (follow label instructions) for severe infections.
🥘 Step 4: Adjust Watering - Water at the base (avoid wetting leaves) and early in the day so foliage dries quickly.
🌡️ Prevention Tips: - Space plants properly to prevent humidity buildup. - Clean pruners with rubbing alcohol between cuts. - Avoid overhead watering in humid climates.
--- Signs: Blackened, mushy stems, crispy leaves, or wilting despite cold soil.
How to Fix It: 🔥 Step 1: Trim Damaged Growth - Cut back blackened stems to healthy green tissue (use sterilized shears).
🍳 Step 2: Mulch Heavily - Pile 4–6 inches of mulch around the base to insulate roots.
👨🍳 Step 3: Gradual Warmth - If potted, move to a sheltered spot (like a garage or porch) until nighttime temps rise above 40°F (4°C).
🥘 Step 4: Fertilize Lightly - Wait until new growth appears, then apply a balanced fertilizer (10-10-10) to encourage recovery.
🌡️ Prevention Tips: - Cover plants with frost cloth before the first frost. - Choose cold-hardy varieties (e.g., Hydrangea macrophylla ‘Endless Summer’). - Avoid fertilizing late in the season—it encourages tender new growth.
--- - Test your soil (pH 5.5–6.2 is ideal for hydrangeas). Adjust with lime (to raise pH) or sulfur (to lower pH). - Prune in late winter/early spring (before new growth) to encourage bushier, healthier plants. - Rotate pots occasionally to ensure even sunlight exposure.
With these steps, your hydrangea should bounce back—and stay alive for years to come! 🌿✨
Frequently asked questions about your dying hydrangea
My hydrangea stems look brown and crispy—is it dead?
Not necessarily! Brown stems can mean winter dormancy, especially if they snap easily when bent. Scratch a small section of bark—if green underneath, the plant's alive. Wait until spring to prune; new growth often emerges from the base.
Should I cut off the brown stems now or wait?
Wait until late winter or early spring (March-April) to prune. Cutting too early removes potential buds for next year's blooms. If stems are mushy or smell rotten, trim them immediately to prevent spread.
What if there are no buds at all?
Check for aphids or lace bugs (tiny yellow spots on leaves). These pests can kill buds before they open. Spray with soapy water or neem oil. If no pests, your hydrangea might need more sunlight—try moving it to morning sun.
Can I save a hydrangea with no leaves?
Yes! Leaves often fall in winter or during drought. Dig gently to check roots—if they're white and firm, the plant's alive. Water deeply and mulch heavily. New leaves should appear within 2-3 weeks if roots are healthy.
How do I know if it's root rot instead of winter dormancy?
Root rot shows as black, mushy roots with a foul smell. Dormant roots are firm and white. If rot is confirmed, trim affected roots, repot in fresh soil with perlite, and reduce watering immediately.