
Transplanting
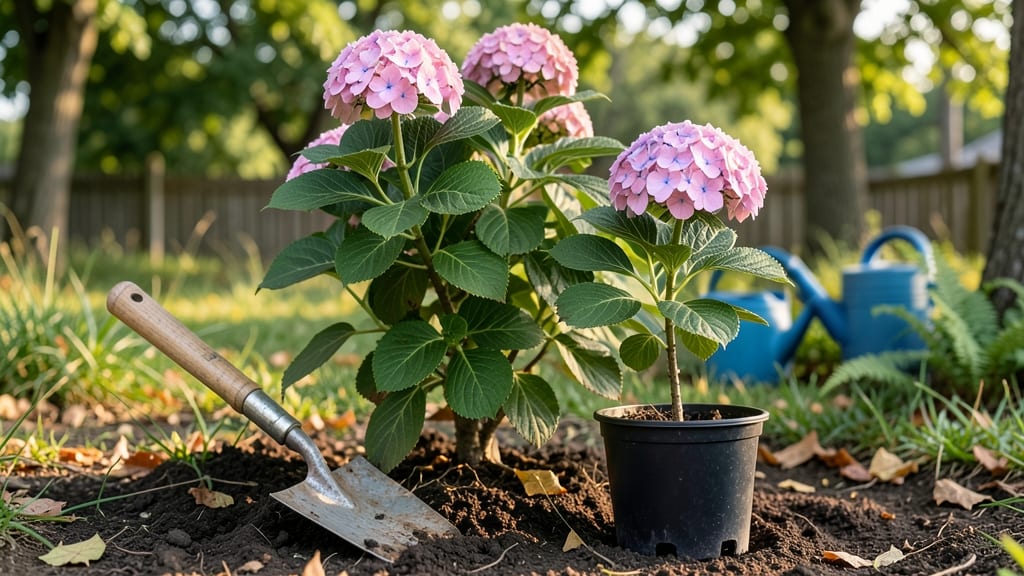
Moving hydrangeas at the right time means the difference between a thriving bush and one that struggles for years. The best time to transplant them is late fall or early spring when they're dormant—this minimizes stress and gives roots time to establish before summer heat arrives.
I’ve moved hydrangeas in both seasons, and the ones transplanted in October bounced back fastest, with new growth appearing by early May. The secret isn’t just timing—it’s preparation.
Dig up the root ball when the soil is cool but workable, keep it moist (but not soggy) during transport, and avoid moving during extreme heat or cold. Even if you’re not a seasoned gardener, this method works because hydrangeas are forgiving when handled gently.
You’ll see fewer wilted leaves and more vibrant blooms the following year if you follow these steps. After transplanting, focus on watering deeply once a week for the first month to encourage root growth. Mulch around the base to retain moisture and protect roots from temperature swings.
Within 6-8 weeks, you’ll notice new shoots pushing through the soil—proof the plant is settling in. This works for bigleaf, oakleaf, and panicle hydrangeas alike, whether you’re relocating a single bush or an entire hedge. The key is patience—hydrangeas take time to recover, but the payoff is worth it.
📚 In This Guide
- What you need
- Instructions
- Tips and common mistakes
- Wrapping up and next steps
What you need
- ● Garden gloves (1 pair) – Heavy-duty to protect your hands from thorns and dirt.
- ● Pruning shears or sharp shovel – For clean cuts and digging roots (sterilize blades with rubbing alcohol).
- ● 5-gallon bucket or wheelbarrow – To transport hydrangeas and soil.
- ● Burlap or landscape fabric (1–2 yards) – For wrapping roots and minimizing root disturbance.
- ● Organic mulch (e.g., pine bark or shredded leaves, 2–3 bags) – To retain moisture and protect roots post-transplant.
- ● Watering can or hose with a gentle spray nozzle – For hydrating plants before and after moving.
- ● Transplanting spade or garden fork – To loosen soil around roots (18–24" deep for mature plants).
- ● Root stimulator (e.g., Mycorrhizal fungi or liquid rooting hormone) – Boosts recovery (follow label instructions).
- ● Soil pH test kit – Ensures your new location matches your hydrangea’s ideal pH (4.5–6.0 for most varieties).
- ● Stake and twine – For supporting top-heavy plants during establishment.
- ● Shade cloth (30–50%) – Temporarily shields transplants from harsh sun.
- ● Old towels or newspaper – To cover plants during transport (keeps them hydrated).
- ● Choose a dormant season – Late fall (after first frost) or early spring (before buds swell).
- ● Select a new location – Partial shade, well-draining soil, and space for mature size (3–6 ft wide).
- ● Check local frost dates – Avoid transplanting during freezing temps or extreme heat.
- ● Water plants 1–2 days before moving – Well-hydrated roots transplant better!
Step-by-Step guide for moving hydrangeas successfully
Here's the foolproof method I've used for years to transplant hydrangeas with minimal stress and maximum success.
🌱 Step 1: Wait Until Late Fall or Early Spring
Timing is everything with hydrangeas. The absolute best window is late fall (after the first hard frost) or early spring (just as buds swell but before new growth begins). This ensures the plant is fully dormant, conserving energy for root recovery. I always mark my calendar for November or March—any earlier and you risk waking the plant too soon.
Look for brown, crispy foliage in fall or tight, plump buds in spring. These are your visual cues that the plant has entered dormancy. Avoid moving during summer heat or winter's deepest freeze—both extremes shock the plant and reduce survival rates dramatically.
🪴 Step 2: Dig a Generous Hole and Prepare the Site
Choose a location with morning sun and afternoon shade—hydrangeas hate scorching afternoon rays. Dig a hole twice as wide as the root ball but only as deep as the container or root system. The top of the root ball should sit 1-2 inches above ground level to prevent water pooling at the stem.
Amend the native soil with 2-3 inches of compost mixed into the bottom of the hole. Hydrangeas prefer slightly acidic soil (pH 5.2-6.2). If your soil tests higher, add sulfur or peat moss to lower the pH. I always test my soil first—it's the difference between vibrant blooms and sad, sparse flowers.
✂️ Step 3: Carefully Remove and Prune the Hydrangea
Water the plant 24 hours before moving to reduce root shock. Dig around the root ball with a shovel or spade, keeping the soil intact. For container-grown hydrangeas, tip the pot and gently slide the plant out. If roots are circling, trim them with clean pruners to encourage outward growth.
Prune 1/3 of the oldest stems back to the ground to stimulate new growth. This might seem drastic, but it prevents overcrowding and helps the plant focus energy on root establishment. I always wear gloves—hydrangea leaves can irritate skin, and the sap stains easily.
💧 Step 4: Transplant and Water Thoroughly
Place the hydrangea in the hole, ensuring the root flare (where roots meet the stem) is visible above soil level. Backfill with native soil, pressing gently to eliminate air pockets. Water deeply until the soil is saturated 12 inches down—this encourages roots to grow outward rather than stay shallow.
Mulch the base with 2-3 inches of organic mulch (like shredded bark) to retain moisture and regulate soil temperature. Keep mulch 6 inches away from the stem to prevent rot. After transplanting, water every 2-3 days until new growth appears—this keeps the roots hydrated without drowning them.
☀️ Step 5: Monitor and Protect Through the First Season
For the first 4-6 weeks, check soil moisture daily. Hydrangeas are thirsty but hate soggy roots. If leaves yellow or wilt, water immediately but don’t overdo it—hydrangeas recover faster from underwatering than overwatering.
Watch for new growth in spring—this is your sign the transplant took. If buds don’t open or flowers are sparse, the plant may need more phosphorus-rich fertilizer (like 5-10-10) applied in early summer. I always fertilize lightly the first year to avoid stressing the roots.
Tips & tricks for thriving hydrangea transplants
These little details make all the difference between a struggling plant and one that thrives for years after moving.
Timing is Everything: The 24-hour watering before transplanting in Step 3 is non-negotiable—it hydrates the roots so they're less shocked when you move them. I've seen hydrangeas wilt dramatically when this step is skipped. Water deeply in the evening so the soil stays moist overnight, and avoid moving if rain is forecasted within 48 hours.
Root Ball Inspection: When you remove the hydrangea in Step 3, gently tease apart any circling roots with your fingers before trimming. This encourages outward growth rather than a tangled mess. I once transplanted a hydrangea without doing this, and it took three years to recover properly—don't make my mistake!
Soil Science Matters: That 2-3 inch layer of compost in Step 2 isn't just filler—it's where the magic happens. Mix in a handful of coffee grounds if your soil is alkaline, as they naturally acidify. I keep a jar of used grounds in my freezer for this exact purpose. The goal is to create that perfect pH 5.2-6.2 range hydrangeas crave for those vibrant blooms.
Post-Transplant Care: The first 4-6 weeks after moving are critical. I've found that wrapping the root ball with burlap before planting helps retain moisture during this delicate period. Just remove the burlap after a month when new growth appears—it'll naturally decompose and enrich the soil.
Pro Tips for Best Time To Move Hydrangeas
- These little details make all the difference between a struggling plant and one that thrives for years after moving.
- Timing is Everything: The 24-hour watering before transplanting in Step 3 is non-negotiable—it hydrates the roots so they're less shocked when you move them.
- Root Ball Inspection: When you remove the hydrangea in Step 3, gently tease apart any circling roots with your fingers before trimming.
Frequently asked questions
about moving hydrangeas—because even pros need a little extra guidance! Here are answers to the most common questions to help you transplant with confidence.Can I move hydrangeas in spring instead of fall?
While fall is ideal, you can move hydrangeas in early spring before new growth starts (around late winter/early spring). Avoid late spring or summer—hot weather stresses plants, and they may struggle to establish roots. If you must move in spring, water deeply afterward and mulch to retain moisture.
What if I miss the dormant season window?
Don’t panic! If you miss fall or early spring, wait until the next dormant season. For container-grown hydrangeas, you can transplant almost anytime (even summer) as long as you keep them well-watered. Just avoid extreme heat or frost. Pro tip: Prune dead foliage before moving to reduce stress.
How big of a root ball should I dig up?
Aim for a 12–18 inch diameter root ball for mature hydrangeas (bigger is better!). For younger plants, 6–12 inches suffices. Use a shovel or spade to dig a clean, rounded edge around the base. Warning: Avoid cutting into roots—this can shock the plant and delay recovery.
Will my hydrangeas survive if I transplant them in summer?
Summer transplants are risky but possible with extra care. If you must move in summer, do it on a cloudy day, water thoroughly before and after, and provide daily shade for 2–3 weeks. Expect slower growth—hydrangeas may take a season or two to fully recover. Pro tip: Apply a rooting hormone to boost survival rates.
Can I move hydrangeas from a pot to the ground?
Container hydrangeas
transplant beautifully to the ground. Choose a spot with similar light conditions, dig a hole twice as wide as the pot, and amend the soil with compost. Gently remove the plant, loosen roots if pot-bound, and water deeply. Bonus: Container-grown plants often establish faster since their roots aren’t as established.
How often should I water after transplanting?
Water every 2–3 days for the first 2 weeks, then taper to once a week (adjust for heat/drought). Deep watering is key—aim for 1–2 inches of moisture per session. Mulch around the base to retain moisture and protect roots. Signs of overwatering: Yellowing leaves or soggy soil.
Wrapping up and next steps
Moving hydrangeas at the right time—late fall or early spring—sets the stage for a lush, vibrant comeback.
By choosing dormancy, you minimize stress on the plant and maximize root establishment. You’ve got this! Now, grab your gloves, mark your calendar, and give your hydrangeas the fresh start they deserve. Ready to dig in? 🌿✨