
Succulent
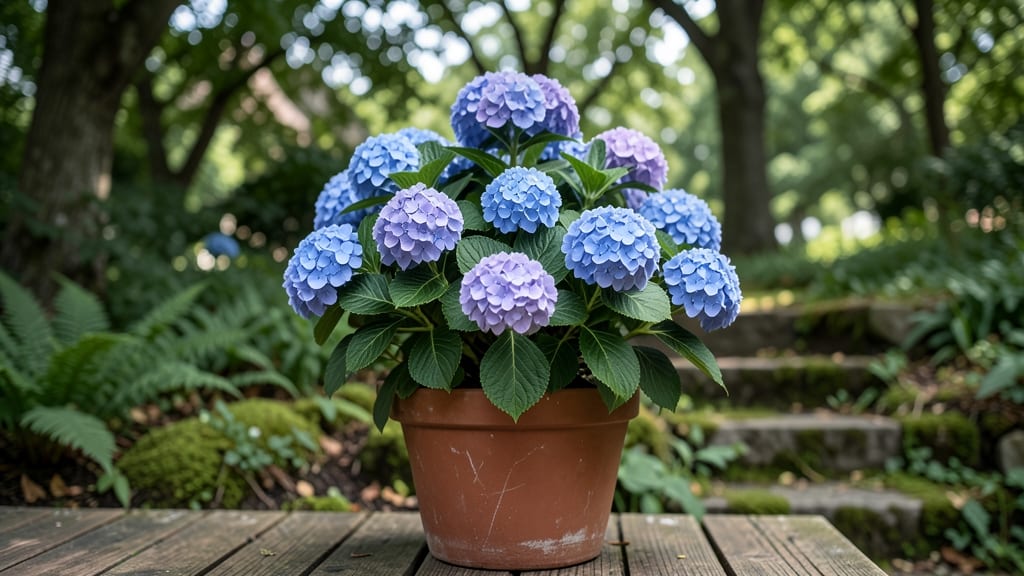
Your Blue Intensity hydrangea could be the deepest blue in the neighborhood—if you nail the soil pH. 💙 I’ve wrestled with these plants for years, and the difference between pale lavender and that rich, jewel-toned blue comes down to one simple science lesson: acidity.
Most gardeners overlook this, but it’s the secret to those showstopping blooms. The magic happens when your soil pH sits between 5.0 and 5.5—that’s the sweet spot for blue. Too alkaline, and you’ll get pink. Too acidic, and the plant struggles.
Test your soil first (kits are cheap) and amend with sulfur or peat moss if needed. This shrub thrives in partial shade too, so pick a spot with morning sun and afternoon dappled light for the best results.
Once you’ve got the pH right, water consistently but avoid soggy roots—these plants hate wet feet. Prune in late winter or early spring, cutting back to just above the first set of leaves.
You’ll see new growth within weeks, and by summer, those blooms will be the deepest blue in the block. Compact size makes it perfect for small gardens, containers, or even as a striking hedge. Just remember: patience is key.
It takes about 2-3 years for established plants to hit peak color intensity, but the wait is worth it for that wow factor every July.
📚 In This Guide
- What you need
- Instructions
- Tips and common mistakes
- Wrapping up and next steps
What you need
- ● Blue Intensity Hydrangea Plants: 3–5 mature Hydrangea macrophylla ‘Blue Intensity’ plants (bare-root or potted). Choose healthy specimens with firm stems and buds.
- ○ Soil Test Kit: A digital or lab-based kit to measure soil pH (aim for 5.2–5.5 for blue blooms). Optional but highly recommended!
- ● Sulfur or Aluminum Sulfate: 1–2 lbs of elemental sulfur (for organic acidification) or
- ● ½–1 lb of aluminum sulfate (faster-acting, synthetic). Do not mix both!
- ● Lime (Calcium Carbonate): ½–1 lb (for emergency pH adjustments if soil is too acidic).
- ● Organic Mulch: 2–3 inches of pine bark, oak leaves, or peat moss to retain moisture and acidify soil over time.
- ● Garden Gloves: Heavy-duty, chemical-resistant (e.g., nitrile-coated).
- ● Trowel or Spade: For digging and amending soil.
- ● Watering Can or Hose: With a spray nozzle for even moisture distribution.
- ● pH Meter or Test Strips: For quick checks (supplement the soil test kit).
- ○ Rain Gauge (Optional): To monitor watering consistency—hydrangeas thrive with 1–1.5 inches of water weekly.
- ● Sunlight: Partial shade (morning sun + afternoon shade) or dappled sunlight (6+ hours/day max). Avoid harsh afternoon rays!
- ● Well-Draining Soil: Amend clay or sandy soil with 20–30% compost before planting.
- ● Patience: Soil pH changes take 4–6 weeks to reflect in bloom color. Stay consistent!
Step-by-Step guide to adjusting soil pH for blue intensity hydrangeas
Here's how I transform hydrangeas into stunning blue bloomers by mastering the soil science.
🌱 Step 1: Test Your Current Soil pH
Start by purchasing a soil pH test kit (digital or liquid test strips work best). Dig a 4-inch deep hole near your hydrangea's root zone and collect a 1-cup soil sample. You'll notice the soil texture varies—sandy soils drain fast and need more frequent pH adjustments, while clay holds moisture longer and may require gentler changes.
Follow the kit instructions to mix your sample with distilled water (never tap water—minerals skew results). Wait 10 minutes for the color change, then compare to the chart. Most hydrangeas need pH 5.2-5.5 for true blue blooms. If your reading is above 6.0, you're dealing with alkaline soil that will produce pink flowers no matter what you do.
💧 Step 2: Apply Acidifying Materials for Blue Blooms
For pH 5.2-5.5, spread 1 pound of elemental sulfur evenly around the plant's drip line (the area where water naturally falls). Work it into the top 6 inches of soil using a garden fork. I like to do this in early spring before new growth appears—this gives the sulfur time to convert into sulfuric acid and lower pH gradually.
Water the area thoroughly after application to help the sulfur dissolve. You'll see white crystals on the soil surface for a few days—that's normal. Avoid applying sulfur when rain is forecasted, as it can wash away before working. For container-grown hydrangeas, use cottonseed meal instead (½ cup per 5-gallon pot), as it's safer and breaks down more predictably.
☀️ Step 3: Monitor and Maintain pH Levels
Retest your soil 6 weeks after application—this is critical because pH changes take time. You might be surprised to find the pH hasn't shifted enough. If needed, apply another ½ pound of sulfur and retest again in 4 weeks. I've had to do this twice in my own garden before achieving the perfect 5.2-5.5 range.
Keep an eye on your hydrangea's leaf color as a visual cue: deep green leaves mean the pH is working, while yellowing leaves signal over-acidification. Water deeply once a week during dry spells to help maintain consistent pH levels. Mulch with 2-3 inches of pine needles annually to slowly acidify the soil naturally—this also suppresses weeds and retains moisture.
⏰ Step 4: Time Your Adjustments for Best Results
The best time to adjust pH is late winter or early spring, just as buds begin to swell. This gives the plant 6-8 weeks to adapt before flowering. Avoid adjusting pH in summer or fall—the plant is either stressed by heat or preparing for dormancy, and sudden pH changes can shock the roots.
If you're dealing with newly planted hydrangeas, wait 3 months before testing and adjusting. Young plants need time to establish their root systems before undergoing major soil changes. You'll know you're on the right track when blue flower buds appear in late spring, followed by vibrant blue blooms in summer. Patience is key—some hydrangeas take a full season to show color changes after pH adjustments.
Tips & tricks for perfect blue hydrangea blooms
Here's what nobody tells you about transforming pink hydrangeas into vibrant blue blooms—these tricks save time and frustration.
Testing Accuracy: For the most reliable results in Step 1, use a digital soil pH meter instead of test strips. I've found that strips can be less precise, especially in clay-heavy soils. When collecting your 1-cup sample, take it from multiple spots around the plant—soil pH can vary by up to 1.5 points just a few feet away. This ensures you're getting an accurate baseline before making adjustments.
Timing Secret: The 10-minute wait in Step 1 is crucial—don't rush this! I learned the hard way that cutting this short can lead to inaccurate readings, especially in cooler weather. If you're testing in early spring when temperatures are still chilly, extend the wait to 15 minutes. Also, test your soil on a dry day—recent rain can temporarily lower pH readings and give you false hope about your alkaline soil.
Container Strategy: For container-grown hydrangeas, the ½ cup of cottonseed meal per 5-gallon pot in Step 2 is your best friend. Unlike elemental sulfur, cottonseed meal breaks down more predictably in small spaces. I recommend mixing it directly into the potting soil rather than spreading it on top—this ensures even distribution. Water thoroughly after mixing, and repeat the process every 3 months to maintain the ideal pH 5.2-5.5 range.
Visual Cues: In Step 3, those deep green leaves you're watching for aren't just about pH—they're also telling you about nitrogen levels. If your leaves are dark green but your hydrangea isn't blooming, it might need a balanced fertilizer with phosphorus to encourage flowering. Yellowing leaves, on the other hand, could mean over-acidification or even too much rain. The 2-3 inches of pine needles for mulching helps prevent this by creating a slow-release acidifying layer that mimics natural forest conditions.
Pro Tips for Blue Intensity Hydrangea
- Here's what nobody tells you about transforming pink hydrangeas into vibrant blue blooms—these tricks save time and f...
- Testing Accuracy: For the most reliable results in Step 1, use a digital soil pH meter instead of test strips. I've f...
- Timing Secret: The 10-minute wait in Step 1 is crucial—don't rush this! I learned the hard way that cutting this shor...
Frequently asked questions
about Blue Intensity Hydrangea—because every gardener deserves vibrant blooms without the guesswork!How do I know if my soil pH is right for blue hydrangeas?
Test your soil with a pH meter or kit (available at garden centers). Aim for 5.2–5.5 for deep blue blooms. If your soil is too alkaline (pH 7+), amend it with elemental sulfur or peat moss—but do this 6–8 weeks before planting for best results. Pro tip: Blue hydrangeas thrive in acidic soil, so avoid lime or wood ash!
How long does it take for Blue Intensity Hydrangeas to bloom after adjusting pH?
Patience is key! If you adjust soil pH in spring, expect blooms the following summer. Hydrangeas are slow to respond—some gardeners see color changes in 1–2 years, especially if the plant is established. Pro tip: Mulch with pine needles or oak leaves to maintain acidity between adjustments.
What if my Blue Intensity Hydrangea turns pink or purple?
Pink/purple blooms mean your soil is too alkaline (pH 6.5+). To fix it:
- Add sphagnum peat moss to the root zone.
- Water with vinegar or lemon juice (1 tbsp per gallon, monthly).
- Plant acid-loving companions like azaleas or blueberries nearby to naturally lower pH.
Pro tip: Avoid tap water with high calcium—it can raise pH over time. Use rainwater if possible!
Can I grow Blue Intensity Hydrangeas in containers?
Containers are ideal for controlling pH. Use a well-draining acidic mix (like 50% peat moss + 50% perlite) and repot every 2–3 years with fresh soil. Pro tip: Add hydrangea-specific fertilizer (high in aluminum) in early spring to boost blue intensity. Drainage holes are a must—root rot is a container gardener’s nightmare!
Do Blue Intensity Hydrangeas need winter care?
These hydrangeas are hardy to USDA Zones 4–9, but young plants or Zone 4–5 gardeners should:
- Mulch heavily with straw or leaves (6+ inches) after the ground freezes.
- Avoid wrapping unless temps drop below -20°F.
- Prune in late winter/early spring (never in fall—it encourages tender new growth!).
Pro tip: If you live in a hot, dry climate, water deeply in winter to prevent drought stress.
Wrapping up and next steps
Mastering the art of growing Blue Intensity hydrangeas is all about understanding—and tweaking—your soil’s pH! 🌱 With the right balance of acidic conditions (aim for 5.2–5.5), you’ll unlock those stunning cobalt-blue blooms that steal the show.
Remember, consistency is key: test your soil regularly, amend as needed, and don’t forget organic matter to keep roots happy.
Ready to turn your garden into a blue paradise? Grab those pH strips, roll up your sleeves, and start experimenting—your hydrangeas (and your neighbors!) will thank you. Happy gardening! 🌸