
Propagation
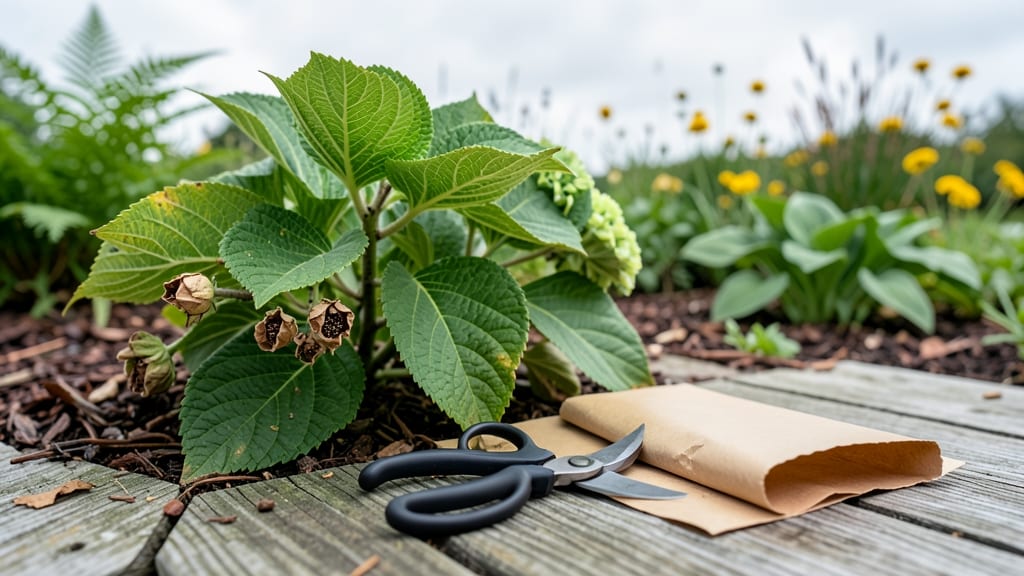
Collecting hydrangea seeds is the quiet art of turning last year’s spent blooms into next season’s surprises. 🌿 The key moment arrives in late fall when those once-vibrant flowers transform into brown, papery seed heads—each one holding the potential for new plants.
This method isn’t about instant gratification; it’s about patience, timing, and understanding when those seeds are truly ready to be collected.
You’ll need sharp scissors, a paper bag for drying, and a dry, dark spot to store them until spring.
The process starts by identifying mature seed heads—look for the ones that have fully dried and turned a crisp brown, often still clinging to the plant long after the blooms have faded. These are your future garden’s hidden treasures, waiting to be coaxed into life.
Once collected, spread the seeds on a screen or paper towel to dry completely, then store them in an envelope or airtight container. Viability drops after a year, so plant them as soon as possible in well-draining soil.
Expect germination to take 4-8 weeks, with seedlings that may not bloom for 2-3 years—but the payoff is worth the wait.
If seeds seem unreliable, hydrangeas propagate better from cuttings, which produce blooms in just a season. Either way, you’re building a garden legacy—one patiently collected seed at a time.
📚 In This Guide
- What you need
- Instructions
- Tips and common mistakes
- Wrapping up and next steps
What you need
- ● Mature hydrangea seeds – Harvest from seed heads (dried flower clusters) of Oakleaf (Hydrangea quercifolia), Panicle (H. paniculata), or Smooth (H. arborescens) varieties. Aim for 30–50 seeds for a good yield.
- ● Sharp pruning shears or scissors – For cleanly snipping seed heads (sterilize with 70% isopropyl alcohol first!).
- ● Paper bags or breathable mesh bags – 2–3 large bags (12x15 inches) to store seeds and allow airflow.
- ● Labeling tags & permanent marker – To track seed types (e.g., color, variety) and harvest date.
- ● Small containers or trays – 2–4 shallow trays (10x20 inches) with drainage holes for sowing.
- ● Seed-starting mix – 2–3 cubic feet of lightweight, sterile potting mix (avoid garden soil—it’s too dense!).
- ● Misting bottle or spray nozzle – To keep seeds consistently moist without drowning them.
- ○ Plastic wrap or humidity dome – Optional but helpful for creating a mini greenhouse effect.
- ● Grow lights or sunny windowsill – Seeds need 6–8 hours of indirect light daily.
- ○ Heat mat (optional) – Speeds up germination if temps dip below 65°F (18°C).
- ● Fertilizer (balanced, 10-10-10) – Diluted to half-strength for young seedlings (use sparingly!).
- ● Notebook or app – To log germination dates and seedling progress.
- ● Tweezers – For delicate seed handling if they’re tiny or sticky.
Step-by-Step instructions for collecting hydrangea seeds
Timing and technique are everything—here's how to harvest viable seeds from your blooms.
🌿 Step 1: Identify and Select Mature Seed Heads
Wait until late fall or early winter when hydrangea seed heads have turned a papery brown and dried completely. These mature heads contain the seeds you'll collect. I look for heads that crumble easily when gently squeezed—this indicates full maturity and seed readiness.
Select heads from healthy plants that produced abundant flowers. Avoid heads that appear moldy or damaged by pests, as these seeds may not germinate. Use clean, sharp pruning shears to cut the entire seed head, leaving about 1 inch of stem attached. This prevents seeds from scattering while you work.
🪴 Step 2: Dry and Process the Seed Heads
Place the collected seed heads in a paper bag (not plastic) and store them in a dry, well-ventilated area for 1-2 weeks. The extra drying period ensures any remaining moisture evaporates, which prevents mold growth during storage. I like to hang the bags from a hook in my garage where airflow circulates naturally.
After drying, gently crush the seed heads between your fingers over a clean sheet of paper. The seeds will fall out while the chaff and dried floral parts remain behind. You'll notice the seeds are small, flat, and dark brown—about the size of a pinhead. Sift through the debris to isolate the seeds using a fine mesh strainer if needed.
⏰ Step 3: Store Seeds Properly for Germination
Place the collected seeds in a paper envelope or small glass jar with a tight-sealing lid. Label the container with the hydrangea variety and the collection date—this helps track germination rates over time. Store the seeds in a cool, dark place where temperatures remain between 35-45°F, such as a refrigerator crisper drawer.
Hydrangea seeds require a cold stratification period to break dormancy. I leave them in storage for 3-4 months before sowing, mimicking the natural winter conditions they'd experience outdoors. This cold treatment significantly improves germination rates, often from near-zero to 50-70% success.
🌱 Step 4: Sow Seeds for Next Season's Growth
In early spring, fill seed trays with a light, well-draining seed-starting mix and moisten it until evenly damp. Scatter the seeds on the surface since they require light to germinate—don't cover them with soil. I use a fine mist spray bottle to avoid dislodging the tiny seeds while keeping the mix moist.
Cover the trays with clear plastic wrap or a humidity dome to maintain moisture and warmth. Place them in a location with bright, indirect light (like a south-facing windowsill) where temperatures stay between 65-75°F. Germination typically occurs in 2-4 weeks, though some seeds may take longer.
☀️ Step 5: Transplant and Care for Young Seedlings
Once seedlings develop 2-3 true leaves, they're ready to transplant into individual 2-3 inch pots. Use the same light, well-draining mix and keep it consistently moist but never soggy. I find that bottom-watering these small pots prevents fungal issues while keeping roots healthy.
Hardening off begins 4-6 weeks before your last frost date. Start by placing seedlings outdoors in a sheltered spot for 1-2 hours daily, gradually increasing their time outside over 10-14 days. Watch for leggy growth—a sign they need more light—as you transition them to full sun exposure.
Tips & tricks for perfect hydrangea seed collection
These tried-and-true techniques will help you maximize your seed yield and ensure healthy germination for next season's hydrangeas.
Timing is Everything: In Step 1, when selecting mature seed heads, wait until they've completely dried to a papery brown and crumble easily. I've learned the hard way that harvesting too early results in seeds that won't germinate. The 1-2 week drying period in Step 2 is crucial—this extra time prevents mold growth and ensures maximum seed viability. Place your paper bags in a well-ventilated area where airflow circulates naturally, like a garage or basement.
Processing Precision: When crushing the dried seed heads over paper in Step 2, work gently but thoroughly. The seeds are tiny (about the size of a pinhead) and easily overlooked. I find using a clean sheet of white paper makes spotting the dark brown seeds much easier. For extra efficiency, place the crushed heads over a fine mesh strainer to catch any seeds that might fall through while keeping the chaff contained.
Cold Stratification Secrets: The 3-4 month cold stratification period in Step 3 is non-negotiable for hydrangea seeds. I store mine in a sealed jar in my refrigerator's crisper drawer where temperatures stay consistently between 35-45°F. This mimics natural winter conditions and breaks seed dormancy. Mark your calendar when you store them so you remember to plant in early spring—this timing is critical for successful germination.
Sowing Strategy: In Step 4, when sowing your seeds, resist the temptation to cover them with soil. Hydrangea seeds need light to germinate, so simply scatter them on the surface of your damp seed-starting mix. The 2-4 week germination window can feel long, but patience pays off. I place my seed trays under grow lights to ensure consistent bright, indirect light during this period—natural windowsill light may not be sufficient for reliable germination.
Pro Tips for Collect Hydrangea Seeds
- These tried-and-true techniques will help you maximize your seed yield and ensure healthy germination for next season...
- Timing is Everything: In Step 1, when selecting mature seed heads, wait until they've completely dried to a papery br...
- Processing Precision: When crushing the dried seed heads over paper in Step 2, work gently but thoroughly. The seeds ...
Frequently asked questions
about collecting hydrangea seeds—because every gardener deserves a little clarity before diving in!When is the best time to collect hydrangea seeds?
Collect seeds in late fall or early winter (after the seed heads have dried and turned brown). If you miss this window, you can also gather them in early spring before new growth starts. Avoid collecting seeds too early—they won’t be fully matured and may not germinate.
How long does it take for hydrangea seeds to germinate?
Hydrangea seeds are notorious for their slow germination—often taking 6–12 months (or even longer) to sprout! Cold stratification (mimicking winter) helps speed this up. Be patient—consistent moisture and warmth will eventually reward you with tiny seedlings.
Can I collect seeds from store-bought hydrangeas?
Yes, but with a caveat: seeds from nursery-bought hydrangeas may not produce plants identical to the parent (due to hybridization). For true-to-type blooms, collect seeds from open-pollinated varieties or ask local growers. If you’re okay with surprises, go for it!
What if my seed heads rot before I can collect them?
Overly wet or humid conditions can cause seed heads to mold. To prevent this:
- Harvest seeds as soon as they’re dry and papery.
- Store them in a paper bag or envelope (not plastic) to allow airflow.
- Keep them in a cool, dry place (like a seed jar) until planting.
Do I need to scarify hydrangea seeds before planting?
Scarification (nick or sand the seed coat) isn’t always necessary, but it can help break dormancy for stubborn seeds. Try soaking seeds in warm water for 24 hours first—if they still resist, gently rub them with sandpaper. Most hydrangea seeds will germinate without this step, though!
Wrapping up and next steps
Collecting hydrangea seeds is a rewarding way to grow new plants with your own unique blooms—just remember, patience is key! 🌱 By following these steps, you’ll ensure healthy seeds for next year’s vibrant garden.
Once you’ve gathered and stored them properly, the real magic happens when you plant them in spring.
Ready to take the next step? Start a seedling journal to track progress, or share your newfound knowledge with fellow gardeners. Happy growing—your future hydrangeas will thank you! 🌸