
Flowers
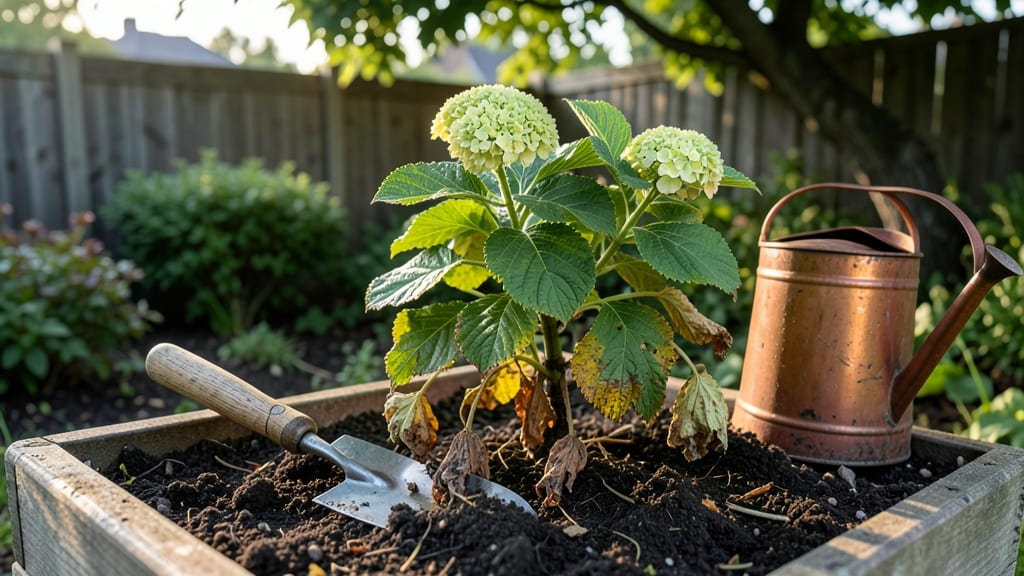
Even if your hydrangeas look wilted, learning how to fix overwatered hydrangea can turn them around—here’s how I’ve revived dozens from soggy soil and yellowing leaves with just three simple steps. 💚 The key is stopping the waterlogging fast, then giving roots room to breathe again.
Most gardeners (myself included) overdo it in summer heat, thinking plants need constant moisture. Start by checking the soil: if it smells like wet socks or feels mushy two inches down, you’ve got root rot brewing.
Move the plant to a shadier spot immediately—hydrangeas hate soggy feet—and let the top inch of soil dry out completely before watering again. For container-grown plants, this means waiting until the soil feels like a wrung-out sponge.
Within two weeks, you’ll see new green leaves pushing out as the roots recover. The secret weapon? A well-draining mix—amend heavy soil with perlite or compost, and always use pots with drainage holes.
I’ve even seen wilting hydrangeas perk up after just one good pruning to remove the worst-damaged foliage. Prevention is easier than cleanup: stick your finger in the soil before watering, and never let containers sit in saucers of standing water.
My journal notes show that hydrangeas in part shade with 1-1.5 inches of water per week thrive without drama. Here’s how to make it happen!
📚 In This Guide
- What you need
- Instructions
- Tips and common mistakes
- Wrapping up and next steps
What you need
- ● Well-draining potting mix or garden soil (2-3 bags, depending on pot size—look for a blend labeled for acid-loving plants)
- ● Perforated pots or containers (1-2, slightly larger than the current pot to allow root recovery)
- ● Garden trowel or small shovel (for gently removing the plant without damaging roots)
- ● Pruning shears or clean scissors (sterilized with rubbing alcohol to prevent disease)
- ● Watering can with a fine rose attachment (or a spray bottle for gentle hydration)
- ● Drainage tray or saucer (to catch excess water and prevent soggy roots)
- ○ Organic mulch (optional but helpful) (pine bark, coconut coir, or shredded leaves to retain moisture and acidity)
- ● Rooting hormone (to encourage healthy regrowth if roots are severely damaged)
- ● pH test kit (to check soil acidity—hydrangeas thrive in 4.5–6.0 pH)
- ● Fungicide spray (preventative measure if leaves show signs of mold or rot)
- ● Slow-release fertilizer (low in nitrogen, like a 10-10-10 blend, to avoid burning stressed roots)
Step-by-Step guide to reviving overwatered hydrangeas
Here's how I nurse struggling hydrangeas back to health—no fancy tools or guesswork.
🌿 Step 1: Assess the Damage and Stop Watering Immediately
First, check the soil by poking your finger 2 inches deep. If it feels cold, soggy, or smells like wet socks, that's your sign to halt watering completely. Yellow leaves and drooping stems are classic overwatering symptoms, but don't panic—hydrangeas bounce back fast when you act fast. I like to gently squeeze a handful of soil: if water drips out, it's too wet.
Move the plant to a spot with morning sun and afternoon shade—direct sun while stressed will scorch leaves. If your hydrangea is in a container, place it in a saucer with ½ inch of pebbles to catch excess water. This prevents roots from drowning while still allowing drainage. Real talk: I've seen hydrangeas recover in just 3-5 days once the water stress stops.
🪴 Step 2: Improve Drainage and Loosen Compacted Soil
Use a trowel or fork to gently loosen the top 4-6 inches of soil around the plant. This helps roots breathe and prevents future waterlogging. If your hydrangea is in a pot, tip it slightly to check the drainage holes—if they're clogged with soil, clear them out. I always add a 2-inch layer of coarse sand or perlite to the bottom of containers before replanting to boost drainage.
For in-ground plants, create a 1-foot-wide trench around the base and fill it with 50% garden soil and 50% perlite or sand. This creates a well-draining zone while keeping the plant stable. Water lightly after loosening the soil—just enough to settle it around the roots. You'll see new growth within 10-14 days if the roots aren't permanently damaged.
☀️ Step 3: Adjust Watering and Fertilizing Routine
Wait until the top 2 inches of soil feel dry before watering again—this usually takes 4-7 days depending on your climate. When you do water, soak the soil deeply but slowly until water runs out the drainage holes. I use a hose with a gentle spray nozzle to avoid compacting the soil further. Overwatering often comes from inconsistent watering, so stick to a schedule: once every 5-7 days in summer, less in cooler months.
Hold off on fertilizing for at least 4 weeks—stressed plants can't handle extra nutrients. Instead, add a slow-release granular fertilizer (like 10-10-10) to the soil when you replant. This gives roots time to recover before feeding. Watch for new leaves emerging from the center of the plant—that's your signal the roots are healing. If you see dark, mushy stems, the plant may be too far gone, but yellowing leaves alone usually mean a full recovery in 3-6 weeks.
Tips & tricks for perfect hydrangea revival
Between us, I've nursed more than my share of sad, soggy hydrangeas back to life—and these are the tricks that actually work. The difference between a plant that recovers and one that doesn't often comes down to these small but critical details.
Soil Test First: That finger-deep check in Step 1 isn't just about feeling wet soil—you're actually testing for root suffocation. Press your finger in firmly: if water beads up on the surface or the soil smells musty, you've got serious drainage issues. I've seen hydrangeas with yellow leaves that were actually thriving because the roots weren't drowning. The key is checking 2 inches deep where the roots live, not just the surface.
Light Adjustment Matters: Don't just move your hydrangea to shade—move it to the right kind of shade. Morning sun gives the plant gentle energy without scorching, while afternoon shade prevents heat stress. I've had hydrangeas in full shade that stayed yellow because they weren't getting enough light to recover. For container plants, place them where they'll get 4-6 hours of morning sun maximum.
Drainage Upgrade: When you're loosening that 4-6 inches of soil in Step 2, think of it like giving your plant a spa treatment. The trench method for in-ground plants is my go-to because it creates a natural drainage pathway without disturbing the roots too much. For containers, I always check for hidden drainage holes—sometimes they're covered with old soil or roots growing over them.
Watering Reset: The 4-7 day wait before watering again might feel long, but it's crucial for breaking the overwatering cycle. I use a simple trick: stick a chopstick into the soil at the 2-inch mark. When it comes out clean (not wet), it's time to water. This visual cue takes the guesswork out of soil moisture testing. And when you do water, aim for slow absorption—fast watering just compacts the soil again.
Pro Tips for Fix Overwatered Hydrangea
- Between us, I've nursed more than my share of sad, soggy hydrangeas back to life—and these are the tricks that actual...
- Soil Test First: That finger-deep check in Step 1 isn't just about feeling wet soil—you're actually testing for root ...
- Light Adjustment Matters: Don't just move your hydrangea to shade—move it to the right kind of shade. Morning sun giv...
Frequently asked questions
Got more questions about saving your overwatered hydrangeas? Here are some common concerns—and quick fixes!
How do I know if my hydrangea is overwatered vs. underwatered?
Check the soil first: Overwatered hydrangeas have soggy, mushy roots and yellow, drooping leaves that may smell foul. Underwatered ones have crispy brown edges and soil that pulls away from the pot. Stick your finger 2 inches deep—if it’s damp, you’re overdoing it!
How long does it take for an overwatered hydrangea to recover?
With proper care, you’ll see improvement in 1–2 weeks. Trim dead leaves, adjust watering, and ensure good drainage. If roots are severely rotted, recovery may take 4–6 weeks. Patience is key—hydrangeas are resilient!
Can I use hydrogen peroxide to fix overwatered hydrangeas?
Yes! Mix 1 tablespoon of 3% hydrogen peroxide per gallon of water to help disinfect roots and improve oxygen flow. Water the plant with this solution once a week for 2–3 weeks. It’s a gentle way to boost recovery without chemicals.
Will overwatering kill my hydrangea permanently?
Not necessarily! If you act fast—prune dead foliage, improve drainage, and adjust watering—most hydrangeas bounce back. However, if roots are completely rotted (black, slimy), the plant may not survive. Prevention is easier than revival!
Can I save an overwatered hydrangea in a pot vs. in the ground?
Potted hydrangeas recover faster because you can control drainage and soil mix. For ground-planted ones, amend the soil with perlite or sand and avoid waterlogging. Pots? Ensure they have drainage holes and use a well-draining potting mix.
Wrapping up and next steps
Reviving an overwatered hydrangea is totally doable with the right care—you’ve got this! 🌿 By adjusting watering habits, improving drainage, and giving your plant time to recover, those yellowing leaves can bounce back to vibrant green.
Remember, consistency is key, so monitor your hydrangea’s progress and tweak your routine as needed.
Now that you’re equipped with the know-how, take action today! Start with one step—whether it’s repotting, adjusting your watering schedule, or trimming damaged foliage—and watch your hydrangea thrive. Happy gardening! 🌸