
Propagation
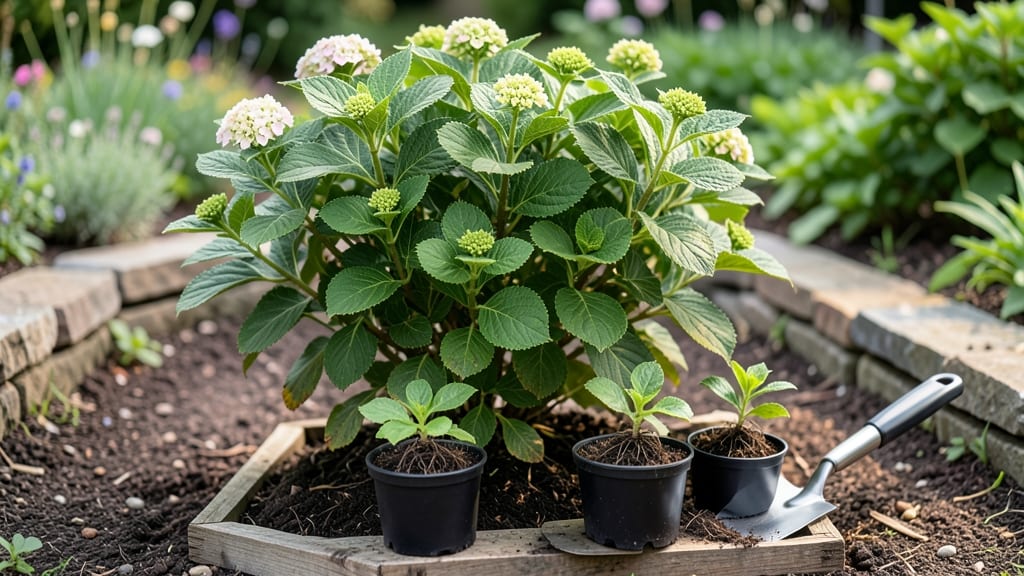
Propagating hydrangeas in soil feels like magic when those first roots appear. 🌱 I’ve grown dozens from cuttings, and the layering trick is the secret—it lets you root new plants without the stress of transplant shock.
The key is timing: late spring or early summer when stems are mature but still flexible, not woody.
You’ll need sharp pruners, rooting hormone (optional but helpful), a small pot with well-draining soil, and a plastic bag to create humidity. The process takes about 6-8 weeks, with roots forming before you even notice.
I’ve rooted hydrangeas this way in everything from 5-gallon buckets to old coffee cans—any container with drainage works.
By the time you’re pinching off new growth, you’ll have 3-4 inch-long roots ready to separate. The best part? These new plants bloom faster than store-bought hydrangeas because they’re already established in their own soil.
Just keep them shaded while they adjust, and you’ll have lush, thriving bushes in no time.
Works for bigleaf, oakleaf, and panicle types—just adjust timing for your climate. Early spring or late summer are backup options if you miss the prime window. Here’s how to do it without losing a single cutting.
📚 In This Guide
- What you need
- Instructions
- Tips and common mistakes
- Wrapping up and next steps
What you need
- ● Healthy hydrangea plant (preferably 1–3 years old, with flexible stems)
- ● Sharp pruning shears or clean garden scissors (sterilized with rubbing alcohol)
- ○ Rooting hormone (optional but helpful) (powder or gel, like Dip’n Grow)
- ● Small rocks or pebbles (for securing layers, ~½ cup)
- ● Twist ties or plant clips (to hold stems in place, 2–3 pieces)
- ● Well-draining potting mix (50/50 blend of perlite + peat or coco coir, ~1 gallon)
- ● Small pots or containers (4–6 inches deep, with drainage holes, 1–2 per cutting)
- ● Spray bottle with water (for keeping soil moist)
- ○ Clear plastic bag or propagator lid (to retain humidity, optional)
- ● Garden twine or zip ties (for staking, if needed)
- ● 💡 Choose a warm, partially shaded spot (60–75°F is ideal for root growth).
- ● 🌡️ Water lightly but consistently—keep soil damp, not soggy!
- ● ✨ Avoid direct sunlight on new layers until roots form (4–8 weeks).
Step-by-Step instructions for propagating hydrangeas in soil
This layering method works like magic—no rooting hormone needed, just patience and a little soil magic.
🌿 Step 1: Select and Prepare a Healthy Stem
Choose a non-flowering stem from last year's growth—these are the ones with thick, woody texture and multiple leaf nodes. Avoid stems that are too thin or already blooming, as they won’t root well. Look for a stem that’s about 1/4 inch thick and at least 12 inches long—longer is better for extra rooting potential.
Use clean, sharp pruners to make a 45-degree cut about 6 inches from the tip. This angled cut prevents water from pooling and encourages faster healing. Immediately strip off the lower third of leaves—this reduces water loss while roots form. If leaves are large, trim them in half to further minimize stress on the stem.
💧 Step 2: Create a Soil Trench for Layering
Dig a 3-inch deep trench along the edge of your hydrangea’s root zone, keeping it 4-6 inches away from the main stem. The trench should run parallel to the ground, not too close to the base (where old roots already thrive) but close enough to reach the stem easily. Gently loosen the soil at the bottom with your fingers—this helps new roots penetrate without resistance.
Moisten the trench lightly with water until the soil feels damp but not soggy. Overwatering here will suffocate potential roots. If your soil drains poorly, mix in a handful of perlite or sand to improve aeration. The goal is a moist, crumbly texture—like a well-wrung sponge.
✂️ Step 3: Bend the Stem and Secure It
Bend the prepared stem into the trench, ensuring the cut end remains above ground. The section of stem buried should have 2-3 leaf nodes—these are the spots where roots will emerge. If the stem is too stiff to bend naturally, make a small nick on the underside near a node to encourage flexibility without breaking.
Secure the stem in place with two U-shaped bent wires or plastic plant ties, pressing the nodes gently into the soil. The wires should cradle the stem without crushing it. Cover the buried portion with 1-2 inches of fresh potting soil, patting it lightly to remove air pockets. Water the area again until moisture reaches 1 inch deep—this kickstarts root formation.
☀️ Step 4: Monitor and Encourage Root Growth
Keep the soil consistently moist (not wet) for the next 6-8 weeks. Check daily by inserting your finger—if the top inch feels dry, water again. Too much water causes rot; too little stalls rooting. Place a mulch ring around the trench to retain moisture and shield new roots from temperature swings.
In 4-6 weeks, gently tug on the stem near the soil line. If you feel light resistance (not full strength), roots are forming. Once you can barely wiggle it free, it’s ready to separate. Use pruners to cut just below the new roots, then transplant the stem into its own pot with well-draining soil. Keep it in partial shade for a week to recover.
🪴 Step 5: Transplant and Care for New Plants
Wait until spring or early fall to transplant outdoors, when temperatures are mild (60-75°F). Choose a spot with morning sun and afternoon shade—hydrangeas hate scorching heat. Dig a hole twice as wide as the root ball but only as deep as the plant’s original soil line. Amend the soil with compost to boost fertility.
Water deeply after planting, then once a week for the first month, letting moisture penetrate 6 inches deep. Avoid fertilizing for 8 weeks—new roots need time to establish without competition. You’ll know it’s thriving when new leaves emerge and the stem stops wilting in afternoon heat.
Tips & tricks for perfect hydrangea propagation in soil
This layering method is deceptively simple—here's how to maximize your success without the guesswork.
Timing is Everything: The 6-8 week monitoring period in Step 4 is non-negotiable, but don't panic if roots appear sooner. Check for root formation at the 4-week mark by gently tugging—you'll feel slight resistance when roots are developing. This early check helps you adjust care before full root establishment, especially in cooler climates where growth slows. The key is consistency in moisture levels during this window.
Soil Science Matters: When preparing your 3-inch deep trench in Step 2, test your soil's moisture retention first. Press a handful—if it crumbles easily, add 1 part perlite to 3 parts soil. If it sticks together, mix in an extra part sand. This balance prevents both root suffocation and dehydration, which are the two most common failure points. Think of it as creating the perfect sponge texture for new roots to explore.
Node Placement Strategy: In Step 3, those 2-3 buried leaf nodes are your secret weapon. Make sure they're positioned horizontally in the trench—not vertically—so they can spread roots in multiple directions. If your stem has particularly large leaves, reduce their size by half before burying to minimize water loss through transpiration. This simple adjustment can double your success rate with stubborn stems.
Transplanting Transition: The partial shade requirement in Step 5 is crucial during the first week after transplanting. Use sheer curtains or shade cloth if your outdoor space gets intense afternoon sun. This gradual acclimation prevents transplant shock, which often manifests as yellowing leaves or wilting stems. I've seen hydrangeas recover beautifully after this careful transition, while those moved directly to full sun often struggle.
Pro Tips for Propagate Hydrangeas In Soil
- This layering method is deceptively simple—here's how to maximize your success without the guesswork.
- Timing is Everything: The 6-8 week monitoring period in Step 4 is non-negotiable, but don't panic if roots appear sooner.
- Soil Science Matters: When preparing your 3-inch deep trench in Step 2, test your soil's moisture retention first.
Frequently asked questions
Got questions about propagating hydrangeas in soil? Here are some common ones—and their answers—to help you succeed!
When is the best time to propagate hydrangeas?
The ideal time is late spring or early summer (May–June) when new growth is active but before extreme heat. For cooler climates, early fall (September) also works. Avoid winter propagation—hydrangeas need warmth and moisture to root effectively.
How long does it take for hydrangea cuttings to root in soil?
With the layering method, roots typically form in 4–8 weeks, depending on soil moisture, temperature, and hydrangea variety. Check for resistance at the stem base—if it feels firm, roots are likely developing! Patience is key.
What if my hydrangea layers aren’t rooting?
Try these fixes: Increase humidity (use a plastic bag or mist daily), check soil moisture (keep it damp but not soggy), or adjust light (partial shade prevents stress). If layers stay soft, they may need more time—don’t give up!
Can I propagate hydrangeas from store-bought flowers?
Nope! Store-bought hydrangeas are often spray-painted or treated to last longer, so they won’t root. Stick to healthy, garden-grown hydrangeas with strong stems and leaves for successful propagation.
Will propagated hydrangeas keep the same color as the parent plant?
Generally, yes—propagated hydrangeas inherit traits like color, size, and bloom time from the parent. However, soil pH (for blue/pink blooms) or light exposure can influence final colors. Test your soil if you’re aiming for a specific hue!
Wrapping up and next steps
You’ve now mastered the easy, stress-free layering trick to propagate hydrangeas in soil—no fancy tools or guesswork required! 🌱 With patience and a little care, you’ll soon have thriving new plants ready to brighten up your garden or share with fellow plant lovers. Remember: consistency is key, and soon, your hydrangea family will grow stronger than ever.
Ready to watch your garden flourish? Grab a pair of pruners, pick a sunny spot, and start layering—your future blooms will thank you! 🌸 Next up: Learn how to transplant your new hydrangeas for a seamless transition into their forever home.