
Planting
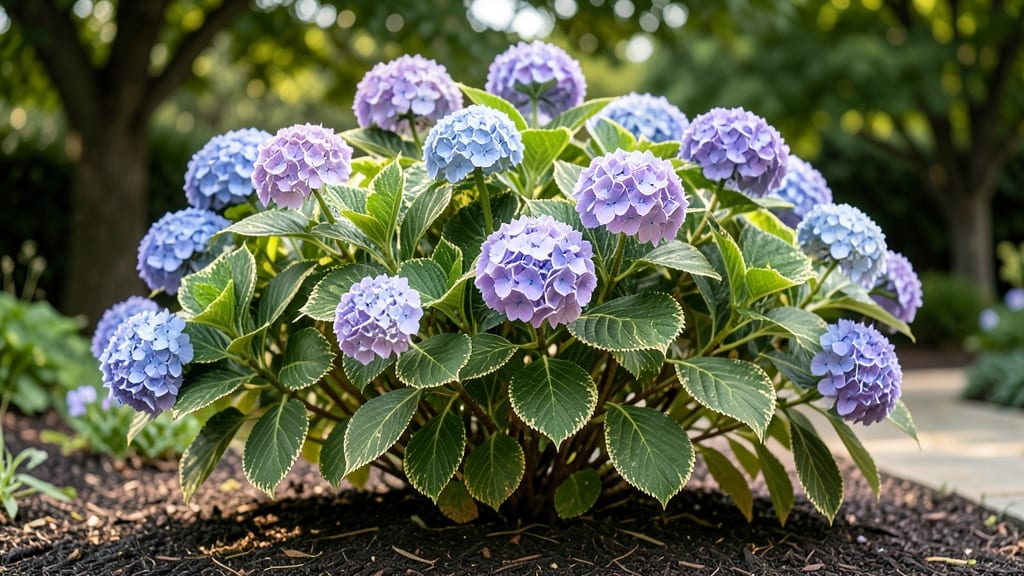
Multi-colored hydrangeas transform any garden into a living watercolor painting. 🌸 I fell for them after seeing how they shift from blush pink to deep purple over a single summer—no other plant delivers that kind of drama in such a compact package.
Their lush, rounded blooms create instant vertical interest, perfect for small spaces where every inch counts. The secret to their magic lies in placement and companions. Plant them where they get morning sun and afternoon shade—they’ll reward you with bigger blooms and more vibrant color shifts.
Pair them with ferns for texture contrast or lavender for a fragrant, cottage-garden feel. Even in containers, they become showstoppers when paired with trailing ivy or ornamental grasses. You’ll love how they adapt to your garden’s mood: soft pinks in spring, bold purples in summer, and subtle tans in winter.
They’re low-maintenance too—just prune spent blooms in fall and feed them compost in spring. The payoff? A garden that feels lush and intentional without requiring acres of space. Perfect for borders, mixed beds, or even as standalone container stars.
Here’s how to make them the centerpiece of your outdoor design—no green thumb required.
📚 In This Guide
- What you need
- Instructions
- Tips and common mistakes
- Wrapping up and next steps
What you need
- ● Multi-colored hydrangea plants: 1–3 nursery-bought Hydrangea macrophylla or Hydrangea paniculata (ensure they’re labeled for multi-color blooms, like 'Endless Summer' or 'Limelight').
- ○ Optional: Bare-root plants (cheaper but require extra care during transplanting).
- ● Planting site: Partially shaded area (4–6 hours of morning sun, protected from harsh afternoon rays).
- ● Well-draining soil (amend with compost if your soil is heavy or clay-like).
- ● Container or in-ground space: For containers: 1–2 large pots (18–24 inches in diameter) with drainage holes.
- ● For in-ground: Space 3–5 feet apart (depending on variety).
- ● Garden tools: Trowel or hand shovel (for digging).
- ● Gloves (to protect your hands from thorns and soil).
- ● Pruning shears (sterilized, for shaping and deadheading).
- ● Soil amendments: 5–10 lbs of peat moss or coconut coir (for improving drainage).
- ● 2–3 lbs of balanced fertilizer (10-10-10 or organic options like composted manure).
- ○ Optional: Hydrangea-specific soil mix (pre-mixed for optimal pH balance).
- ● Mulch: 2–3 inches of pine bark or shredded leaves (to retain moisture and regulate soil temperature).
- ● Watering supplies: Watering can or hose with a gentle spray nozzle.
- ○ Optional: Drip irrigation system (for consistent moisture in containers).
- ● 🌡️ Test your soil pH: Hydrangeas thrive in acidic (5.2–5.5 for blue/purple blooms) to neutral (6.0–7.0 for pink blooms). Use a soil test kit to adjust with aluminum sulfate (for blue) or lime (for pink).
- ● ✨ Choose the right variety: 'Nikko Blue' for deep blues, 'Blushing Bride' for pink-to-purple transitions, or 'Little Lime' for lime-green blooms.
- ● 🔥 Container hack: Use terracotta pots (they wick away moisture) or fabric grow bags (for better root aeration).
Step-by-Step guide to planting and caring for multi-colored hydrangeas
Here's how to keep your hydrangeas thriving with vibrant blooms year after year.
🪴 Step 1: Choose the Right Location and Prepare the Soil
Hydrangeas love partial shade—6 hours of morning sun followed by afternoon shade works best. If your garden gets intense afternoon heat, provide dappled shade or filtered light through trees. I always test the spot by watching how nearby plants react during summer afternoons.
Dig a hole twice as wide as the root ball but only as deep as the container. Amend the native soil with 2-3 inches of compost and a handful of hydrangea-specific fertilizer (high in phosphorus for blooms). Mix it thoroughly so the roots have access to nutrients right away. The goal is loose, well-draining soil that holds moisture without becoming soggy.
☀️ Step 2: Plant at the Correct Depth and Water Thoroughly
Place the hydrangea in the hole so the top of the root ball sits level with the surrounding soil—burying the stem too deep causes rot, while planting too high stresses the plant. I tap the sides of the hole gently to settle the soil while keeping the plant steady. Fill in around the roots with the amended soil, pressing lightly to remove air pockets.
Water deeply right after planting—1-2 gallons per plant—until water runs out the drainage holes. This helps settle the soil and eliminates air gaps. Mulch with 2-3 inches of organic mulch (like shredded bark) around the base, keeping it 6 inches away from the stem. This protects roots from temperature swings and retains moisture.
💧 Step 3: Water Consistently and Monitor Soil Moisture
Hydrangeas need consistent moisture but hate soggy roots. Water once or twice weekly, depending on your climate, until the top 2 inches of soil feel damp. In hot summers, you may need to water every 2-3 days, but always check before watering—overwatering is the fastest way to kill these beauties.
Here’s the trick: water deeply but infrequently. A slow drip near the base for 10-15 minutes encourages deep root growth. You’ll know you’re doing it right when the mulch stays slightly damp but not wet. Avoid wetting the leaves to prevent fungal diseases like powdery mildew.
✂️ Step 4: Prune for Shape and Encourage More Blooms
Prune hydrangeas right after they finish blooming (late summer to early fall) to shape the plant and encourage next year’s flowers. Cut back old wood (last year’s stems) by one-third to promote new growth. For multi-colored varieties, look for stems with both green and brown bark—these are the ones to prune lightly.
Remove any dead, damaged, or crossing branches with clean pruners. I always sterilize my tools with rubbing alcohol between cuts to prevent disease spread. Avoid heavy pruning in early spring—hydrangeas bloom on old wood, so cutting too early removes potential flowers.
🌿 Step 5: Fertilize and Adjust pH for Color Changes
Feed hydrangeas every 4-6 weeks during the growing season with a balanced, acid-loving plant fertilizer (like 10-10-10 or a hydrangea-specific formula). The key to those stunning multi-colored blooms? Soil pH. Blue flowers thrive in acidic soil (pH 5.0-5.5), while pink blooms prefer neutral to slightly alkaline soil (pH 6.0-7.0).
Test your soil with a home pH kit and adjust as needed. To lower pH (for blues), add sulfur or peat moss to the soil. For pinks, mix in lime. I like to do this in early spring so the plant has time to adapt before blooming. Watch your hydrangeas transform colors as the season progresses—it’s like magic!
Tips & tricks for perfect multi-colored hydrangea care
These simple strategies will help you coax vibrant blooms from your hydrangeas all season long.
Lighting Strategy: The 6 hours of morning sun in Step 1 is crucial for photosynthesis, but afternoon shade prevents leaf scorch. I've found that positioning hydrangeas near a north-facing window or under deciduous trees works beautifully. If you notice leaves turning yellow or crispy in late afternoon, that's your cue to move them to a shadier spot immediately.
Soil Preparation Secret: When amending soil with 2-3 inches of compost in Step 1, mix in a handful of coffee grounds too—hydrangeas love the acidity! I use equal parts compost and used coffee grounds (from my morning brew) for an extra boost. This helps maintain that perfect pH range for those stunning color changes we're all after.
Watering Wisdom: That 10-15 minute deep watering in Step 2 isn't just about quantity—it's about technique. Use a slow drip system or soaker hose to deliver water directly to the roots. I've seen too many gardeners water from above, which wastes water and spreads fungal spores. Aim for the base of the plant and let the soil absorb moisture gradually.
Pruning Precision: In Step 4, when cutting back old wood by one-third, focus on stems with both green and brown bark—they're the ones that will produce next year's blooms. I always make my cuts just above a leaf node or bud, at a 45-degree angle. This prevents water from pooling on the cut and encourages new growth. Remember, hydrangeas bloom on old wood, so be gentle!
Pro Tips for Multi Colored Hydrangea Plant
- These simple strategies will help you coax vibrant blooms from your hydrangeas all season long.
- Lighting Strategy: The 6 hours of morning sun in Step 1 is crucial for photosynthesis, but afternoon shade prevents leaf scorch.
- Soil Preparation Secret: When amending soil with 2-3 inches of compost in Step 1, mix in a handful of coffee grounds too—hydrangeas love the acidity!
Frequently asked questions
Got questions about keeping your multi-colored hydrangeas vibrant and thriving? Here are some common ones—plus expert tips to keep your plants looking their best!
How often should I water my multi-colored hydrangea?
Water your hydrangea consistently—about 1-2 inches per week, especially during blooming season (spring to summer). Pro tip: Mulch around the base to retain moisture, and avoid soggy soil to prevent root rot. Adjust based on your climate (drought-prone areas may need more frequent watering).
When is the best time to prune my hydrangea?
Prune late winter or early spring (before new growth appears) to shape the plant and encourage blooms. Key rule: Never prune after mid-summer—this removes next year’s flower buds! For mophead varieties, trim back 1/3 of the stems to a leaf or bud.
Why aren’t my hydrangea flowers changing color like I expected?
Color shifts depend on soil pH—blue/purple blooms thrive in acidic soil (pH 5.0-5.5), while pink/red need neutral to alkaline (pH 6.0-7.0). Test your soil and amend with lime (to raise pH) or sulfur (to lower pH) as needed. Patience is key! Changes take 4-6 weeks.
Can I grow multi-colored hydrangeas in containers?
Choose a large pot (at least 15 gallons) with drainage holes and use a well-draining potting mix. Move containers to partial shade in summer to prevent leaf scorch. Bonus: Container plants are easier to monitor for pests and adjust soil pH seasonally.
What pests should I watch for on hydrangeas?
Keep an eye out for aphids, spider mites, and scale insects. Early signs: Sticky leaves, yellowing, or tiny webs. Treat with neem oil or insecticidal soap. For severe infestations, hose off pests with water or use horticultural oil. Prevention tip: Prune regularly to improve airflow and reduce hiding spots.
Wrapping up and next steps
Transforming your small garden into a vibrant, year-round oasis with multi-colored hydrangeas is easier—and more rewarding—than you think! These stunning plants bring vertical elegance, bold hues, and seasonal charm with minimal space.
Whether you’re a beginner or a seasoned gardener, their adaptability and low-maintenance nature make them a perfect choice for adding color and texture to any setting.
Ready to get started? Pick your favorite variety, gather your supplies, and plant with confidence! 🌸 For extra inspiration, browse hydrangea care guides or join local gardening groups to share your progress. Your garden’s next masterpiece is just a shovel’s throw away!