
Companion Plants
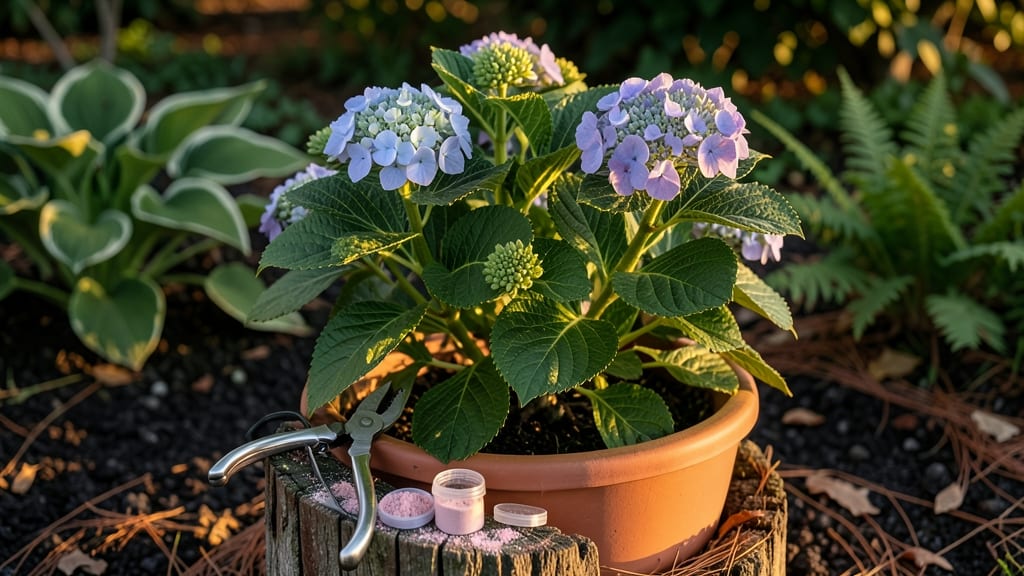
How to take cuttings from hydrangea plants in late summer means next year’s blooms could be growing in your neighbor’s yard—no green thumb required. ✨ required. Start with 4-6 inch semi-hardwood cuttings from non-flowering stems, just below a leaf node.
Dip the cut end in rooting hormone (optional but helpful), then place in water or moist soil. Within 4-6 weeks, roots will form, ready for transplanting into pots. You’ll end up with lush, established hydrangeas that bloom just like their parent plants.
The process is foolproof if you avoid overwatering or letting cuttings dry out—both kill more hydrangea roots than anything else. Works for mophead, oakleaf, and panicle varieties alike. Here’s how to do it right the first time!
📚 In This Guide
- What you need
- Instructions
- Tips and common mistakes
- Wrapping up and next steps
What you need
- ● Sharp pruning shears or clean scissors – Disinfect with rubbing alcohol to prevent disease.
- ● Healthy hydrangea plant – Choose non-flowering stems (green, not woody) from late spring to early summer.
- ○ Rooting hormone (optional but recommended) – A gel or powder to boost root growth (e.g., Rootone or Clonex).
- ● Small pots or containers – 4–6 inches wide with drainage holes (one per cutting).
- ● Well-draining potting mix – A blend of perlite, vermiculite, or sand mixed with peat or coconut coir (avoid garden soil!).
- ● Clear plastic bags or propagator domes – To create a humid microclimate (e.g., ziplock bags with holes punched in them).
- ● Spray bottle with water – For gentle misting (avoid soaking the cuttings!).
- ○ Heat mat (optional) – Keeps soil warm (70–75°F) for faster rooting.
- ● Grow lights or bright indirect sunlight – If propagating indoors.
- ● Label markers & pencil – Track varieties (e.g., "Oakleaf Hydrangea – June 2024").
- ● Hydrogen peroxide (3%) – Diluted to 10% for sterilizing tools or water.
Step-by-Step guide to propagating hydrangeas from cuttings
Here’s how I’ve successfully rooted dozens of hydrangea cuttings—no fancy tools, just patience and the right technique.
🌿 Step 1: Select Healthy Stems for Cuttings
Choose stems from this year’s growth—look for 4-6 inch long sections with 3-5 leaf nodes and no flowers. The stems should feel firm, not woody or brittle. I always pick from the newest, non-flowering tips because they root most reliably. Avoid stems with yellowing leaves or signs of disease.
Use clean, sharp pruners to cut just below a leaf node at a 45-degree angle. This angled cut increases surface area for root development. Immediately place the cuttings in water to prevent wilting while you prepare the rooting medium. I keep them in a vase with fresh water until ready to plant—this keeps them hydrated and turgid.
✂️ Step 2: Prepare the Cuttings for Rooting
Remove the lower 1-2 sets of leaves from each cutting to reduce moisture loss and prevent rot. You can trim the remaining leaves in half if they’re large—this helps the plant conserve energy for root growth instead of supporting big foliage. Dip the cut end in rooting hormone (optional but recommended for faster results).
I like to use a hormone powder because it’s easy to apply and works well with hydrangeas. If you skip this step, roots will still form, but it may take 2-4 extra weeks. After dipping, let the powder dry for a minute before planting—wet powder can smother the cutting and cause rot.
🪴 Step 3: Plant Cuttings in Moist Root Medium
Fill a small pot or tray with a well-draining rooting mix—I use a blend of 50% perlite and 50% peat moss for aeration and moisture retention. Moisten the mix until it’s damp but not soggy; you should be able to squeeze a handful and feel slight resistance, not dripping water. Insert each cutting 2-3 inches deep, pressing gently to secure it without compacting the soil.
Space the cuttings 2 inches apart to allow airflow and prevent overcrowding. Cover the pot with a clear plastic bag or use a humidity dome to create a mini greenhouse. This traps moisture and warmth, which hydrangeas love for rooting. Place the setup in bright, indirect light—direct sun can overheat the cuttings under the plastic.
☀️ Step 4: Maintain Ideal Conditions for Root Growth
Keep the rooting medium consistently moist but never waterlogged. Mist the cuttings lightly every 2-3 days and check the soil moisture by sticking your finger 1 inch deep. If it feels dry, water gently at the base—avoid soaking the leaves to prevent fungal issues. Hydrangea cuttings root best in warmth (70-75°F), so a sunny windowsill or under a grow light works well.
Roots typically form in 4-8 weeks, depending on conditions. You’ll know it’s working when you see new leaves emerging from the top—this means the cutting has established roots and is photosynthesizing. At this stage, I gradually acclimate the cuttings to lower humidity by removing the plastic for 1-2 hours daily over a week.
🌱 Step 5: Transplant Rooted Cuttings to Soil
Once the cuttings have 3-4 inches of new growth and roots are visible when gently tugged, they’re ready to transplant. Fill a small pot with well-draining potting mix and dig a hole deep enough to bury half the stem. Water thoroughly after planting to settle the soil and eliminate air pockets around the roots.
Place the new plants in partial shade for the first week to reduce stress. Afterward, gradually introduce them to morning sun before moving to full sun. Hydrangeas are heavy feeders, so I add a balanced fertilizer (10-10-10) at half strength 4-6 weeks after transplanting. This gives them a nutrient boost without overwhelming the roots.
Tips & tricks for perfect hydrangea propagation
Here's what I've learned after rooting dozens of hydrangea cuttings—these tricks make all the difference between success and disappointment.
Timing is Everything: The best time to take hydrangea cuttings is in late spring or early summer when new growth is vigorous but before flowering. This aligns perfectly with the plant's natural growth cycle when stems are most responsive. I've found that morning cuttings (when plants are fully hydrated) root faster than afternoon ones.
Cutting Angle Matters: That 45-degree angle in Step 1 isn't just for looks—it creates more surface area for root formation. Use clean pruners and make the cut just below a leaf node to maximize your chances. I always sanitize my tools with rubbing alcohol before cutting to prevent bacterial contamination that could cause rot.
Rooting Hormone Hack: While rooting hormone is optional, I've discovered a simple trick to make it more effective: after dipping the cut end, gently tap off the excess powder. Too much hormone can actually smother the cutting and prevent root growth. A light, even coating is all you need to speed up the process by those critical 2-4 weeks mentioned in Step 2.
Lighting Strategy: Bright, indirect light is key during the 4-8 week rooting period, but here's what nobody tells you—hydrangea cuttings actually benefit from a gradual light increase. Start with filtered light, then slowly move them to slightly brighter conditions over 2 weeks. This helps prevent leaf scorch while maintaining the energy needed for root development.
Pro Tips for Take Cuttings From Hydrangea Plants
- Here's what I've learned after rooting dozens of hydrangea cuttings—these tricks make all the difference between succ...
- Timing is Everything: The best time to take hydrangea cuttings is in late spring or early summer when new growth is v...
- Cutting Angle Matters: That 45-degree angle in Step 1 isn't just for looks—it creates more surface area for root form...
Frequently asked questions
Got questions about propagating hydrangeas? You’re not alone—this process can feel tricky at first! Below, we’ve rounded up the most common queries to help you grow confident with your cuttings.
When is the best time to take hydrangea cuttings?
The ideal window is early summer (June), when new growth is firm but not yet woody. Avoid taking cuttings after flowering or in extreme heat—these conditions stress the plant and reduce rooting success. For mophead or bigleaf hydrangeas, focus on softwood stems; oakleaf or panicle types can also root from semi-hardwood in late summer.
How do I know if my cutting will root successfully?
Look for these signs of a healthy cutting: green, flexible stems (not yellow or mushy), 3–5 leaf nodes, and no flowers or buds. Avoid cuttings with disease spots, wilting, or excessive sap—these won’t root well. Pro tip: Test the stem’s snap—it should bend slightly but not break easily.
What if my hydrangea cuttings rot instead of rooting?
Rot is usually caused by overwatering, poor drainage, or fungal issues. To fix it: Reduce watering (keep soil lightly moist, not soggy), improve airflow by spacing cuttings, and use a fungicide if needed. If rot appears, trim the affected area with sterilized scissors and replant in fresh, sterile rooting medium. Prevention tip: Dip cuttings in cinnamon powder or hydrogen peroxide (1 part to 10 parts water) before planting.
Can I root hydrangea cuttings in water instead of soil?
Yes! Hydrangeas root well in water, but transition them to soil within 2–3 weeks to encourage stronger roots. Use room-temperature water and change it every 3–4 days. Place cuttings in indirect light (no direct sun) and avoid overcrowding the container. Once roots hit 2–3 inches, plant in a pot with well-draining soil and keep humidity high with a plastic bag.
What if my hydrangea cuttings don’t grow roots at all?
Patience is key—rooting can take 4–8 weeks. If nothing happens after 2 months, check these fixes: Adjust light (bright but not scorching), raise humidity (use a humidity dome or pebble tray), or try a rooting hormone. Some hydrangea varieties (like Hydrangea paniculata) root faster—if yours is stubborn, consider taking new cuttings from younger, healthier stems.
| Quick Troubleshooting Guide |
|---|
| Problem: Yellowing leaves |
| Cause: Overwatering or low light |
| Fix: Reduce water, move to brighter (but indirect) light |
| Problem: Black or mushy stems |
| Cause: Fungal/bacterial rot |
| Fix: Trim affected area, replant in fresh medium, add fungicide |
Wrapping up and next steps
Taking cuttings from hydrangeas is a rewarding way to expand your garden—and you’ve got this! With the right tools, timing, and care, you’ll soon be nurturing new plants that’ll thrive just like their parents. Start small, stay patient, and watch your green thumb grow stronger with each successful cutting.
Ready to root your newfound skills? Plant your first cutting this weekend and celebrate the magic of propagation! 🌱✨