
Pruning
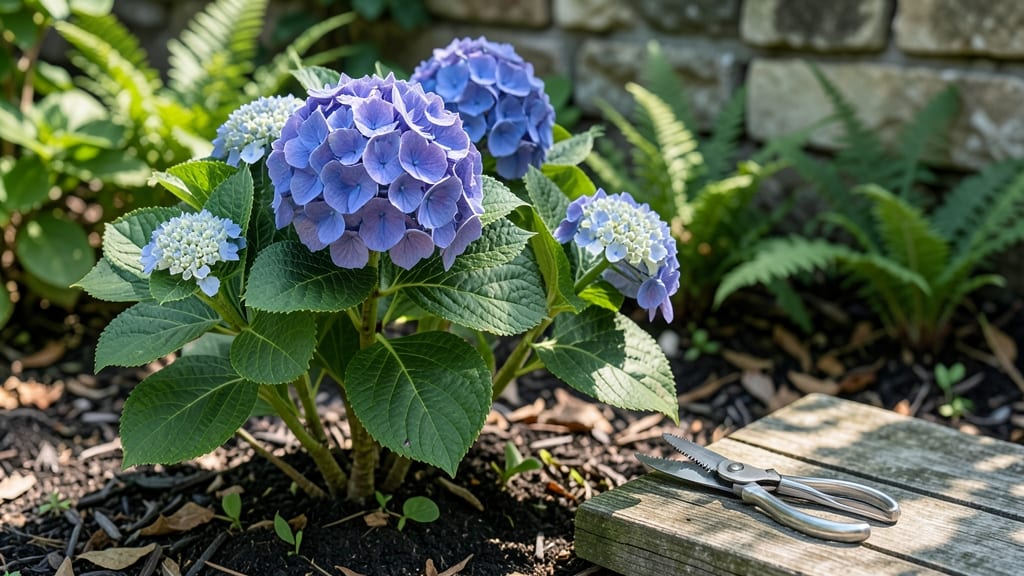
Trimming back a hydrangea bush transforms it from a tangled mess into a vibrant, showstopping focal point—once you know the right cuts. ✂️ I’ve turned my overgrown hydrangeas into lush, blooming powerhouses by mastering the timing and technique, and I’ll show you exactly how, whether you’ve got mopheads, panicles, or oakleaf varieties.
The key is understanding your hydrangea type—mopheads bloom on old wood, so prune right after flowering, while panicle and oakleaf types thrive when pruned in late winter or early spring.
Grab sharp bypass pruners, gloves, and a bucket for clippings (they make great mulch!), and we’ll get your bush looking like a pro did it.
After just 10 minutes of strategic cuts, you’ll see stronger stems, more abundant blooms, and a shape that fills out beautifully all season. The secret? Cutting back to 3-5 buds from the base encourages bushier growth, while removing dead wood keeps diseases at bay.
This method works for any hydrangea, whether it’s a towering specimen or a compact patio plant. Let’s get those blooms popping—your neighbors will be asking for your secrets!
📚 In This Guide
- What you need
- Instructions
- Tips and common mistakes
- Wrapping up and next steps
What you need
- ○ Pruning shears – Bypass pruners (sharp, 5-7" blades) for clean cuts. Optional: Felco F-2 or Gonicc for durability.
- ● Loppers – Bypass or anvil type (8-12" blades) for thicker stems (½"–1" diameter). Pro tip: Use extendable loppers for tall bushes!
- ○ Hand pruners – Anvil or bypass (4-5" blades) for small stems/tips. Optional: Ergo-friendly grips to reduce hand fatigue.
- ● Garden gloves – Nitrile-coated (for grip) or leather (for heavy-duty cuts). Size: Medium/Large for most hands.
- ● Disinfectant – 70% isopropyl alcohol or rubbing alcohol (1 small bottle) to sterilize tools between cuts.
- ● Rags or paper towels – For wiping tools and hands.
- ○ Garden twine or zip ties – Optional, for securing large branches post-pruning.
- ○ Safety glasses – Optional if debris might fly (e.g., thorny hydrangeas).
- ○ Knee pads – Optional for comfort if kneeling.
- ● Trash bag – Heavy-duty (13-gallon) for clippings.
- ● Hose or bucket of water – To clean tools and rinse off sap.
- ○ Notebook & pen – Optional, to sketch your bush’s shape before trimming.
Step-by-Step guide to trimming back a hydrangea bush
Reviving your hydrangea’s blooms starts with precise pruning—here’s how to do it right.
✂️ Step 1: Identify Your Hydrangea Type and Bloom Time
Hydrangeas fall into two main categories: bigleaf (mophead or lacecap), which bloom on old wood, and panicle or smooth hydrangeas, which bloom on new wood. Bigleaf varieties need minimal pruning—just remove dead stems and shape lightly in late winter or early spring before buds swell. Panicle types, like 'Limelight' or 'Little Lime,' can be pruned more aggressively in late winter or early spring to encourage fresh growth.
Look for dormant buds along the stems—these are your guide. If you see fat, plump buds near the base of the plant, those are old-wood bloomers. If the stems are mostly bare with small buds higher up, it’s a new-wood variety. Pruning the wrong type at the wrong time means no flowers that season.
✂️ Step 2: Remove Dead, Weak, or Crossing Branches
Start by cutting out any dead, diseased, or damaged stems at the base with clean, sharp pruners. These branches won’t produce flowers and can harbor pests. Next, remove any branches that cross or rub against others—this prevents wounds and improves airflow, which reduces fungal issues like powdery mildew. I always prune on a dry day when the plant is dormant; wet conditions can spread disease through open cuts.
If a branch is too thick for your pruners, use a pruning saw instead of trying to force it. Make cuts just outside the branch collar (the swollen area where the branch meets the stem) at a 45-degree angle. Avoid leaving stubs—this invites rot and weakens the plant. You’ll know you’re on the right track when the cuts look smooth and the remaining branches are evenly spaced.
✂️ Step 3: Shape the Bush for Optimal Airflow and Light
For bigleaf hydrangeas, prune lightly to maintain the plant’s natural shape—cut back only 10-20% of the oldest stems to encourage new growth. Focus on opening up the center of the bush so light and air can reach the inner stems. This prevents congestion and reduces the risk of pests or fungal diseases. If your hydrangea is overgrown, you can trim back stems by one-third, but never more than that—old-wood bloomers rely on last year’s growth.
For panicle or smooth hydrangeas, you can be bolder. Cut back stems to 6-12 inches from the ground in late winter or early spring. This encourages vigorous new growth and larger blooms later in the season. Step back occasionally to visualize the shape—aim for a balanced, rounded form with an open center. If you’re unsure, prune conservatively at first and adjust next year.
⏰ Step 4: Time Your Pruning for Maximum Blooms
Bigleaf hydrangeas bloom on old wood, so prune them right after they finish flowering in late summer or early fall. This gives the plant time to set next year’s buds before winter. If you prune in late winter or spring, you’ll cut off the flower buds before they open. For panicle types, prune in late winter or early spring while the plant is still dormant but before new growth begins.
Watch for new growth as your cue—if you see fresh shoots emerging, it’s too late to prune for that season. Hydrangeas are forgiving, but timing matters. If you miss the window, don’t panic—just adjust your approach for the next year. A well-timed pruning session now means a bush full of blooms by next summer.
💧 Step 5: Post-Pruning Care for a Strong Recovery
After pruning, give your hydrangea a light application of balanced fertilizer (10-10-10) to support new growth. Water deeply to help the plant recover, especially if you’ve made significant cuts. Mulch around the base with 2-3 inches of organic mulch to retain moisture and regulate soil temperature. Avoid overwatering, though—hydrangeas prefer consistently moist but well-drained soil.
Monitor the plant for new shoots in spring, which means your pruning was successful. If you notice yellowing leaves or stunted growth, it could signal over-pruning or nutrient deficiency. Adjust your approach next year by pruning less aggressively. With the right cuts and care, your hydrangea will reward you with lush foliage and abundant blooms for years to come.
Tips & tricks for perfect hydrangea pruning
These game-changing tips will help you avoid common mistakes and transform your hydrangea into a blooming powerhouse.
Type-Specific Technique: When pruning bigleaf hydrangeas in Step 1, focus on removing only the oldest stems—look for those with no new growth at the base. These are the stems that won't produce flowers if left unchecked. For panicle types, you can be more aggressive in Step 3, cutting back to 6-12 inches from the ground, but never below the first set of buds. I've seen gardeners accidentally remove all the flower buds by pruning too low—always count those buds before making your cuts!
Tool Precision: In Step 2, your pruning tools make all the difference. Use bypass pruners for clean cuts on stems up to ½ inch thick, and a pruning saw for thicker branches. The key is making cuts just outside the branch collar at a 45-degree angle—this prevents water from pooling and causing rot. I keep a small bottle of rubbing alcohol with me to wipe down tools between cuts, which helps prevent disease transmission between branches.
Seasonal Timing Strategy: The timing in Step 4 is everything—bigleaf varieties need that late summer/early fall pruning to set next year's buds. If you're unsure about your hydrangea type, do a quick test: Look for fat, plump buds near the base of the plant. If they're there, it's an old-wood bloomer and you should prune after flowering. For panicle types, late winter/early spring is perfect, but don't wait until you see new growth—you'll miss the optimal window.
Recovery Boost: After pruning, the care in Step 5 sets the stage for next year's blooms. I've found that adding a 2-inch layer of organic mulch (like shredded bark) helps regulate soil temperature better than the standard 2-3 inches. This extra insulation is especially helpful in colder climates where hydrangeas struggle with winter dieback. Water deeply but infrequently—hydrangeas hate soggy roots but need consistent moisture to recover from pruning stress.
Pro Tips for Trim Back A Hydrangea Bush
- These game-changing tips will help you avoid common mistakes and transform your hydrangea into a blooming powerhouse.
- Type-Specific Technique: When pruning bigleaf hydrangeas in Step 1, focus on removing only the oldest stems—look for those with no new growth at the base.
- Tool Precision: In Step 2, your pruning tools make all the difference.
Frequently asked questions
Got questions about trimming your hydrangeas? You’re not alone! Here are answers to the most common concerns—so you can prune with confidence and keep those blooms coming back bigger and better.
When is the best time to trim hydrangeas?
The ideal time depends on your hydrangea type. For mophead and lacecap varieties (which bloom on new wood), prune in late winter or early spring (before buds swell). For bigleaf hydrangeas (which bloom on old wood), trim right after flowering in summer or fall. Always check your plant’s label!
Can I trim hydrangeas in winter?
Yes, but only if it’s dormant (no green growth). Prune in late winter (after the worst cold passes) to avoid damaging tender stems. If your area has harsh winters, wait until mid-to-late February or when the ground thaws. Avoid trimming in deep freeze—it stresses the plant!
What if I cut too much off my hydrangea?
Don’t panic! Most hydrangeas are resilient and will bounce back. If you’ve over-pruned, focus on healthy stems (cut just above a leaf node) and avoid trimming more than ⅓ of the bush. Next year, prune less aggressively and fertilize to encourage regrowth. Patience is key—new blooms will return!
Why aren’t my hydrangeas blooming after pruning?
Bloom failure often comes down to timing or variety. If you pruned old wood types (like oakleaf or panicle hydrangeas) too late, they may skip blooms that year. For new wood types, ensure you’re cutting back enough old stems (but not all). Also check for sunlight, water, and nutrients—hydrangeas need 6+ hours of sun and consistent moisture.
Can I shape my hydrangea like a topiary?
Hydrangeas respond well to light shaping, especially mophead and smooth varieties. Use hand pruners or shears to trim into rounded or boxy forms, but avoid overly tight cuts (leave some natural shape). Prune in early spring for best results. Just remember: Less is more—hydrangeas bloom on new growth, so don’t trim too aggressively!
Wrapping up and next steps
Trimming your hydrangea bush doesn’t have to be intimidating—with the right tools, timing, and technique, you’ll revive those lush blooms in no time! 🌸 Whether you’re pruning for shape, size, or seasonal growth, remember: confidence comes with practice.
Start small, observe your plant’s response, and soon you’ll master the art of year-round beauty.
Ready to take the next step? Grab those shears and get pruning! For extra inspiration, check out our hydrangea care calendar to keep your bush thriving all season long. Happy gardening! 🌿