
Propagation
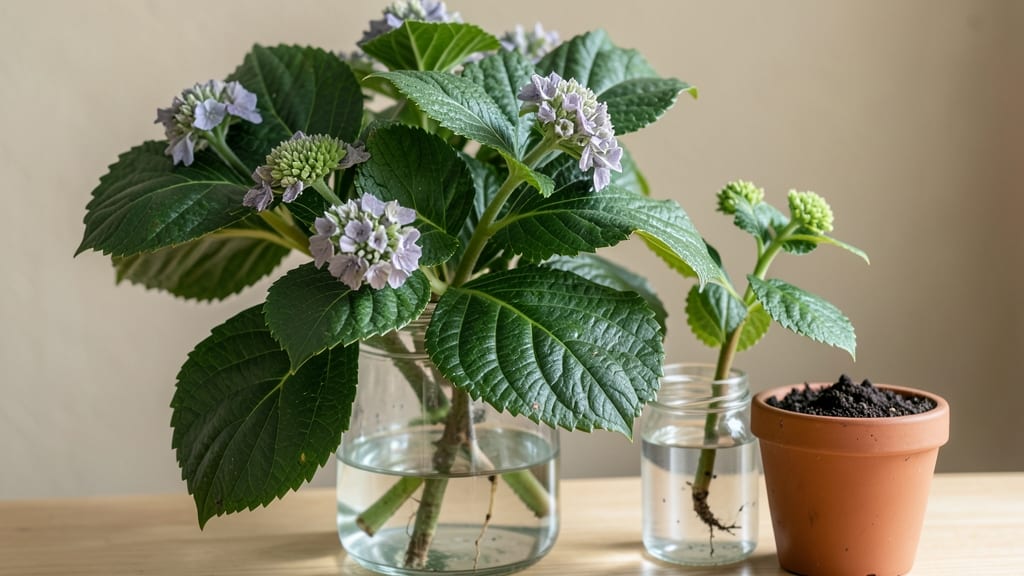
Mastering hydrangea cutting propagation is simpler than you think—and it’s how I doubled my garden’s blooms last summer. 🌿 The key is timing: take cuttings in late summer when new growth has hardened off but before frost.
This method works for bigleaf, panicle, and oakleaf varieties, and you’ll have rooted plants ready for transplanting by next spring.
You only need 3 supplies: sharp pruners, rooting hormone (optional but helpful), and either water or a well-draining soil mix. I prefer soil because it mimics natural conditions better, but water works too—just change it every few days.
The magic happens when you snip 4-6 inch stems just below a leaf node and strip the lower leaves to expose the nodes where roots will form.
Within 4-6 weeks, you’ll see tiny roots forming, and by early spring, your cuttings will be sturdy enough to plant out.
The first flush of blooms might be modest, but by year two, your propagated hydrangeas will be just as lush as their parent plants—and you’ll have saved money while expanding your garden.
This method works in zones 4-9, though colder climates may need to start cuttings indoors under grow lights. The biggest mistake? Overwatering or letting cuttings dry out—keep soil moist but not soggy. With this approach, you’ll avoid the heartbreak of store-bought plants that struggle to adapt.
📚 In This Guide
- What you need
- Instructions
- Tips and common mistakes
- Wrapping up and next steps
What you need
- ● Mature hydrangea cuttings: 4–6 inches long, with at least 2–3 sets of leaves (preferably from non-flowering stems).
- ● Sharp pruning shears or clean knife: Sterilized with rubbing alcohol to prevent disease.
- ○ Rooting hormone (optional but recommended): A powder or gel (e.g., Clonex or Rootone).
- ● Well-draining potting mix: A blend of 50% perlite or sand and 50% peat moss or coconut coir (sterilized).
- ● Small pots or trays: 4–6 inches wide, with drainage holes (or a propagation tray).
- ● Clear plastic bag or humidity dome: To retain moisture (e.g., a Ziploc bag with holes punched in it).
- ● Spray bottle: For gentle watering (avoid soaking the mix).
- ● Water: Room-temperature, filtered if possible.
- ● Heat mat: Keeps soil warm (70–75°F) for faster rooting.
- ● Grow lights or bright indirect light: 6–8 hours daily (e.g., LED grow bulbs).
- ● Fertilizer (low-dose): A balanced liquid fertilizer (5-5-5) after 4–6 weeks.
- ● Labeling tags: To track cutting types/dates.
- ● Hydrogen peroxide (3%): For sterilizing tools or cutting wounds.
Step-by-Step instructions for hydrangea cutting propagation
Here's the straightforward method I've used to root hydrangeas successfully every season.
🌿 Step 1: Select and Prepare Healthy Stems
Choose 4-6 inch long stems from this year's growth—look for ones that are pencil-thick with at least 3-4 leaf nodes. The best cuts come from non-flowering stems, so avoid any branches with blooms. Use sharp pruners to make a clean cut just below a node (that little bump where leaves grow).
Strip the lower third of the leaves off each cutting, being careful not to tear the stem. This reduces moisture loss and encourages root growth. If leaves are large, trim them in half to further minimize evaporation. I always work in the morning when stems are hydrated—this gives them the best chance to survive the rooting process.
💧 Step 2: Dip Cuttings in Root Hormone
Fill a small container with rooting hormone powder (I use a 1-quart size) and dip the cut end of each stem about 1 inch deep. Tap off any excess powder—you want a light, even coating, not a clump. This step is crucial because hydrangeas root slowly without it. If you don't have rooting hormone, you can use cinnamon powder as a natural alternative, though success rates drop.
While the cuttings are still damp, plant them immediately. The hormone needs to stay moist to activate properly. I like to work with 4-5 cuttings at a time so I can focus on getting each one planted correctly without rushing. Don't let them sit exposed—they'll dry out before you even get to the soil.
🪴 Step 3: Plant in Moistened Propagation Medium
Fill your propagation container with perlite and vermiculite mix (equal parts) until it's about half full. Moisten the mix thoroughly with water until it feels like a damp sponge—squeeze a handful and it should hold together but not drip. Make a hole with your finger or a pencil about 2 inches deep and insert each cutting until it's firmly seated.
Space the cuttings 2 inches apart so they don't compete for moisture. Gently firm the mix around each stem to eliminate air pockets. Here's the thing—hydrangeas need consistent moisture, but they'll rot if they're waterlogged. The perlite-vermiculite mix drains perfectly while holding enough moisture for roots to form.
☀️ Step 4: Provide Humidity and Indirect Light
Place a clear plastic bag over the container to create a humidity tent, securing it loosely with a rubber band. This mimics the moist forest floor where hydrangeas naturally grow. Set the container in a spot with bright, indirect light—think filtered sunlight from an east-facing window. Direct sun will overheat the cuttings and cause them to wilt.
Check the moisture level every 2-3 days by lifting the container. If it feels light, mist the cuttings and medium until damp. Roots typically form in 4-8 weeks, though some may take longer. You'll know it's working when you see new leaves emerging—this means roots have established and the plant is photosynthesizing again.
⏰ Step 5: Transition to Independent Growth
Once cuttings develop 2-3 new leaves (usually after 6-8 weeks), they're ready to graduate from the humidity tent. Remove the plastic bag gradually over 3-4 days to avoid shocking the plants. Start by uncovering them for 1 hour daily, then increase exposure until they're fully acclimated.
After another 2 weeks of normal care, you can transplant them to individual pots. I use 4-inch containers with regular potting mix for this step. Keep them in partial shade for their first week outdoors to prevent leaf scorch. With patience, you'll have rooted hydrangeas ready for your garden in just a few months.
Tips & tricks for perfect hydrangea cutting propagation
A few simple tricks that'll help your hydrangea cuttings thrive from start to finish.
Timing Secret: In Step 1, when you're selecting stems, focus on cutting just after morning dew has evaporated but before the heat of the day sets in. The stems will be fully hydrated but won't wilt from afternoon sun exposure. This morning window gives you the best chance for successful propagation right from the start.
Root Hormone Technique: For Step 2, I've found that gently tapping the cuttings against the side of the container after dipping helps remove excess hormone powder more effectively. This prevents clumping at the base where roots will form. Also, keep your rooting hormone powder in a sealed container—exposure to air reduces its effectiveness over time.
Moisture Management: In Step 3, when planting your cuttings, press the perlite-vermiculite mix firmly around each stem to eliminate air pockets. This creates better contact between the cutting and the medium, which is crucial for root development. After planting, give the mix one final misting to ensure everything is evenly damp.
Humidity Transition: During Step 5, when removing the humidity tent, I recommend doing it in two stages: first remove the bag completely for just 30 minutes on day 1, then gradually increase exposure over the next 3 days. This slow acclimation prevents transplant shock and gives your new roots time to adjust to less humid conditions.
Pro Tips for Hydrangea Cutting Propagation
- A few simple tricks that'll help your hydrangea cuttings thrive from start to finish.
- Timing Secret: In Step 1, when you're selecting stems, focus on cutting just after morning dew has evaporated but before the heat of the day sets in.
- Root Hormone Technique: For Step 2, I've found that gently tapping the cuttings against the side of the container after dipping helps remove excess hormone powder more effectively.
Frequently asked questions
Got questions about hydrangea cutting propagation?
You’re not alone! Here are answers to the most common queries to help you grow like a pro.
When is the best time to take hydrangea cuttings?
The ideal window is late spring to early summer (May–June), when new growth is firm but still flexible. Avoid cutting after the first frost—hydrangeas need warmth to root! For tropical varieties, you can extend the season slightly into early fall.
How long does it take for hydrangea cuttings to root?
Most hydrangea cuttings root in 4–8 weeks, depending on humidity, temperature, and care. Check for roots by gently tugging the cutting—if resistance meets your fingers, you’ve got success! Patience is key; don’t rush the process.
Why are my hydrangea cuttings turning yellow or mushy?
Yellowing or mushy stems usually signal overwatering or poor drainage. Ensure your cuttings are in moist (not soggy) soil and that the container has drainage holes. Yellow leaves can also mean stress—adjust humidity or move to a brighter spot without direct sunlight.
Can I propagate hydrangeas from store-bought flowers?
Nope! Store-bought hydrangea blooms are often from last year’s growth and won’t root. Stick to greenwood cuttings (soft, new stems) or semi-hardwood (slightly woody) cuttings for the best results. Save those pretty bouquets for decor!
What’s the difference between water and soil propagation for hydrangeas?
Both work, but soil propagation (using a rooting hormone and potting mix) often yields stronger roots faster. Water propagation is slower but great for monitoring root growth. Whichever you choose, keep humidity high—hydrangeas love it damp!
Do hydrangea cuttings need light while rooting?
Yes! Place cuttings in bright, indirect light (like a north-facing window or under grow lights). Avoid harsh sun, which can dry them out. A simple plastic bag or propagator tray creates a mini greenhouse effect—perfect for humidity lovers!
Wrapping up and next steps
Propagating hydrangeas from cuttings is a rewarding way to expand your garden—and you’ve got all the tools to succeed! 🌱 With patience, the right timing, and a few simple steps, you’ll soon be nurturing lush new plants from just a few snips.
Now that you’re armed with knowledge, why not take the plunge? Grab those shears, pick a sunny spot, and watch your hydrangea family grow!
💡 Next step: Start with one cutting this week—confidence builds with every tiny root!