
Aphids
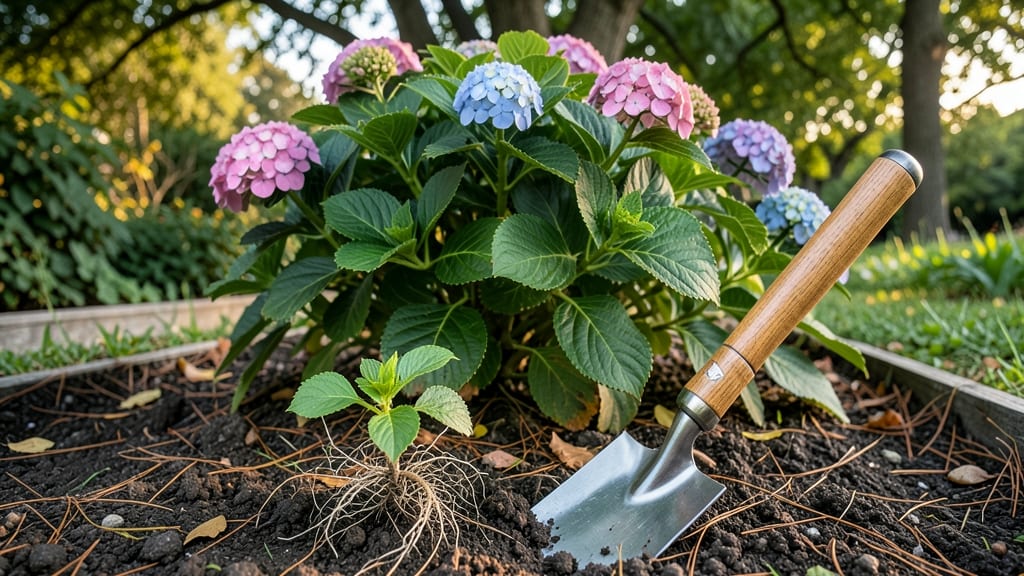
Follow these hydrangea planting instructions to dig deeper than just a hole—you’re actually setting the stage for blooms that shift from blue to pink based on your soil’s hidden chemistry. 🌸 I’ve planted dozens over the years, and the difference between a lackluster shrub and a showstopper often comes down to one simple test: the soil.
Most gardeners overlook soil prep, but hydrangeas are divas—they demand the right conditions to thrive. You’ll need well-draining soil, the right sunlight balance, and a little patience while roots establish. The payoff?
Lush foliage and clusters of blooms that shift colors with the seasons, depending on your soil’s acidity or alkalinity. For mophead varieties, aim for morning sun and afternoon shade, while panicle types handle full sun better. Oakleaf hydrangeas? They’re the most forgiving, adapting to partial shade beautifully.
The key is matching your variety to its ideal spot—once you do, you’ll see new growth within weeks. Here’s the game-changer: Test your soil before planting. A simple kit reveals whether your hydrangeas will lean blue (acidic) or pink (alkaline), and you can adjust with amendments.
Trust me, your future self will thank you when those blooms pop in summer.
📚 In This Guide
- What you need
- Instructions
- Tips and common mistakes
- Wrapping up and next steps
What you need
- ● Hydrangea plants: 1–3 mature plants (bare-root or container-grown) or 10–20 seeds (if starting from scratch). Choose varieties like Hydrangea macrophylla (bigleaf) or Hydrangea paniculata (panicle) for best results.
- ● Well-draining potting mix or garden soil: 5–10 gallons (for container planting) or amend native soil with 2–3 inches of compost or aged manure.
- ● Organic mulch: 2–3 inches of shredded bark, pine needles, or straw to retain moisture and regulate soil temperature.
- ● Slow-release fertilizer: 1–2 cups of 10-10-10 or 5-10-5 NPK blend (or organic options like bone meal or fish emulsion).
- ● pH testing kit: Digital or liquid test kit to monitor soil pH (aim for 5.2–5.5 for blue flowers or 6.0–7.0 for pink).
- ● Watering can or hose with a gentle spray nozzle: For consistent moisture without damaging roots.
- ● Garden trowel or shovel: For digging holes (depth: 2x wider than root ball, depth: same as root ball).
- ● Pruning shears: To trim dead foliage or overgrown stems (sterilize with rubbing alcohol!).
- ● Gloves: Heavy-duty gardening gloves to protect hands from thorns and soil.
- ● Measuring tape or ruler: To ensure proper spacing (keep plants 3–6 feet apart, depending on variety).
- ○ Wheelbarrow or bucket: For mixing soil amendments (optional but handy!).
- ● Sunlight: Partial shade (4–6 hours of sun/day) for most hydrangeas; morning sun is ideal to prevent leaf scorch.
- ● Water access: Consistent moisture (water 1–2 inches per week; more in containers).
- ○ pH adjustment supplies (optional): For bluer flowers: Add aluminum sulfate (1–2 tbsp per gallon of water, applied monthly).
- ● For pinker flowers: Sprinkle lime (calcium carbonate) (1/2 cup per plant) or use wood ash.
- ● Pest control (preemptive!): Neem oil spray or insecticidal soap to deter aphids or spider mites.
Step-by-step instructions for planting hydrangeas
Here's how I've planted dozens of hydrangeas—each thriving with vibrant blooms by following these simple steps.
🌱 Step 1: Choose the Perfect Location with Light and Shelter
Hydrangeas crave morning sun and afternoon shade—especially in hot climates. I always select a spot that gets 4-6 hours of sunlight but remains protected from harsh afternoon rays that can scorch leaves. A location near a north-facing wall or under a deciduous tree works beautifully.
Test your spot by observing how much sun it gets over a week. If leaves on nearby plants show signs of stress (yellowing or crispy edges), that's your clue the area gets too much direct sun. Hydrangeas reward you with bigger blooms when they have this balance of light.
🪴 Step 2: Prepare the Soil with Proper pH and Drainage
Here's where the color magic begins: hydrangeas change bloom colors based on soil pH. For blue flowers, aim for pH 5.0-5.5 using aluminum sulfate. For pink flowers, keep pH at 6.0-7.0 with lime. I test my soil first using a simple pH kit—it's the only way to know for sure.
Dig a hole twice as wide as the root ball but only as deep. Amend the native soil with 2-3 inches of compost mixed into the bottom and sides of the hole. This improves drainage while providing essential nutrients. Never plant deeper than the root flare—burying it too deep suffocates the plant.
💧 Step 3: Plant with Careful Watering and Mulching
Remove the hydrangea from its container and gently loosen any circling roots. Place it in the hole so the top of the root ball sits 1 inch above soil level. This prevents water from pooling around the stem. Backfill with the amended soil, pressing lightly to eliminate air pockets.
Water thoroughly right after planting to settle the soil and eliminate air gaps. I always add 2-3 inches of mulch around the base, keeping it 6 inches away from the stem. This conserves moisture and regulates soil temperature. Avoid organic mulches like wood chips if you're aiming for blue flowers—they can acidify the soil over time.
☀️ Step 4: Establish Watering Routine and Fertilize Properly
Newly planted hydrangeas need 1-1.5 inches of water weekly, more during hot spells. I check by sticking my finger 2 inches into the soil—if it feels dry, it's time to water. Deep, infrequent watering encourages strong root growth better than frequent shallow watering.
Wait until 4-6 weeks after planting before fertilizing. Use a balanced 10-10-10 fertilizer at half strength in early spring. For blue blooms, I switch to an acid-loving plant fertilizer in late spring. Avoid high-nitrogen fertilizers—they produce leafy growth at the expense of flowers.
✂️ Step 5: Prune and Maintain for Season-Long Blooms
Timing is everything with hydrangea pruning. For mophead and lacecap varieties, prune right after flowering in late summer or early fall. Cut back 1/3 of the oldest stems to encourage new growth and more blooms next season. Never prune in late winter—you'll cut off next year's flower buds.
Watch for yellowing leaves, which often signal overwatering or poor drainage. If you planted in heavy clay soil, consider adding organic matter annually to improve structure. The key to long-term success is consistency—hydrangeas reward patient gardeners with dramatic color changes and lush foliage.
Tips & tricks for perfect hydrangea planting
The secret to show-stopping hydrangea blooms lies in these often-overlooked details that transform good plantings into garden showpieces.
Location Insight: That 4-6 hours of morning sun is non-negotiable for vibrant blooms, but here's what nobody tells you—the afternoon shade should come from something taller than your hydrangea. I've learned the hard way that planting under shorter shrubs means your hydrangea will still get scorched by late afternoon rays. Look for natural shade from trees or build a temporary shade structure if needed. The goal is to keep leaves from reaching 120°F in summer afternoons.
Soil Science: The pH range of 5.0-5.5 for blue flowers isn't just a number—it's where aluminum becomes available to the plant, creating that signature blue pigment. I test my soil annually because even if you adjust pH at planting, rain and organic matter can shift it over time. For pink flowers, maintain that 6.0-7.0 range religiously—any lower and you'll get purple blooms instead. Pro tip: Mix aluminum sulfate or lime directly into the backfill soil when planting for immediate effect.
Planting Precision: That 1-inch elevation above soil level isn't just about drainage—it's about preventing stem rot. I use a level to verify this before backfilling, and I always press the soil firmly around the roots to eliminate air pockets. Think of it like creating a cozy nest where roots can spread without stress. The mulch ring should be like a donut around the plant—2-3 inches thick but with that 6-inch gap from the stem to prevent moisture buildup that invites disease.
Watering Wisdom: The 1-1.5 inches weekly is your baseline, but here's the real trick: water deeply enough that it reaches 12 inches down. I use a soil probe to check—if it comes out dry at that depth, you need more water. The 2-inch soil check is just for surface moisture. Deep watering encourages roots to grow downward where they'll find more stable moisture, while shallow watering keeps them near the surface where they'll dry out faster.
Pro Tips for Hydrangea Planting Instructions
- The secret to show-stopping hydrangea blooms lies in these often-overlooked details that transform good plantings into garden showpieces.
- Location Insight: That 4-6 hours of morning sun is non-negotiable for vibrant blooms, but here's what nobody tells you—the afternoon shade should come from something taller than your hydrangea.
- Soil Science: The pH range of 5.0-5.5 for blue flowers isn't just a number—it's where aluminum becomes available to the plant, creating that signature blue pigment.
Frequently asked questions
Got questions about hydrangeas? You’re not alone! Here are some of the most common queries—plus expert answers to help you grow stunning blooms with confidence.
When is the best time to plant hydrangeas?
The ideal time to plant hydrangeas is in early spring (after the last frost) or early fall (4-6 weeks before the first frost). This gives roots time to establish before extreme temperatures. Avoid planting in summer heat or winter cold, which can stress young plants.
How do I adjust soil pH to change my hydrangea colors?
To shift blooms from pink to blue (or vice versa), test your soil’s pH first. For blue flowers, aim for pH 5.5–6.0 (add aluminum sulfate or peat moss). For pink flowers, raise pH to 6.0–7.0 (use lime or wood ash). Re-test in 2–3 months and reapply as needed.
Why aren’t my hydrangeas blooming?
Common culprits include over-pruning (cut back only in late winter/early spring), poor sunlight (they need 6+ hours of sun), or nutrient deficiencies. Feed with a balanced fertilizer in spring and mulch to retain moisture. If blooms appear but don’t open, check for aphids or bud blast (late frost damage).
Can I grow hydrangeas in containers?
Dwarf varieties like ‘Endless Summer’ or ‘Limelight’ thrive in pots (15+ gallons for mature plants). Use well-draining soil, a container with drainage holes, and repot every 2–3 years. Move containers to partial shade in summer to prevent wilting and fertilize monthly during growing season.
How do I prevent aphids from attacking my hydrangeas?
Aphids love hydrangeas! Prevent them by spraying plants with water to dislodge pests or introducing ladybugs. For severe infestations, use neem oil or insecticidal soap. Prune affected leaves and dispose of them in sealed bags. Healthy plants (with proper watering and fertilization) are less vulnerable!
Still stumped? Drop your question in the comments—we’re happy to help your hydrangeas reach their full, colorful potential!
Wrapping up and next steps
Planting hydrangeas is a rewarding journey that blends science and art—especially when you unlock their color-changing magic by mastering soil pH! 🌸 With the right location, soil prep, and care, your blooms will thrive and dazzle in shades of blue, pink, or purple.
Don’t forget to monitor soil conditions and adjust as needed—your patience will pay off in stunning seasonal transformations.
Ready to dive in? Start by marking your calendar for the best planting window in your zone, then grab those gloves and get growing! Your future garden masterpiece awaits—let’s make it bloom. 🌱✨