
Landscaping
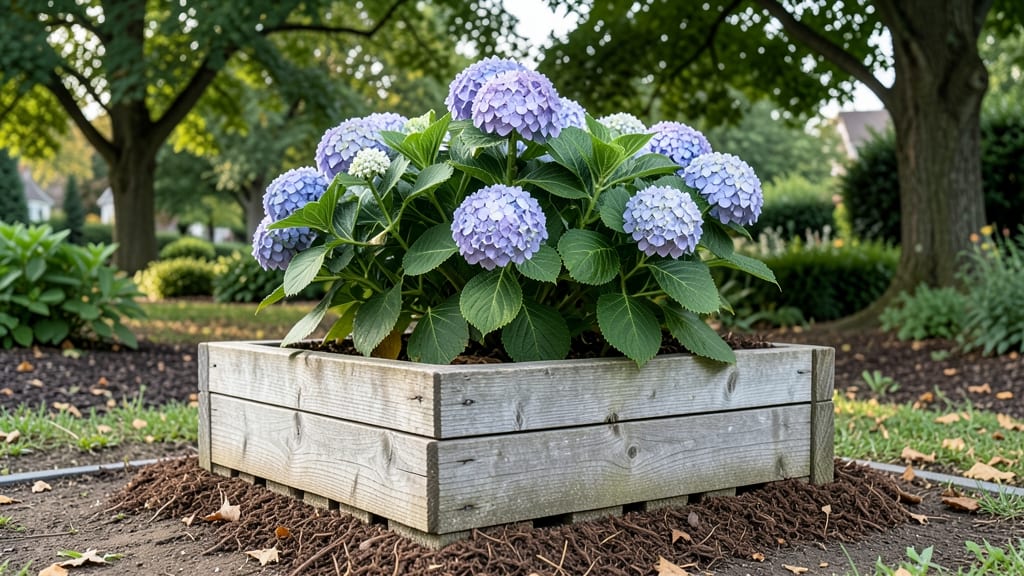
Growing hydrangeas in planter boxes lets you shift their colors from pink to blue with just a soil pH tweak—something I discovered after my first blue-morning glory blooms turned out pinker than expected. 🌸 The secret isn’t just the container size (aim for 18-24 inches deep) but the soil mix you use, which controls that dramatic color change.
Most gardeners miss this simple hack that turns hydrangeas into living mood rings. Start with a high-quality potting mix blended with 20% perlite or vermiculite for drainage, then add a slow-release fertilizer designed for acid-loving plants.
The key to those vibrant blooms is adjusting pH: add aluminum sulfate for blues, lime for pinks. My Endless Summer hydrangeas now shift colors twice a season just by swapping the soil amendments. You’ll end up with lush, compact plants that spill over planter edges beautifully, creating instant curb appeal.
Pair them with silver foliage plants like lamb’s ear or dusty miller to make the blooms pop even more. The best part? You can move the entire display to chase sunlight or create seasonal vignettes.
For small spaces or urban balconies, this method works perfectly—just rotate your containers every few weeks to prevent uneven growth. The color-changing potential alone makes it worth trying, even if you’ve never grown hydrangeas before.
📚 In This Guide
- What you need
- Instructions
- Tips and common mistakes
- Wrapping up and next steps
What you need
- ● Planter box – Choose one with drainage holes (12"–18" depth, width/length to fit your space). Pro tip: Terracotta or resin are great for aesthetics!
- ● Well-draining potting mix – 3–5 gallons (depending on box size). Look for a blend labeled for acid-loving plants or amend regular mix with peat moss or pine bark.
- ● Hydrangea plants – 1–3 mature bushes (size depends on box dimensions; dwarf varieties like ‘Endless Summer’ work well).
- ● Slow-release fertilizer – Acid-loving plant formula (e.g., Miracle-Gro Azalea/Camellia/Fern). Follow package rates for your box size.
- ● pH adjustment tools – Lime (for raising pH) – Powdered or granulated (e.g., garden lime), ~1–2 cups per box.
- ● Sulfur or aluminum sulfate (for lowering pH) – Granular form, ~1–3 tbsp per box (test first!).
- ● Mulch – Pine bark or wood chips (1–2 inches thick) to retain moisture and acidity.
- ● Drip irrigation or watering can – With a spray nozzle for gentle watering.
- ● Garden trowel or small shovel – For mixing soil and amendments.
- ● pH testing kit – Critical! Use a digital meter or liquid test kit (e.g., LaMotte Soil pH Test Kit) to monitor soil acidity (aim for 5.2–5.5 for blue/purple blooms or 6.0+ for pink).
- ○ Gloves – Optional but helpful for handling soil and amendments.
- ● Measuring cups/spoons – For precise pH adjustments.
- ● Sunlight assessment – Hydrangeas need partial shade (morning sun + afternoon shade) or dappled light. Avoid harsh afternoon sun.
- ● Drainage plan – Ensure your planter box sits on feet or a tray to catch excess water (hydrangeas hate soggy roots!).
- ● Time commitment – ~1–2 hours for setup + weekly watering and monthly pH checks.
Instructions for planting hydrangeas in planter boxes
Here's how I turn planter boxes into vibrant hydrangea displays with dramatic color shifts—no guesswork, just science.
🪴 Step 1: Select the Right Planter Box and Drainage
Choose a planter box at least 12 inches deep—hydrangeas need room for roots to spread. I always look for containers with drainage holes along the bottom, but if yours don't have them, drill ½-inch holes every 6 inches to prevent root rot. Line the bottom with 1-2 inches of gravel or broken pottery shards to create a drainage layer that keeps water moving.
This isn't just about drainage—it's about preventing soggy soil that turns hydrangea leaves yellow overnight. If your box has feet, position it so water can pool and drain away from the house or patio. I like to place mine on a small stand or elevated surface to ensure proper airflow underneath.
🌱 Step 2: Layer Soil for pH Control and Color Shifts
Fill the bottom third of the planter with a mix of ½ peat moss and ½ perlite—this creates an acidic base that's perfect for blue hydrangeas. For pink or purple blooms, swap the peat for garden compost or well-rotted manure to raise the pH slightly. I always add a handful of slow-release fertilizer granules to this layer to give roots a nutrient boost right away.
Top this with 4-6 inches of regular potting mix, then add a 1-inch layer of orchid bark or pine fines to help maintain moisture and acidity. This layered approach lets you control the pH without constantly amending the soil later. The bark also prevents soil compaction, which hydrangeas hate.
☀️ Step 3: Plant Hydrangeas at the Right Depth and Spacing
Dig a hole twice as wide as the root ball but no deeper than the container's base. Gently remove the hydrangea from its nursery pot and loosen any circling roots with your fingers—this encourages outward growth. Place the plant so the top of the root ball sits 1 inch below the planter's rim. Hydrangeas need this extra depth to establish strong roots before flowering.
Space multiple hydrangeas 12-18 inches apart—crowding leads to weak stems and fewer blooms. If you're planting four hydrangeas in a single box (like the servings suggest), arrange them in a square pattern for even growth. Water deeply right after planting to settle the soil around the roots, but avoid compacting it with your hands.
💧 Step 4: Water and Adjust for Color Changes
Water the planter until 1 inch of water drains out the bottom, then let it dry slightly before watering again. Hydrangeas in planters dry out faster than in-ground plants, so I check the soil 2 inches down daily during hot weather. For blue blooms, add 1 tablespoon of aluminum sulfate per gallon of water every 4-6 weeks during the growing season. For pink or purple, use lime instead—just ½ teaspoon per gallon.
Watch the leaves for clues: Dark green with blue flowers? You're on track. Yellowing leaves mean the soil is too acidic—flush the planter with plain water and reduce aluminum sulfate. Pale green leaves with pink blooms? Add a little more lime to boost the pH. The color shift happens gradually, so be patient—it can take 2-3 weeks to see noticeable changes.
✂️ Step 5: Prune and Maintain for Next Year's Blooms
Deadhead spent blooms in late summer to encourage new flowers, but save the heavy pruning for late winter or early spring, before new growth appears. Cut back ⅓ of the oldest stems to the ground—this rejuvenates the plant and makes room for fresh, vibrant blooms. I always sterilize my pruners with rubbing alcohol between cuts to prevent disease.
In fall, add a 2-inch layer of mulch around the base of the hydrangeas (but not touching the stems) to protect roots from freezing temperatures. This also keeps the soil acidic longer, which helps maintain your desired flower color through winter. If you're in a colder climate, move the planter to a sheltered spot or wrap it in burlap for extra protection.
Tips & tricks for perfect hydrangea planter boxes
Here's what nobody tells you about getting those showstopping blooms in your containers.
The Drainage Detail: If your planter doesn't have drainage holes, don't just drill a few—space those ½-inch holes every 6 inches all along the bottom. I learned this the hard way after watching hydrangeas develop root rot in just two weeks. For extra insurance, add a layer of landscape fabric over the gravel before soil to keep it from washing out during watering.
Soil Layering Secret: That 1-inch layer of orchid bark or pine fines in Step 2 isn't just for moisture—it creates tiny air pockets that prevent compaction. I like to mix in a handful of pine needles too (they're free if you have pine trees!) for that extra acidity boost. For pink blooms, replace the peat moss with composted leaf mold instead of regular compost—it's more reliable for gradual pH adjustment.
Planting Position: When you place those hydrangeas 1 inch below the rim, use a level to check—uneven planting leads to uneven growth. I mark the depth with a pencil on the planter side before digging holes. Also, avoid pressing soil around roots when watering—just let water settle naturally to prevent air pockets that strangle roots.
Color Change Timing: Those 2-3 weeks for color shifts might feel slow, but here's the trick: Start your pH adjustments in early spring when new growth begins. The plant absorbs amendments most efficiently then. I keep a journal noting when I add aluminum sulfate or lime—it helps track which treatments work best for my specific hydrangea variety.
Pro Tips for Hydrangeas In Planter Boxes
- Here's what nobody tells you about getting those showstopping blooms in your containers.
- The Drainage Detail: If your planter doesn't have drainage holes, don't just drill a few—space those ½-inch holes eve...
- Soil Layering Secret: That 1-inch layer of orchid bark or pine fines in Step 2 isn't just for moisture—it creates tin...
Frequently asked questions
Got questions about growing hydrangeas in planter boxes?
You’re not alone! Here are answers to the most common queries—plus a few pro tips to keep your blooms thriving.
How often should I water hydrangeas in planter boxes?
Water hydrangeas in planter boxes daily during hot, dry spells—especially in containers, which dry out faster than garden beds. Aim for 1-2 inches of water per week, but check soil moisture first. Pro tip: Use a moisture meter or stick your finger 1-2 inches deep; if it’s dry, water thoroughly until it drains from the bottom. Mulch helps retain moisture!
When is the best time to plant hydrangeas in planter boxes?
Plant hydrangeas in early spring or early fall for the best results. This gives roots time to establish before extreme heat or cold. If planting in summer, water deeply and provide afternoon shade to reduce stress. Avoid transplanting in winter—roots need time to recover before dormancy.
Why aren’t my hydrangeas changing color like I expected?
Color shifts depend on soil pH—blue hydrangeas love acidic (pH 5.0-5.5), while pinks thrive in neutral/alkaline (pH 6.0-7.0). Test your soil with a kit and amend with sulfur (for blue) or lime (for pink). Planter boxes dry out faster, so re-test pH every few months and adjust as needed.
Can I grow hydrangeas in planter boxes year-round?
Hydrangeas are perennial in USDA Zones 5-9, but planter boxes add challenges. In colder zones (< Zone 5), move pots to a sheltered spot or wrap them in burlap. In hot climates, ensure shade and consistent moisture. If winters are harsh, consider container-friendly varieties like ‘Endless Summer’, which rebloom and tolerate cooler temps better.
What’s a good alternative if my hydrangeas struggle in planter boxes?
If hydrangeas prove finicky, try these planter-box-friendly alternatives with similar drama:
- Impatiens – Thrives in shade, blooms all summer, and loves moisture.
- Coleus – Low-maintenance, colorful foliage, and tolerates partial shade.
- Petunias – Bright blooms, heat-tolerant, and perfect for containers.
- Heuchera (Coral Bells) – Stunning foliage, compact, and drought-tolerant once established.
Wrapping up and next steps
Growing hydrangeas in planter boxes is a rewarding way to add vibrant color and texture to your space—especially when you master the soil pH hack! With the right container, drainage, and a little patience, you’ll unlock stunning blooms in shades of blue, pink, or purple.
Whether you’re a beginner or a seasoned gardener, these tips make it easier than ever to create a showstopping display.
Ready to dive in? Start small—pick a sunny spot, grab your supplies, and experiment with pH adjustments. Before you know it, your planter boxes will be the envy of the neighborhood! 🌸✨