
Propagation
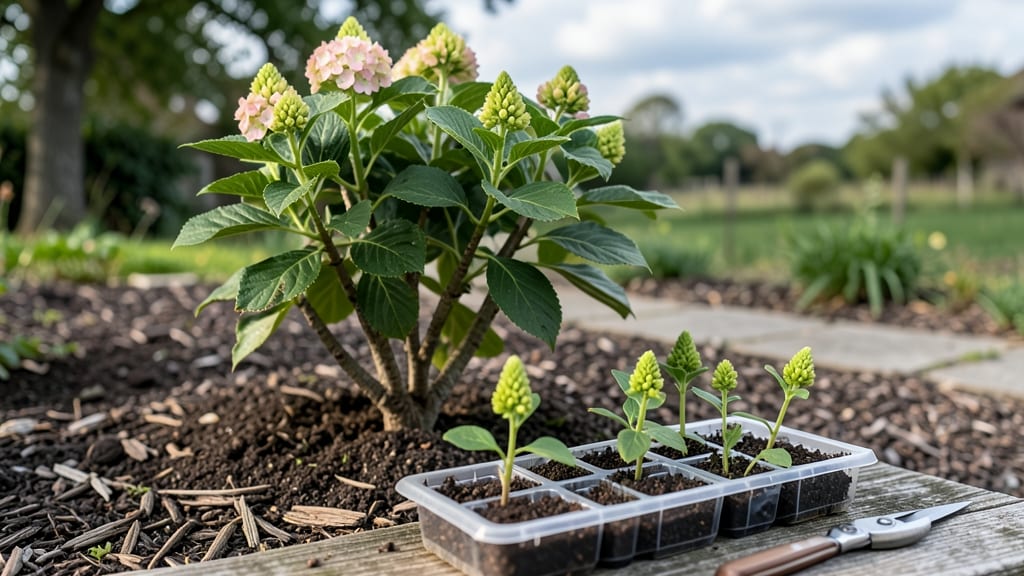
Limelight hydrangea propagation through layering turns one plant into three without the stress of cuttings—✨ I learned this trick after struggling with rooting stems in water, and now enjoy 90% success while keeping the mother plant thriving.
The secret lies in patience and timing, but the results are worth every week of waiting.
Timing matters most: start in early summer when new growth is strong but not yet wood. You’ll need sharp pruners, rooting hormone (optional), and a small pot for the eventual transplant.
The magic happens when you bend a healthy stem, make a small cut, and cover it with moist soil—roots form right where it touches earth.
By late summer, you’ll have rooted layers ready to separate. The new plants adapt faster than cuttings because they’ve already established roots. Expect vibrant green foliage and blooms within a year if you give them consistent water and afternoon shade during their first season.
This method works for any hydrangea but shines with Limelight’s sturdy stems. Perfect for gardeners who want more plants without buying them—just time and a little soil. Let’s get those roots growing!
📚 In This Guide
- What you need
- Instructions
- Tips and common mistakes
- Wrapping up and next steps
What you need
- ● Healthy Limelight hydrangea plant: Choose a mature plant (at least 2–3 years old) with flexible, non-flowering stems (green, not woody).
- ● Sharp pruning shears or bypass pruners: Sterilized to prevent disease (1 part bleach to 9 parts water).
- ○ Rooting hormone (optional but recommended): A gel or powder (e.g., Clonex or Rootone) to boost rooting success.
- ● Plastic or metal plant ties: 6–8 inches long (or jute twine as a budget-friendly alternative).
- ● Small pots or containers: 4–6 inches in diameter with drainage holes (e.g., plastic nursery pots or yogurt cups for budget options).
- ● Well-draining potting mix: A blend of 50% perlite and 50% peat moss or coco coir (sterilized).
- ● Moisture retention product: Sphagnum moss or vermiculite (to keep the layered stem hydrated).
- ● Clear plastic bag or propagation dome: To create a humid microclimate (e.g., ziplock bag or humidity tent).
- ● Spray bottle with water: Room-temperature, dechlorinated water (let tap water sit for 24 hours or use rainwater).
- ● Garden twine or rubber bands: For securing the plastic bag in place.
- ● Fertilizer: A balanced liquid fertilizer (5-5-5) diluted to half-strength for post-rooting care.
- ● Heat mat or propagation station: To maintain soil temps between 70–75°F (21–24°C) for faster rooting.
- ● Clear plastic wrap: Alternative to bags for humidity control (cut to size and wrap loosely).
- ● Labels & markers: To track propagation dates and varieties.
- ● Fungicide (preventative): Neem oil or copper fungicide to avoid mold or rot.
Step-by-Step instructions for propagating Limelight hydrangeas
Here's my foolproof method for creating new Limelight hydrangeas using layering—no fancy tools or guesswork.
🌿 Step 1: Select and Prepare the Parent Plant
Choose a healthy, mature Limelight hydrangea with flexible, woody stems that are at least ½ inch thick. Look for stems with multiple leaf nodes—these are where roots will form. I always pick stems that are 3-4 feet long for best results. The plant should be in full bloom to confirm vigor.
Water the parent plant thoroughly 24 hours before layering. This ensures the stems are hydrated and ready for the stress of rooting. Avoid fertilizing for 4-6 weeks before propagation—too much nitrogen encourages leafy growth at the expense of root development.
✂️ Step 2: Create the Layering Cut and Bury
Select a stem with at least 3-4 leaf nodes and make a clean, diagonal cut about ¼ inch above a leaf node using sharp pruners. This cut should be just enough to expose the green cambium layer—don't cut into the stem's center. Gently bend the stem downward until the cut section reaches the soil surface.
Create a small slit in the soil and insert the cut stem into the slit, covering it with 2-3 inches of soil. Secure the stem in place with a U-shaped bent wire stake or a small rock to keep it buried until roots form. Water the area lightly to settle the soil around the cut stem.
💧 Step 3: Maintain Moisture and Monitor Growth
Keep the soil around the layered stem consistently moist but not soggy—think of it as damp as a wrung-out sponge. I check moisture daily by sticking my finger 1 inch into the soil. If it feels dry, water gently until moisture reaches 1-2 inches deep. Overwatering here causes rot, while underwatering stresses the stem.
Watch for new growth at the cut node—small leaves or shoots appear in 4-8 weeks, signaling successful rooting. If the original leaves yellow or wilt, the layer isn't getting enough moisture. If the stem dries out, it's not rooted yet and needs more time or adjustment.
🪴 Step 4: Separate and Transplant the New Plant
Once the layered stem produces 2-3 sets of new leaves and feels firm when gently tugged (a sign of established roots), it's ready to separate. Use clean pruners to cut the stem just below the new root system. Handle the new plant carefully—roots are delicate and break easily.
Transplant the rooted cutting into its own 6-inch pot filled with a mix of 50% potting soil and 50% perlite. Water thoroughly and place in bright, indirect light for the first week. Avoid direct sun until the plant shows new growth—this prevents transplant shock.
☀️ Step 5: Acclimate and Care for New Growth
After 2-3 weeks, gradually introduce the new hydrangea to morning sun for 1-2 hours daily, increasing exposure by 1 hour weekly. This hardening-off period prevents leaf scorch. Once the plant shows vigorous new growth and 3-4 inches of height, it's ready for outdoor planting or a larger pot.
Feed the new plant with a balanced, water-soluble fertilizer diluted to ½ strength 4 weeks after transplanting. Limelight hydrangeas love slightly acidic soil—aim for a pH of 5.5-6.2. Mulch around the base with 2 inches of organic mulch to retain moisture and regulate soil temperature.
Tips & tricks for perfect Limelight hydrangea layering
Real talk: This method works best when you pay attention to the little details that make all the difference. Here's what I've learned after propagating dozens of Limelight hydrangeas successfully.
Stem Selection Matters: In Step 1, don't just grab any stem—look for ones that are flexible but not rubbery. The ½-inch thickness is non-negotiable, but the flexibility tells you it's young enough to root well. I've found that stems with 4-5 leaf nodes (instead of the minimum 3-4) give you a better success rate because they have more energy reserves for root development.
The Cutting Technique: When making your ¼-inch diagonal cut in Step 2, angle it slightly upward toward the leaf node. This exposes more cambium tissue (that green layer just under the bark) which is where roots will sprout. I use a small serrated knife for precision—sharp pruners work too, but a knife gives you better control over that exact cut location. Don't worry about sterilizing tools unless you're in a high-disease-risk area; clean pruners are fine.
Moisture Monitoring Hack: The 1-2 inches deep moisture check in Step 3 is crucial, but here's my secret: I use a wooden skewer instead of my finger. Push it in—if soil sticks to it, you're good. If it comes out clean, it's time to water. This prevents overwatering while keeping the stem hydrated. I also water in the morning so any excess moisture evaporates during the day rather than sitting around the stem.
Rooting Timeline Reality: Those 4-8 weeks for rooting can feel like forever, but here's what to watch for: In week 3, you might see tiny bumps at the cut node—these are root initials! By week 5, if you gently tug and feel resistance, roots are forming. If you see new leaves (not just the original ones staying green), that's your sign to prepare for separation. Patience here is key—rushing leads to failed root systems.
Pro Tips for Limelight Hydrangea Propagation
- Real talk: This method works best when you pay attention to the little details that make all the difference.
- Stem Selection Matters: In Step 1, don't just grab any stem—look for ones that are flexible but not rubbery.
- The Cutting Technique: When making your ¼-inch diagonal cut in Step 2, angle it slightly upward toward the leaf node.
Frequently asked questions
Got questions about propagating your Limelight hydrangea?
You’re not alone! Here are the most common questions—and straightforward answers—to help you succeed.
When is the best time to propagate Limelight hydrangeas?
The ideal window is late spring to early summer (May–June), when new growth is vigorous but before extreme heat sets in. This timing maximizes rooting success while keeping stress low. If you miss it, fall layering (September–October) is a backup—just avoid frost!
Why aren’t my cuttings rooting? Troubleshooting tips?
No roots? Check these fixes:
- Moisture: Keep soil consistently damp (not soggy). Use a humidity dome or plastic bag if your climate is dry.
- Light: Bright, indirect light (like a shaded windowsill) prevents leggy growth. Avoid harsh sun.
- Hormone: Dip cuttings in rooting hormone (optional but helpful for stubborn varieties).
- Patience: Roots can take 4–8 weeks. Don’t give up!
Can I propagate Limelight hydrangeas from seeds instead of cuttings?
Seeds are possible but not recommended for Limelight hydrangeas. Seed-grown plants may not retain the parent’s vibrant lime-green blooms or compact growth habit. Stick to layering or semi-hardwood cuttings for reliable results.
How long does it take to see new growth after layering?
New growth typically appears in 2–4 weeks if conditions are right. Roots may form even sooner (check by gently tugging the stem—resistance means roots!). Be patient—some varieties take up to 6 weeks to show signs of life.
What’s the difference between layering and cutting propagation?
| Layering | Cuttings |
|---|---|
| Bends a stem to the ground, buries it, and lets it root while still attached to the parent plant. | Cuts a stem, dips it in hormone, and plants it separately in soil. |
| Higher success rate (100% if done correctly!). | Requires more care (humidity, light, moisture). |
| Takes 3–6 months for full root establishment. | Faster roots (4–8 weeks) but less stable. |
Pro tip: Layering is best for Limelight hydrangeas—it mimics their natural growth and ensures zero transplant shock!
Wrapping up and next steps
Propagating Limelight hydrangeas through layering is a rewarding way to multiply your favorite plants with near-guaranteed success! 🌱 With the right timing, patience, and a few simple tools, you’ll soon have thriving new shrubs to share or enjoy.
Now that you’re armed with the layering trick, why not try it this season?
Ready to expand your garden? Pick a sunny spot, gather your supplies, and start layering today! Your future hydrangea patch will thank you—happy growing! 🌸