
Companion Plants
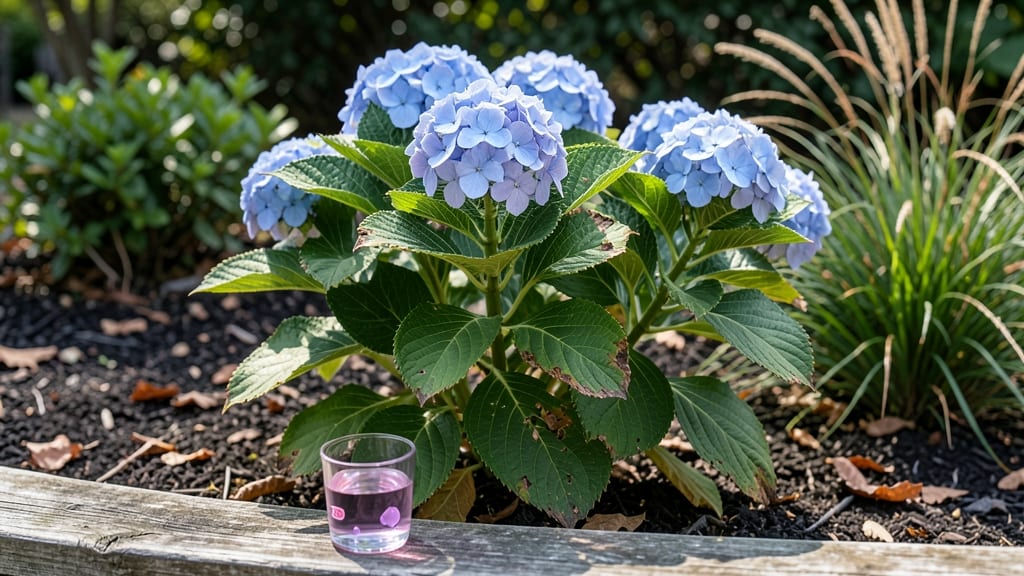
Those crispy brown leaves on the hydrangea plant are your shrub’s way of crying for help—and the fix is often easier than you’d expect. 🌿 overlooked factor: soil pH. That bronze-tinged stress isn’t just cosmetic; it’s your plant’s way of saying, "I’m struggling to access what I need to thrive." The good news?
Hydrangeas are tough survivors once you address the root cause. Start by checking the soil moisture—those leaves could be screaming for water (or begging for a break from soggy roots). Then test your soil’s pH: hydrangeas crave slightly acidic soil (around 5.5–6.2).
If your soil’s too alkaline, iron and manganese lock up, leaving leaves yellowing and browning at the edges. A simple soil test kit solves half the mystery right there. What you’ll end up with is lush, deep-green foliage and those showstopping blooms you planted for.
The first flush of new growth after adjusting care is always a relief—like giving your hydrangeas a fresh start. And the best part? Once you balance the pH, your plants build resilience against future stress. This works for backyard beds, containers, or even those hydrangeas gracing your porch pots.
Let’s turn those brown leaves into a thing of the past—starting with the simplest fixes first.
Root Causes of Hydrangea Leaf Discoloration
Seeing your once-vibrant hydrangea leaves turn brown can feel like a mystery—especially when the plant seems otherwise healthy. But don’t worry! Understanding the why behind this issue is the first step to restoring your plant’s lush, green beauty.
Below, we break down the most common culprits, backed by science, so you can diagnose—and fix—the problem like a pro.
Hydrangeas are tender perennials, meaning they thrive in moderate climates but struggle with sudden temperature swings. When exposed to scorching heat (above 90°F) or frost (below 28°F), their leaves undergo oxidative stress, causing them to brown and crisp at the edges.
This is especially true for bigleaf hydrangeas (Hydrangea macrophylla), which are more sensitive to heat than their oakleaf or panicle cousins.
🔍 How to spot it:
- Brown, papery edges on leaves (like burnt paper).
- Wilting or drooping even when soil is moist.
- Symptoms appear suddenly after a heatwave or freeze.
💡 Fix it:
- 🌳 Provide afternoon shade during peak summer heat (use shade cloth if needed).
- ❄️ Mulch heavily (3–4 inches of organic mulch) to insulate roots in winter.
- 💧 Water deeply in the morning to help leaves retain moisture.
Hydrangeas hate "wet feet"—their roots need aeration to breathe. When soil stays soggy for too long, anaerobic bacteria thrive, robbing roots of oxygen and triggering root rot. The plant then translocates toxins upward, causing leaves to turn brown, yellow, or even black. Clay soil or containers without drainage holes are major culprits.
🔍 How to spot it:
- Yellowing leaves that later brown and fall off.
- Mushy, dark roots when you check the soil.
- Leaves brown from the bottom up.
💡 Fix it:
- 🚿 Check soil moisture—stick your finger 2 inches down; if it’s damp, wait to water.
- 🏗️ Amend heavy clay soil with compost or perlite to improve drainage.
- 🔄 Repot in containers if using pots—ensure they have drainage holes.
While hydrangeas love dappled shade, too much direct sunlight—especially in hot climates—can cause photosynthetic damage. The leaves lose moisture faster than they can absorb water, leading to desiccation and brown, crispy patches. This is common in oakleaf hydrangeas (Hydrangea quercifolia), which can handle more sun but still need protection in intense heat.
🔍 How to spot it:
- Brown patches that look leathery or dry (not mushy).
- Symptoms appear on exposed leaves first.
- Plant looks thirsty even after watering.
💡 Fix it:
- 🌿 Move to partial shade (4–6 hours of morning sun max).
- 💦 Increase watering frequency during heatwaves (but avoid soggy soil).
- 🎨 Use shade cloth (30–50% coverage) if relocating isn’t an option.
Hydrangeas are heavy feeders, and imbalances in soil nutrients can trigger browning. Two key issues stand out:
- Magnesium deficiency (often from over-fertilizing with nitrogen): Causes interveinal chlorosis (yellowing between veins) that progresses to brown.
- Excessive fluoride or boron: Common in tap water or certain fertilizers, these can burn leaf tissue and cause brown spots.
🔍 How to spot it:
- Brown spots or edges with yellowing underneath.
- Stunted growth despite regular watering.
- Leaves brown unevenly (not just edges).
💡 Fix it:
- 📊 Test your soil (pH and nutrient levels) via a local extension office or DIY kit.
- 🍃 Apply Epsom salt (1 tbsp per gallon of water) if magnesium is low—spray leaves and soil.
- 💧 Use filtered or rainwater to avoid fluoride buildup.
- 🌱 Fertilize with a balanced formula (10-10-10) in spring, avoiding high-nitrogen alone.
While hydrangeas are relatively pest-resistant, spider mites, scale insects, and fungal diseases (like powdery mildew or leaf spot) can cause browning. Pests pierce leaves, sucking out sap and leaving behind brown, stippled damage. Diseases often start as yellow spots that turn brown and crusty.
🔍 How to spot it:
- Tiny webs on leaves (spider mites).
- Sticky residue (honeydew) on leaves or nearby surfaces.
- Brown speckles or rings on leaves (fungal infections).
💡 Fix it:
- 🕷️ Blast pests off with a strong spray of water, then apply neem oil or insecticidal soap.
- 🍄 Prune infected leaves and dispose of them (don’t compost!).
- 🌿 Improve airflow by spacing plants 3–4 feet apart.
- 💊 Use fungicide (copper-based) if fungal disease is suspected.
Now that you’ve pinpointed the likely cause, the next step is actionable fixes to bring your hydrangea back to its blooming best! 🌸
Revive Your Hydrangea’s Health
Brown leaves on your hydrangea don’t have to mean the end of its beauty—with the right care, you can bring it back to vibrant life! Below are targeted solutions based on the most common causes of browning, from environmental stress to nutrient deficiencies.
Follow these steps to nurse your plant back to health and keep it thriving.
If your hydrangea’s leaves are turning brown and mushy, root rot is likely the culprit. Overwatering or soggy soil suffocates roots, cutting off oxygen and nutrients.
What to do:
- 🔥 Check the soil moisture – Stick your finger 1–2 inches into the soil. If it’s damp, hold off on watering.
- 👨🍳 Repot if needed – If the roots are black or smelly, transfer your hydrangea to a pot with drainage holes and fresh, well-draining potting mix.
- 🥘 Water wisely – Hydrangeas prefer consistently moist but not soggy soil. Water deeply 2–3 times per week (adjust for climate) and avoid letting it sit in saucers of water.
💡 Prevention tip: Use a moisture meter or opt for self-watering pots to maintain steady hydration without overdoing it.
If brown patches appear only on leaves exposed to direct sun, your hydrangea is likely suffering from sun scorch or heat stress.
What to do:
- 🍳 Provide afternoon shade – Move your hydrangea to a spot with morning sun and afternoon shade, especially in hot climates.
- 🌡️ Mulch the roots – Apply 2–3 inches of organic mulch (like shredded bark or pine needles) to keep soil cool and retain moisture.
- 🎯 Hydrate properly – Water deeply in the morning to give roots a chance to absorb moisture before the heat peaks.
💡 Prevention tip: If you’re growing hydrangeas in hot, dry climates, consider white or light-colored pots—they reflect heat better than dark containers.
Brown, crispy, or yellowing leaves with black spots could signal powdery mildew, leaf spot, or bacterial blight. Fungal issues thrive in humid, stagnant conditions.
What to do:
- 🔪 Prune affected leaves – Use sterilized pruners to remove brown or spotted leaves immediately to prevent spread.
- 🌿 Improve airflow – Space plants 12–18 inches apart and avoid overcrowding.
- 💪 Apply fungicide – Spray with a copper-based fungicide or neem oil solution (1 tsp neem oil + 1 quart water) every 7–10 days until the issue clears.
💡 Prevention tip: Water at the base (not overhead) and water early in the day so foliage dries quickly—fungi love damp leaves!
Brown, crispy edges or yellowing between veins can mean your hydrangea is nutrient-deficient, often due to low nitrogen, magnesium, or iron.
What to do:
- 📊 Test your soil – Use a home soil test kit to check pH and nutrient levels. Hydrangeas thrive in slightly acidic soil (pH 5.2–6.0).
- 🥗 Feed with balanced fertilizer –
- For nitrogen (green growth): Use a 10-10-10 or 20-20-20 fertilizer in spring.
- For magnesium (yellowing leaves): Apply Epsom salt (1 tbsp per gallon of water) every 4–6 weeks.
- For iron (bronzing leaves): Use an iron chelate supplement if soil pH is too high.
- 🍎 Boost organic matter – Mix compost or aged manure into the soil to improve nutrient availability.
💡 Prevention tip: Feed in early spring (when new growth starts) and avoid over-fertilizing—too much salt can burn roots!
Chewing insects like aphids, spider mites, or Japanese beetles can cause brown, ragged leaves as they feed on sap.
What to do:
- 🔍 Inspect leaves – Look for tiny webs, holes, or sticky residue (aphid honeydew).
- 🛁 Blast off pests – Spray leaves with water to dislodge soft-bodied insects like aphids.
- 💪 Use insecticidal soap – Apply a mild soap spray (1 tsp castile soap + 1 quart water) or neem oil to suffocate pests.
- 🎯 Set traps – For Japanese beetles, use beetle traps (but place them far from hydrangeas—they attract more beetles!).
💡 Prevention tip: Encourage beneficial insects like ladybugs and lacewings by planting dill, fennel, or marigolds nearby!
Once your hydrangea recovers, prevent future browning with these proactive steps:
- 🌡️ Monitor soil moisture – Stick to a consistent watering schedule (deep but infrequent).
- 🍃 Prune regularly – Remove dead or diseased branches in late winter or early spring before new growth starts.
- 🔄 Adjust pH as needed – If blooms stay blue (high pH) or pink (low pH), amend soil with sulfur (to lower pH) or lime (to raise pH).
- 🌿 Mulch annually – Refresh mulch in early spring to protect roots and retain moisture.
With the right care, your hydrangea will bounce back—and next season, it’ll reward you with bold, vibrant blooms instead of browned leaves! 🌸
Frequently asked questions about brown leaves on hydrangeas
Why do my hydrangea leaves turn brown in the middle of summer?
This is usually heat stress or sun scorch. Hydrangeas prefer dappled shade, especially in hot climates. When exposed to direct afternoon sun above 90°F, leaves lose moisture faster than they can absorb water, causing crispy brown patches. Try moving your plant to a shadier spot or using shade cloth for 30-50% coverage. Water deeply in the morning to help leaves retain moisture.
Can I save my hydrangea if the brown leaves are falling off?
Yes, but act quickly! If leaves are falling due to root rot (brown/mushy leaves from overwatering), prune affected areas and repot in fresh, well-draining soil with drainage holes. If it's nutrient deficiency (yellowing between veins), apply Epsom salt (1 tbsp/gallon) or a balanced fertilizer. For fungal issues, remove infected leaves and apply copper fungicide. With proper care, new growth should emerge within 4-6 weeks.
Is it too late to fix brown leaves before winter?
Not necessarily! Focus on root health and nutrient balance now. Test your soil pH (hydrangeas prefer 5.2-6.0) and amend if needed. Apply 2-3 inches of organic mulch to insulate roots and retain moisture. Prune back dead or diseased branches to encourage new growth in spring. Avoid fertilizing late in the season—it can stimulate tender new growth that won't survive frost.
Why do my hydrangea leaves turn brown only at the edges?
This classic sign usually means underwatering or low humidity. Hydrangeas need consistently moist soil (check soil 1-2 inches deep—it should feel like a damp sponge). Brown edges can also signal fluoride buildup from tap water—try using rainwater or filtered water instead. Increase humidity by placing the pot on a pebble tray with water or grouping plants together.
Will pruning brown leaves help my hydrangea recover?
Yes, but only prune dead or diseased leaves—never healthy green ones. Use sterilized pruners to avoid spreading pathogens. For root rot, remove all mushy, blackened leaves. For pests, prune infested foliage and dispose of it (don’t compost!). Pruning stimulates new growth, but avoid heavy pruning in late summer—wait until early spring for major shaping. Always clean your tools with rubbing alcohol between cuts.