
Pruning
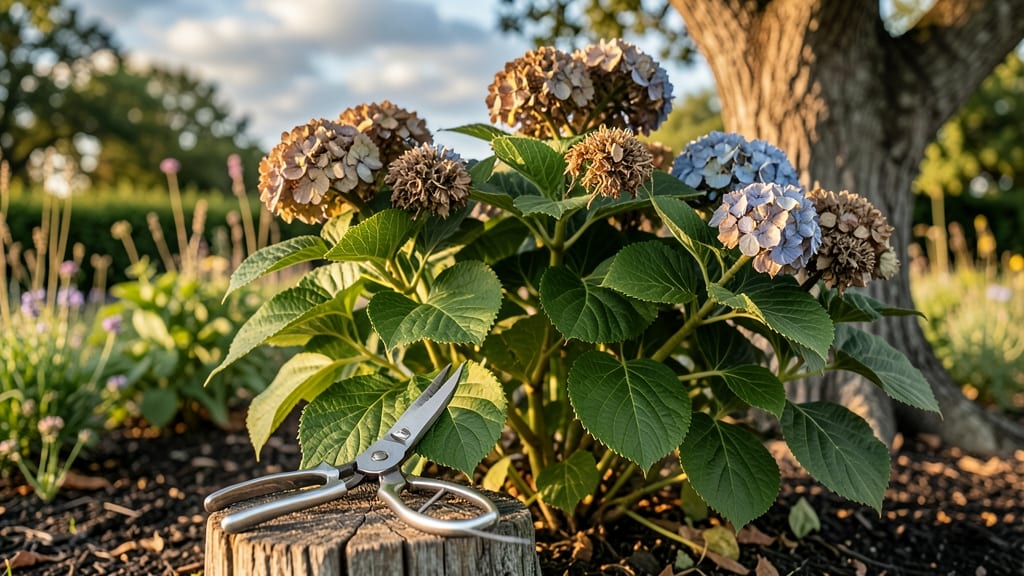
Cutting down hydrangeas in late winter or early spring unlocks a summer of showstopping blooms. ✂️ I’ve turned my overgrown, leggy bushes into lush, flower-covered giants using just three strategic cuts—and it’s easier than you think.
The secret lies in knowing your hydrangea type: old-wood bloomers like mopheads need minimal pruning, while new-wood varieties like panicle hydrangeas thrive after aggressive trimming. Most gardeners over-prune, leaving their plants stressed and sparse—don’t be one of them. You’ll see new growth within weeks, with fuller blooms by summer.
The key is timing: prune after the last frost but before buds swell, and always cut just above a leaf node or outward-facing bud. Works for both container and in-ground plants, and even revives neglected bushes. Here’s how to do it right!
📚 In This Guide
- What you need
- Instructions
- Tips and common mistakes
- Wrapping up and next steps
What you need
- ● Bypass pruners: Sharp, high-quality pruners (e.g., Felco or Fiskars) for clean cuts on stems up to ½-inch thick.
- ● Loppers: Heavy-duty loppers (e.g., Corona or Bahco) for thicker stems (½-inch to 1½-inch diameter).
- ● Hand saw: Pruning saw with a fine-tooth blade for stubborn, woody stems (2-inch diameter or larger).
- ● Gloves: Sturdy gardening gloves (e.g., Mechanix or Dr. McGill’s) to protect hands from thorns and sap.
- ○ Disinfectant (optional but recommended): 70% isopropyl alcohol or a 1:10 bleach-water solution to sterilize tools between cuts and prevent disease.
- ● Rubbing alcohol or bleach wipes: For quick tool sanitization mid-pruning.
- ● Pruning shears (for fine trimming): Small, sharp shears (e.g., Felco F-2) for delicate adjustments.
- ● Garden twine or plant ties: To secure stems if heavy pruning causes instability (especially for large hydrangeas).
- ● Garden hose or bucket of water: For rinsing tools and cleaning up sap or debris.
- ● Trash bags or compost bin: To dispose of pruned material (avoid composting diseased stems!).
- ● Pruning sealant: For sealing large cuts (e.g., Tree Help Wound Pruning Seal) to prevent disease entry (controversial—skip if your hydrangea is healthy!).
- ● Knee pads or stool: For comfort, especially when pruning large or ground-level hydrangeas.
- ● Labeling tags: If dividing hydrangeas, mark new plants for easy identification.
- ● Fertilizer (balanced or acidic): Post-pruning boost (e.g., 10-10-10 or sulfur-based for blue blooms).
- ● Garden journal: To track pruning dates, varieties, and bloom responses for future reference!
Instructions for pruning hydrangeas to ensure year-round blooms
Here's how to revive your hydrangeas with precise cuts that guarantee vibrant flowers all season.
✂️ Step 1: Identify Your Hydrangea Type and Bloom Cycle
First, determine whether your hydrangea is a late-summer bloomer (like macrophylla or grandiflora) or an early-summer bloomer (like paniculata or arborescens). Late bloomers produce flowers on new wood, so you can prune aggressively in late winter or early spring without fear. Early bloomers, however, set buds on old wood—prune too early, and you'll sacrifice next year's spring flowers.
Look for last year's blooms: if they're still visible as dried clusters, you're dealing with an old-wood bloomer. If the plant looks bare, it's likely a new-wood variety. I always make a note on my calendar after pruning to remember which type I have—this simple step prevents costly mistakes.
✂️ Step 2: Time Your Pruning for Maximum Impact
For late-summer bloomers, prune in late winter or early spring (February to March) before new growth begins. Cut back 1/3 of the oldest stems to the ground each year to encourage fresh, vigorous growth. For early-summer bloomers, wait until right after flowering (late summer) to prune, removing only dead or crossing branches.
Here's the thing—hydrangeas are forgiving, but timing matters. If you prune too early on old-wood types, you'll miss next year's spring show. I like to prune on a dry, overcast day to reduce stress on the plant. Avoid pruning in extreme heat or cold, which can shock the plant and invite disease.
✂️ Step 3: Make Clean, Strategic Cuts for Healthy Growth
Use sharp, sterilized pruners to make cuts at a 45-degree angle, about 1/4 inch above a leaf node or outward-facing bud. This angle helps water run off and prevents rot. For late-summer bloomers, cut back to just above a set of healthy buds—you'll see them as small, swollen areas on the stem. For early bloomers, remove only dead wood or stems that rub against each other.
Don't be afraid to get bold—hydrangeas respond well to aggressive pruning if done correctly. I often cut back half the plant in one year and the other half the next, so the plant never feels overwhelmed. After pruning, step back and admire your work—you're shaping a plant that will reward you with lush, abundant blooms.
🌿 Step 4: Post-Pruning Care for a Strong Recovery
Water deeply after pruning to help the plant recover and encourage new growth. Apply a balanced, slow-release fertilizer (like 10-10-10) to support the plant as it regains its strength. Mulch around the base with 2-3 inches of organic mulch to retain moisture and protect roots from temperature swings.
Watch for new shoots emerging within 4-6 weeks—this is your signal that the pruning worked. If you notice any yellowing leaves or wilting, it could mean over-pruning or stress. In that case, trim back slightly and give the plant extra water. Hydrangeas are resilient, but they do need a little TLC after a major pruning session.
⏰ Step 5: Maintain Year-Round with Seasonal Check-Ins
Every 3-4 months, inspect your hydrangeas for dead, diseased, or crossing branches and prune them out immediately. This keeps air circulating and prevents pests. In late summer, deadhead spent blooms on late-summer types to encourage a second flush of flowers. For early bloomers, leave the faded flowers on—birds and pollinators love them, and they add winter interest.
I like to take a photo of my hydrangeas after each pruning session so I can track their progress over the seasons. Real talk: the first year after a major pruning, the plant might look a little sparse, but by the second year, it'll be more vigorous than ever. Patience is key—your hydrangeas will thank you with bigger, brighter blooms year after year.
Tips & tricks for perfect hydrangea pruning
These game-changing insights will help you transform your hydrangeas into a year-round floral masterpiece—without the guesswork.
Type Identification: The first step is non-negotiable—misidentifying your hydrangea type can mean sacrificing an entire season's blooms. For old-wood varieties, look for dried flower clusters from last year still clinging to the stems. For new-wood types, you'll notice bare stems with no lingering blooms. I keep a small notebook by my gardening tools to jot down which type each plant is—this simple habit has saved me from pruning errors that would have cost me my spring flowers.
Pruning Timing: The February-March window for late-summer bloomers is critical because it aligns perfectly with the plant's natural growth cycle. If you're working with early-summer varieties, wait until after they've finished flowering in late summer—this ensures you're not cutting off next year's buds. Confession: I once pruned my early bloomer in early spring, and it took me two full seasons to recover the lost blooms. Trust me on this—timing is everything.
Cutting Technique: That 45-degree angle isn't just for aesthetics—it's a hydraulic engineering marvel for plants. The slanted cut prevents water from pooling at the cut site, which dramatically reduces the risk of rot and fungal infections. For late-summer bloomers, focus on cutting just above those plump, outward-facing buds. They'll be your plant's future blooms, so treat them like they're carrying the weight of your entire garden's beauty.
Recovery Care: The 4-6 week window for new shoot emergence is your plant's way of saying "I'm back!" during its recovery phase. During this time, resist the urge to prune again—your hydrangea needs to channel all its energy into establishing new growth. I've found that applying a thin layer of mulch right after pruning helps maintain consistent soil moisture, which is crucial during these early weeks of recovery. Think of it as giving your plant a cozy blanket to help it heal.
Pro Tips for Cutting Down Hydrangeas
- These game-changing insights will help you transform your hydrangeas into a year-round floral masterpiece—without the guesswork.
- Type Identification: The first step is non-negotiable—misidentifying your hydrangea type can mean sacrificing an entire season's blooms.
- Pruning Timing: The February-March window for late-summer bloomers is critical because it aligns perfectly with the plant's natural growth cycle.
Frequently asked questions
Got questions about cutting down hydrangeas? You’re not alone! Whether you’re a first-time pruner or just want to refine your technique, here are answers to the most common concerns—so you can keep those blooms looking fabulous year after year.
When is the best time to cut down hydrangeas?
The timing depends on your hydrangea type! For bigleaf and oakleaf varieties, prune in late winter or early spring (before buds swell). Panicle and smooth hydrangeas can handle pruning in late winter through early spring. Avoid pruning in fall—it removes next year’s blooms!
Do I need to cut all the stems down to the ground?
Not always! For bigleaf hydrangeas (like H. macrophylla), cut back old wood to just above the first set of buds. For panicle or smooth types, you can trim up to 1/3 of the plant to encourage bushier growth. Over-pruning can stress the plant—so err on the side of caution!
Why aren’t my hydrangeas blooming after pruning?
Bloom woes often stem from pruning at the wrong time or cutting back new wood (which holds next year’s flowers). Bigleaf hydrangeas bloom on old wood, so avoid heavy pruning until after they’ve finished flowering. If you pruned too late, be patient—it may take a season to rebound!
Can I cut down hydrangeas in winter?
Yes, but with caution! Late winter (just before buds swell) is ideal for most types. If you prune in harsh winter, protect cuts with a thin layer of pruning sealant to prevent disease. Avoid pruning during freezing temps—hydrangeas hate wet, cold cuts!
What if my hydrangeas are overgrown or leggy?
Don’t panic! For severely overgrown plants, prune in stages over 2–3 years to avoid shock. Focus on removing dead, weak, or crossing branches first. Thin out dense areas to improve airflow, and fertilize lightly in spring to encourage new growth.
Wrapping up and next steps
Cutting down hydrangeas might seem intimidating, but with the right timing and technique, you’ll unlock year-round blooms and healthier plants! Remember: late winter or early spring is ideal for most varieties, while summer pruning can encourage extra flowers.
Whether you’re reviving old shrubs or shaping new growth, confidence comes with practice—so grab those shears and get pruning!
Ready to see your hydrangeas thrive? Next, check your local frost dates and mark your calendar for the best pruning window. Happy gardening! 🌸✂️