
Propagation
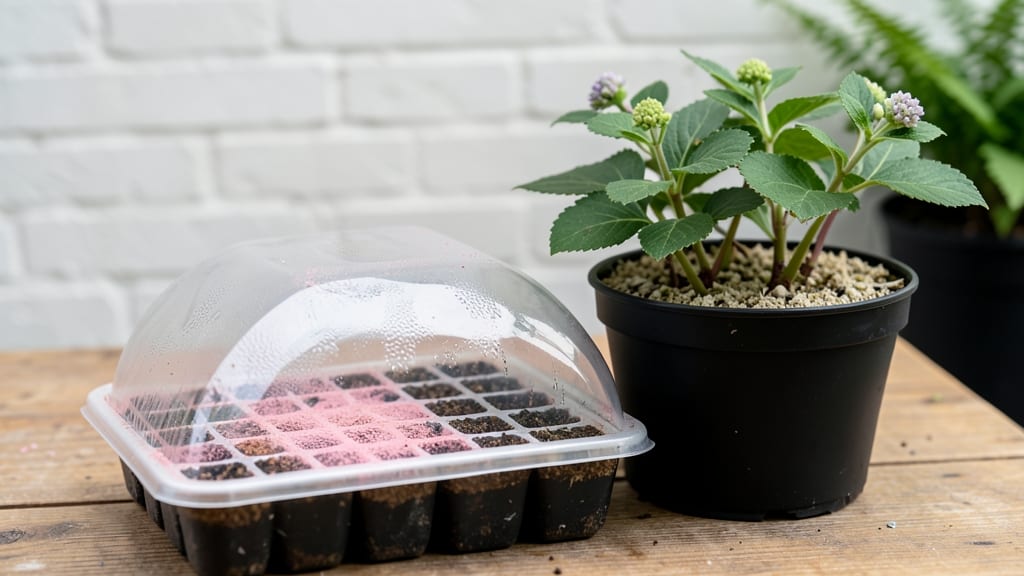
Taking hydrangea cuttings in late summer gives you free plants for next year’s garden. 🌿 I’ve propagated dozens this way, and the key is timing—wait until new growth slows but leaves stay plump.
This method works for both water rooting (easiest for beginners) and direct soil planting (faster for established roots).
The tools you need are simple: sharp pruners, rooting hormone (optional but helpful), small pots or jars, and a mix of perlite and peat moss. Most cuttings root within 4-6 weeks, but patience is key—rushing leads to rot.
I’ve seen cuttings fail when overwatered or kept too warm, so balance is everything.
Once rooted, your new hydrangeas will need bright, indirect light and consistent moisture. They’ll bloom in 2-3 years, but the wait is worth it for those lush, showy clusters. The best part? You’ll have backup plants if your originals get damaged.
Whether you’re multiplying prized varieties or just curious, this method works for any hydrangea type. Let’s get those cuttings growing!
📚 In This Guide
- What you need
- Instructions
- Tips and common mistakes
- Wrapping up and next steps
What you need
- ● Healthy hydrangea cuttings: 4–6-inch-long, non-flowering stems (greenwood) from the current season’s growth.
- ● Sharp pruners or clean scissors: Sterilized to avoid disease (rubbing alcohol wipe works!).
- ○ Rooting hormone (optional but helpful): A powder or gel (e.g., Rootone or Clonex).
- ● Clear glass or jar (for water method): Large enough to submerge 2–3 inches of the stem.
- ● Well-draining potting mix (for soil method): A blend of perlite, vermiculite, and peat moss (or a pre-mixed propagation mix).
- ● Small pots or trays: 4–6 inches in diameter with drainage holes.
- ● Plastic bag or humidity dome: To retain moisture (e.g., a ziplock bag with holes or a propagation lid).
- ● Spray bottle: For misting cuttings (keeps them hydrated!).
- ● Water (for water method): Room-temperature, filtered if possible.
- ● Labeling tags or sticks: To track varieties.
- ○ Heat mat (optional): Speeds up rooting in cooler climates.
- ● Fertilizer (low-dose): Add to water after roots form (e.g., diluted fish emulsion).
- ● Grow lights: If natural light is limited (12–16 hours/day).
Instructions for propagating hydrangeas from cuttings
Here’s how I’ve reliably rooted hydrangeas—whether in water or soil—with minimal fuss.
🌿 Step 1: Select Healthy Stems for Cuttings
Choose 4-6 inch long stems from this year’s growth—they’re still flexible, not woody. Look for sections with at least 3-4 sets of leaves and avoid any with flower buds or blooms. I always snip just below a leaf node (the bump where leaves attach) with clean, sharp pruners—this is where roots will sprout.
Timing matters: Take cuttings in early summer when new growth is vigorous but not yet hardening off. Morning is best—the stems hold moisture longer. Strip the lower leaves (about the bottom 2 inches) so only a few top leaves remain. This reduces moisture loss and directs energy to root development.
💧 Step 2: Prepare Cuttings for Rooting (Water or Soil)
For water rooting, fill a clean jar with room-temperature water and add a rooting hormone tablet (optional but speeds things up). Submerge only the stripped bottom 2 inches—never the leaves. Change the water every 3-4 days to prevent bacterial growth. You’ll see tiny white roots in 2-3 weeks if conditions are right.
For soil rooting, mix equal parts perlite and peat moss (or use a pre-made propagation mix) in a small pot. Dip the cut end in rooting hormone powder, then insert the cutting 2 inches deep at a slight angle. Water lightly until the mix feels evenly moist but not soggy. Cover the pot with a plastic bag to retain humidity—this mimics a greenhouse.
☀️ Step 3: Provide Ideal Conditions for Root Growth
Place your cuttings in bright, indirect light—no direct sun yet. A 65-75°F spot works best, so a kitchen windowsill or under grow lights is perfect. If using water, keep the jar away from drafts or heat sources, which can stress the stems. For soil-rooted cuttings, remove the plastic bag daily for 10 minutes to prevent mold after 1 week.
Water-rooted cuttings need fresh water every 3-4 days—stagnant water breeds algae and bacteria. Soil-rooted cuttings should stay consistently moist (stick your finger in—top inch should feel damp). You’ll know it’s working when new leaves appear—this means roots are actively growing. I’ve seen roots form in 3-4 weeks with consistent care.
✂️ Step 4: Transplant Rooted Cuttings to Soil
Once roots reach 1-2 inches long (for water-rooted) or when new growth emerges (soil-rooted), it’s time to transplant. For water-rooted cuttings, gently rinse off any algae from the roots, then plant in a small pot with well-draining potting mix. Bury the roots 1 inch deep and water lightly to settle the soil.
For soil-rooted cuttings, carefully remove the plastic bag and acclimate them to air for 2-3 days before transplanting. Use a 6-inch pot with moistened potting mix and firm the soil around the base. Keep the new transplant in bright, indirect light for 1 week before introducing it to morning sun. Overwatering now is the biggest mistake—let the top inch of soil dry between waterings.
🌱 Step 5: Care for New Hydrangea Plants
After transplanting, your new hydrangeas need consistent moisture but no soggy soil. Water when the top 2 inches feel dry, and fertilize lightly with a balanced liquid fertilizer (10-10-10) every 4-6 weeks in growing season. You’ll know they’re thriving when they produce new leaves and healthy stems—this usually happens within 4-6 weeks of transplanting.
Once established, hydrangeas love morning sun and afternoon shade, especially in hot climates. Prune back any leggy growth in early spring to encourage bushier growth. With patience, your cuttings will mature into full-sized hydrangeas in 1-2 years—and you’ll have saved money while expanding your garden!
Tips & tricks for perfect hydrangea propagation
Between us, these little details make all the difference between cuttings that thrive and ones that wilt. Here's what I've learned after years of experimenting with hydrangeas.
Timing is Everything: That 10-minute daily air exposure after week one for soil-rooted cuttings is non-negotiable. I learned this the hard way when mold took over my first batch. The key is to do this in the morning when humidity is naturally lower, giving your cuttings time to dry slightly before nightfall. For water rooting, morning is also best for changing water—this is when stems are most hydrated and can handle the fresh water without stress.
Leaf Node Location: When selecting stems in Step 1, look for leaf nodes that are slightly swollen and green, not brown or dried out. These are the sweet spots for root development. I always make my cut just below the node at a 45-degree angle—this increases surface area for root growth. Make sure your pruners are clean and sharp; dull blades crush stems, which can introduce bacteria and prevent root formation.
Temperature Matters: The 65-75°F range isn't just a suggestion—it's the Goldilocks zone for root development. If your home runs cooler, consider using a heat mat under soil-rooted cuttings. For water rooting, keep the jar away from cold drafts or heat vents. I've noticed that when temperatures dip below 60°F, root growth slows dramatically. A simple solution is to place your cuttings on top of the fridge (not near the coils) for a gentle warmth boost without direct heat.
Transplanting Transition: The 2-3 day acclimation period before transplanting soil-rooted cuttings is where most people fail. I've seen cuttings wilt overnight when moved too quickly. Start by removing the plastic bag for just 10 minutes on day one, then gradually increase to 30 minutes by day three. This slow adaptation prevents transplant shock. For water-rooted cuttings, that 1-inch burial depth is crucial—any deeper and the roots suffocate, any shallower and they dry out.
Pro Tips for Cuttings Of Hydrangeas
- Between us, these little details make all the difference between cuttings that thrive and ones that wilt.
- Timing is Everything: That 10-minute daily air exposure after week one for soil-rooted cuttings is non-negotiable.
- Leaf Node Location: When selecting stems in Step 1, look for leaf nodes that are slightly swollen and green, not brown or dried out.
Frequently asked questions
about propagating hydrangeas from cuttings—because every gardener deserves a little clarity!How long does it take for hydrangea cuttings to root?
Patience is key! In water, roots typically appear in 2–4 weeks, while soil-rooted cuttings may take 4–8 weeks. Factors like temperature (65–75°F), humidity, and light speed up the process. Keep an eye out for tiny white or brownish roots—your first sign of success!
Can I root hydrangea cuttings in water year-round?
Nope! Stick to late spring or early summer (May–June) for best results. Hydrangeas are semi-dormant in winter and overheat in scorching summer. If you must try other times, use a heating mat or grow light to mimic ideal conditions.
What if my hydrangea cuttings rot before rooting?
Rot is a common hiccup—usually from too much moisture or poor drainage. If you’re rooting in water, change it every 3–5 days. For soil, ensure pots have drainage holes and use a perlite-sand mix. Trim mushy stems and replant healthy sections to save your cuttings! →
Are there hydrangea varieties that root easier than others?
Bigleaf (mophead/lacecap) and panicle hydrangeas
are the easiest for beginners. Oakleaf and some climbing varieties can be trickier. If you’re unsure, ask your local nursery for “softwood” cuttings—young, flexible stems root best.
Should I fertilize hydrangea cuttings while rooting?
Hold off on fertilizers until roots form! Once you see growth (new leaves or stems), use a diluted, balanced fertilizer (10-10-10) every 4–6 weeks. Over-fertilizing can burn tender roots. Think of this phase as a low-key recovery period.
Can I root hydrangeas from store-bought flowers?
Unfortunately, no—those blooms are sterile (no viable stems). Save cuttings from your own hydrangea bushes or ask a neighbor with a healthy plant. Pro tip: Choose stems with 2–3 sets of leaves and no flowers for best results.
Wrapping up and next steps
Growing hydrangeas from cuttings is a rewarding way to expand your garden—whether in water or soil, the key is patience and the right conditions. 🌱 With the right tools, timing, and care, you’ll soon watch those roots sprout and new blooms emerge!
Now that you’re armed with tips and troubleshooting advice, grab those cuttings and get propagating. Try one method this season, and share your progress with fellow gardeners for extra motivation!