
Pruning
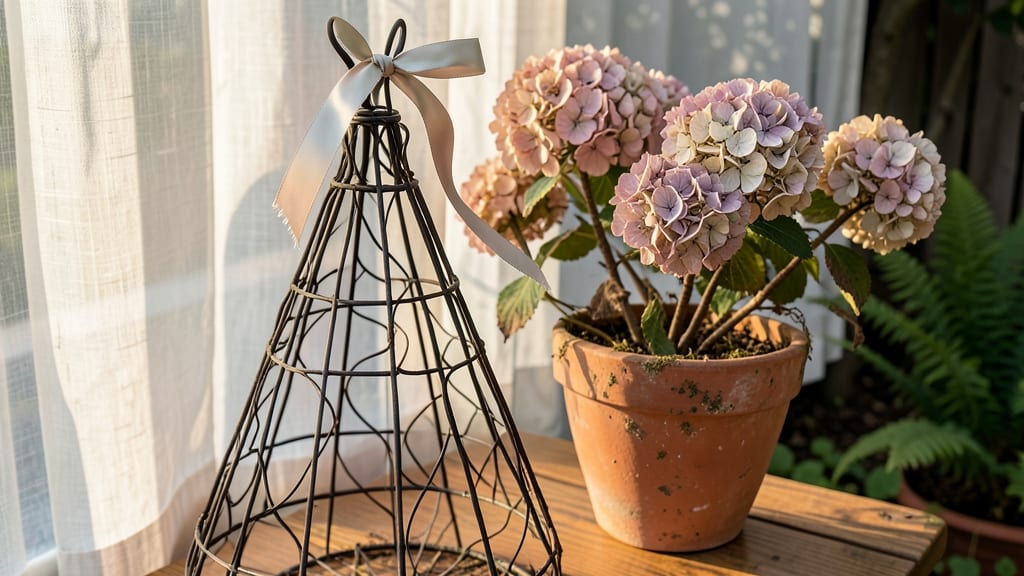
Creating a dried hydrangea Christmas tree turns your garden's summer blooms into a year-round centerpiece that smells like nostalgia and looks like a fairy tale. ✨ I've been making these for years—each one starts with the leftover hydrangeas from my summer garden, transformed into something that outlasts every other holiday decoration.
The best part? It's a project that connects you to your garden even when it's buried under snow.
You'll need just a few simple supplies: dried hydrangea clusters (fresh or pre-dried), a sturdy container (think vintage tins, woven baskets, or even a repurposed ladder), and some dried botanicals like pinecones, eucalyptus, or berries for texture.
The magic happens when you arrange the hydrangeas in a tree-like shape, letting their natural layers create depth. This isn't just a decoration—it's a conversation starter that tells the story of your garden all year long.
The result is a textured, fragrant centerpiece that fills your home with the quiet charm of the garden. Unlike plastic decorations, this arrangement gets better with age, developing a patina that feels authentically yours.
You'll want to make one for every room—each one a reminder of the beauty that grows in your own backyard.
Works perfectly for rustic farmhouse vibes, cozy cabins, or even modern spaces that love natural textures. The best time to start is late summer or early fall, when hydrangeas are still fresh but the holiday season feels just around the corner. Let's bring that garden magic indoors!
📚 In This Guide
- What you need
- Instructions
- Tips and common mistakes
- Wrapping up and next steps
What you need
- ● Dried hydrangeas: 10–15 large clusters (ensure they’re fully dried and brittle to the touch). Pro tip: 💡 Harvest hydrangeas in late summer or buy pre-dried bundles from craft stores!
- ● Floral wire: 1–2 spools of 20–22 gauge green or brown wire (for structure and securing blooms).
- ● Tree base: A sturdy, tapered branch or a pre-made wooden tree form (8–12 inches tall, 3–5 inches wide at the base).
- ● Scissors or floral shears: Sharp, clean tools for trimming stems and wire.
- ● Hot glue gun + glue sticks: For securing the base and larger stems.
- ○ Spray adhesive (optional but helpful): To hold smaller blooms in place temporarily.
- ● Ribbon or twine: Brown, gold, or white for wrapping the base (e.g., 1 yard).
- ● Miniature ornaments: Tiny pinecones, berries, or dried citrus slices for added texture.
- ● Spray paint: Metallic gold or silver to distress the tree base for a vintage look.
- ● Clear sealant spray: To protect your design from dust (e.g., Mod Podge Outdoor).
- ● Garden twine or fishing line: For hanging lighter blooms without wire visibility.
Step-by-Step instructions for creating a dried hydrangea Christmas tree
Transforming dried hydrangeas into a stunning container Christmas tree is simpler than you think—here's how to craft one that lasts all season.
🌿 Step 1: Gather and Prepare Your Hydrangeas
Start with mature, fully bloomed hydrangeas—the larger the better for that lush, tree-like effect. I like to harvest them in late summer or early fall when the blooms have dried naturally on the plant. Cut stems at a 45-degree angle about 6 inches from the base to encourage water uptake if you plan to condition them first.
For a 4-foot-tall tree, you'll need roughly 15-20 stems of varying lengths. Remove any remaining leaves or green growth—these will only take up space and detract from the floral focus. If the blooms feel brittle, place stems in a bucket of lukewarm water for 24 hours before arranging. This rehydrates them slightly for easier handling.
✂️ Step 2: Trim and Shape the Stems
Trim the bottom of each stem at a clean angle to create a fresh cut. This ensures they’ll hold water if you decide to condition them later. For a natural look, leave the stems uneven—some longer, some shorter—just like a real tree. I like to group stems in three tiers: the longest for the trunk, medium lengths for the middle, and shorter stems for the top.
Use floral wire (not too tight) to loosely bind stems into three main clusters—this mimics the branching of a tree. Start with the largest stems at the base, then work your way up to smaller ones. The goal is a triangular shape, wider at the bottom and tapering toward the top. Space clusters about 4-6 inches apart for a full, bushy appearance.
🪴 Step 3: Secure the Tree Structure
Choose a wide, shallow container (like a 12-inch-wide ceramic pot or wooden box) to anchor your tree. Line the bottom with sphagnum moss—it holds moisture and provides a natural base. Insert the longest stems first, fanning them out to form the trunk. Use floral tape (not wire) to secure the base stems together, leaving room for the moss to stay in place.
Add the middle and top clusters, weaving them into the base stems like branches. Step back occasionally to check the balance—you want a natural, slightly uneven silhouette, not a perfect triangle. Once satisfied, trim any stems that look out of place. For extra stability, tuck small chicken wire around the base to hold everything together.
💧 Step 4: Condition and Preserve for Longevity
If your hydrangeas feel dry or brittle, place the entire arrangement in a bucket of water for 4-6 hours before finalizing. This helps them hold their shape longer. After conditioning, let them dry completely before arranging in the final container. For a long-lasting display, spray the blooms lightly with clear acrylic sealer (available at craft stores) to lock in color and prevent dust buildup.
To keep your tree looking fresh, place it in a cool, dry spot away from direct sunlight or heat sources. If the blooms start to dry out further, mist them lightly with water every 2-3 weeks. With proper care, your dried hydrangea Christmas tree will stay vibrant for 6-12 months—perfect for year-round holiday charm.
Tips & tricks for perfect dried hydrangea arrangements
Here's what nobody tells you about crafting dried hydrangea trees that stay stunning for months.
Selection Matters: Harvest hydrangeas when they've dried naturally on the plant—this ensures they'll hold their shape better. Look for blooms that are fully open and have that papery texture. I've found that French hydrangeas (Hydrangea macrophylla) work best because their large, round blooms create that perfect tree silhouette. Avoid any stems with green leaves still attached, as these will only take up space and detract from the floral focus.
The 24-Hour Soak Secret: That 24-hour lukewarm water soak in Step 1 isn't just about rehydration—it's about reviving the stems' natural flexibility. The water helps plump up the dried blooms slightly, making them easier to arrange without breaking. Pro tip: Add a drop of mild dish soap to the water to reduce surface tension and help the stems absorb moisture more evenly. After soaking, pat the stems completely dry before arranging to prevent mold.
Structural Balance: When creating your three-tier clusters in Step 2, think of it like building a real tree—start with the largest stems at the base to form the trunk, then gradually work your way up to smaller stems. The key is to create a natural taper rather than a perfect triangle. I like to step back every few stems and rotate my container to check the balance from all angles. Uneven spacing is actually more natural looking than a perfectly symmetrical arrangement.
Preservation Hack: The clear acrylic sealer in Step 4 isn't just about locking in color—it's a game-changer for longevity. Spray the blooms lightly (about 6 inches away) in a well-ventilated area, then let them dry completely before arranging. This creates an invisible barrier that repels dust and prevents the blooms from drying out further. For extra protection, I like to place my finished trees in a cool basement or closet during summer months when humidity is lowest.
Pro Tips for Dried Hydrangea Christmas Tree
- Here's what nobody tells you about crafting dried hydrangea trees that stay stunning for months.
- Selection Matters: Harvest hydrangeas when they've dried naturally on the plant—this ensures they'll hold their shape better.
- The 24-Hour Soak Secret: That 24-hour lukewarm water soak in Step 1 isn't just about rehydration—it's about reviving the stems' natural flexibility.
Frequently asked questions
Got questions about creating or caring for your dried hydrangea Christmas tree? You’re not alone! Here are some of the most common queries—and their answers—to help you craft the perfect year-round floral display.
Can I use fresh hydrangeas for this project?
While fresh hydrangeas are stunning, they won’t last long in a dried arrangement. To preserve their shape and color, always dry them first. Hang clusters upside down in a dark, well-ventilated space for 2–4 weeks, or use a dehydrator for faster results. Skipping this step risks mold or wilting.
How long will my dried hydrangea tree last?
With proper care, your dried hydrangea tree can stay beautiful for 1–3 years! Store it in a cool, dry place away from direct sunlight to prevent fading. Dust occasionally with a soft brush, and avoid humidity to keep stems sturdy. Think of it as a low-maintenance, everlasting centerpiece!
What’s the best way to style it for holidays?
For a festive look, pair your dried hydrangea tree with pinecones, berries, or fairy lights. Add a ribbon or twine for a rustic touch, or mix in dried eucalyptus for texture. Pro tip: Spray lightly with hairspray (from a distance!) to keep petals from crumbling when handling.
Can I regrow or reuse the stems after drying?
Once fully dried, hydrangea stems are permanently preserved—they won’t regrow. However, you can rearrange or repurpose them! Use fallen petals in potpourri, or trim stems to create smaller bouquets. Store extra stems in a breathable bag until your next project.
What do I do if my dried hydrangeas attract pests?
Dried flowers can sometimes draw spiders or moths. To prevent this, freeze stems for 24 hours before drying to kill pests, and store your finished tree in a sealed container with cedar blocks or lavender sachets. If pests appear, gently vacuum them away and inspect for hidden eggs.
Wrapping up and next steps
Transforming your dried hydrangeas into a stunning year-round Christmas tree is easier—and more rewarding—than you think! With just a few simple steps, you’ve unlocked a beautiful, eco-friendly decor piece that keeps giving, season after season.
Whether you’re a pruning pro or a beginner, this project proves that sustainability and style can go hand in hand.
Ready to elevate your space? Grab your pruners and get creative! Try experimenting with different container shapes, colors, or even adding twinkling fairy lights for extra magic. The possibilities are endless—so go ahead and make it your own! 🌿✨