Planting
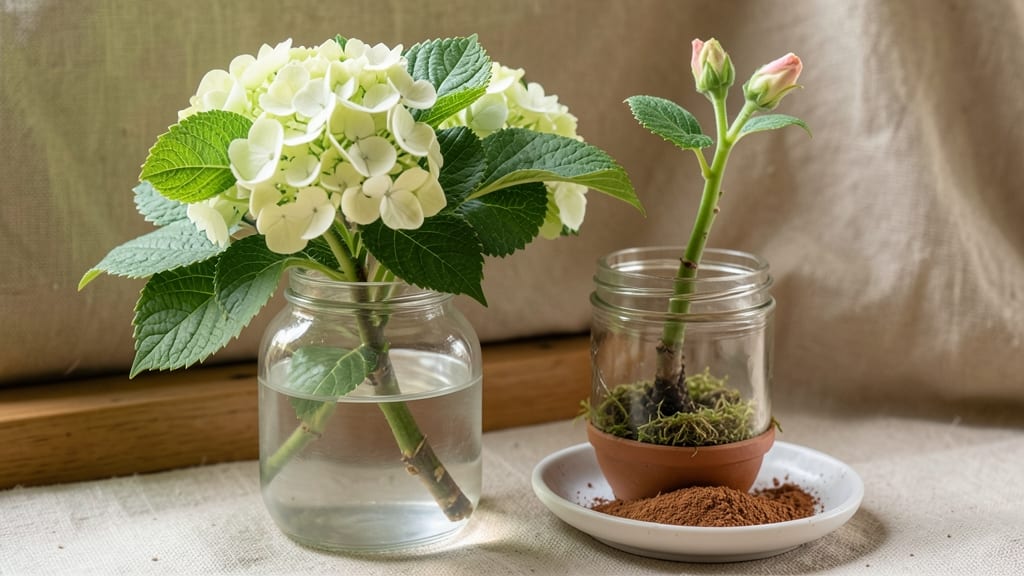
Starting a hydrangea from a cutting is the easiest way to get free, thriving plants—no nursery required. 🌿 I’ve rooted dozens of cuttings, and the secret is timing, the right tools, and a little patience.
Most people give up after the first try, but with these steps, you’ll see roots in just 4-6 weeks.
You’ll need sharp pruners, rooting hormone, and a simple mix of perlite and peat moss. The best time to take cuttings is in late spring or early summer, when new growth is firm but still flexible.
Avoid woody stems—they’re too old and won’t root easily. Once you’ve got your cuttings, the real magic happens in how you prep and place them.
By the end of summer, those cuttings will transform into sturdy young plants ready for their own pot. You’ll love watching the first leaves unfurl and the roots spread through the soil. The best part? These new hydrangeas will bloom just like their parent plants—sometimes even the first year.
This method works for bigleaf, oakleaf, and panicle hydrangeas, and it’s perfect for gardeners who want to multiply their favorite varieties without spending a dime. Let’s get those cuttings growing!
📚 In This Guide
- What you need
- Instructions
- Tips and common mistakes
- Wrapping up and next steps
What you need
- ● Hydrangea cutting: A healthy, non-flowering stem (4–6 inches long) with at least 3–4 leaves, cut at a 45° angle just below a node.
- ● Rooting hormone: A powder or gel (e.g., Clonex or Rootone) to boost root growth.
- ● Small pots or containers: 4–6 oz size (yogurt cups, plastic containers, or seedling trays with drainage holes).
- ● Well-draining potting mix: A blend of 50% perlite or sand and 50% peat moss or coco coir.
- ● Watering can or spray bottle: For gentle hydration (avoid soaking!).
- ● Plastic wrap or humidity dome: To create a mini greenhouse (e.g., a clear plastic bag with holes or a propagator lid).
- ● Scissors or pruning shears: Sharp and sterilized (rubbing alcohol wipe) to make clean cuts.
- ● Heat mat: Keeps soil warm (70–75°F) for faster rooting.
- ● Grow lights: If natural light is weak (12–16 hours/day).
- ● Fungicide: Like Mycorrhizal inoculant to prevent rot.
- ● Label markers: To track cutting dates and varieties.
- ● Newspaper or tray: To catch excess water and keep surfaces clean.
Step-by-step instructions for propagating hydrangeas from cuttings
Here's the simple, foolproof method I've used to grow dozens of hydrangeas from just a few cuttings.
🌿 Step 1: Select and Prepare Healthy Cuttings
Choose 4-6 inch long stems from the current season's growth—look for new, flexible shoots that haven't hardened yet. These are your best candidates for rooting. I always pick cuttings just below a leaf node where roots will form most easily. Use clean, sharp pruners to make a clean cut at a 45-degree angle—this increases surface area for root growth.
Remove all but the top 2-3 sets of leaves to reduce moisture loss. The remaining leaves should be healthy and vibrant. I like to trim the lower leaves completely off and cut the upper leaves in half to further minimize evaporation. Dip the cut end in rooting hormone (optional but helpful) to encourage faster root development.
💧 Step 2: Set Up Your Rooting Medium
Fill a clean container with perlite or vermiculite—these materials stay sterile and provide excellent drainage while retaining enough moisture. I use a small plastic propagator or even a repurposed yogurt cup with drainage holes poked in the bottom. Moisten the medium until it feels like a wrung-out sponge—damp but not soggy.
Make a small hole with your finger or a pencil about 2 inches deep and insert the cutting so that only the lower half (with no leaves) is buried. Gently firm the medium around the stem to eliminate air pockets. This ensures good contact between the cutting and the rooting medium, which is crucial for successful root formation.
☀️ Step 3: Create Ideal Growing Conditions
Place your cuttings in a location with bright, indirect light—think morning sun or filtered light from a sheer curtain. Direct sunlight can scorch tender new growth. I keep my propagator in a warm spot, ideally between 65-75°F, which mimics natural spring conditions. A simple plastic bag loosely draped over the container creates a humidity dome without trapping too much heat.
Keep the medium consistently moist by misting lightly every 2-3 days or when the surface feels dry to the touch. Avoid soaking the medium—waterlogged conditions will cause rot before roots can form. In about 4-6 weeks, you'll see new growth at the top, which means roots are developing below ground. This is your signal that propagation is working!
🪴 Step 4: Transition to Soil and Pot Up
Once you notice new leaf growth (usually after 6-8 weeks), it's time to transplant your cuttings. Gently remove them from the propagator and inspect for roots—you'll often see a small white root ball forming. Plant each cutting in its own 4-inch pot filled with a mix of 50% potting soil and 50% perlite for continued drainage.
Water lightly after potting and place the new plants in partial shade for a week to help them adjust. Gradually introduce them to more sunlight over the next 2 weeks. By late spring or early summer, your rooted cuttings will be ready to move into the garden or larger containers. Here's where it gets fun—watch them bloom next season with the same vibrant colors as their parent plant!
Tips & tricks for perfect hydrangea propagation
These simple tricks will help you turn even the trickiest cuttings into thriving hydrangeas with minimal fuss.
Timing is Everything: The best time to take cuttings is in late spring or early summer when new growth is vigorous and flexible. This is when your hydrangea is putting all its energy into growing, making it much more likely to root successfully. Avoid taking cuttings from hardened, woody stems—they're too old to root easily.
Rooting Hormone Hack: While rooting hormone is optional, it can double your success rate! If you're using it, make sure to dip just the cut end of your stem—not the leaves. I like to use a small container of rooting hormone powder and tap off any excess before planting. This prevents clumping and ensures even coverage where it matters most.
Lighting Secrets: That bright, indirect light is crucial—think of it as the Goldilocks zone for your cuttings. Too much direct sun will scorch the tender leaves, while too little light means weak, leggy growth. A simple solution is to place your propagator near an east-facing window where morning sun is gentle but consistent. If you don't have good natural light, a grow light on a timer for 12-14 hours daily works wonders.
Transplanting Confidence: When you're ready to move your rooted cuttings to soil, don't be afraid to handle them gently but firmly. The roots are delicate at first, so I recommend using a small spoon or butter knife to help loosen the perlite around the roots before transferring. This makes the transition to their new pot much smoother and reduces transplant shock.
Pro Tips for Start A Hydrangea Plant From A Cutting
- These simple tricks will help you turn even the trickiest cuttings into thriving hydrangeas with minimal fuss.
- Timing is Everything: The best time to take cuttings is in late spring or early summer when new growth is vigorous and flexible.
- Rooting Hormone Hack: While rooting hormone is optional, it can double your success rate!
Frequently asked questions
Got questions about propagating hydrangeas from cuttings?
You’re not alone! Here are answers to the most common concerns to help you succeed.
When is the best time to take hydrangea cuttings?
The ideal time is late spring to early summer (May–July), when new growth is firm but not woody. Avoid taking cuttings after the first hard frost or during extreme heat, as they struggle to root in these conditions. Pro tip: Morning is the best time to cut—hydrangeas are hydrated and ready for action!
How long does it take for hydrangea cuttings to root?
Most hydrangea cuttings take 4–8 weeks to develop roots, depending on the variety and conditions. Keep the soil consistently moist (not soggy) and maintain warm, humid conditions. Patience pays off—check for roots by gently tugging the cutting after 6 weeks. If resistance is felt, roots are forming!
Why are my hydrangea cuttings turning yellow or mushy?
Yellowing or mushy stems usually mean overwatering or rot. Ensure your cuttings have partial shade (bright but indirect light) and well-draining soil. If the base feels soft, trim the affected area and replant in fresh, sterile medium. Pro tip: Use a spray bottle for gentle hydration to avoid soggy soil.
Can I propagate hydrangeas from store-bought flowers?
Nope! Store-bought hydrangeas are often treated with growth inhibitors or are already blooming. Instead, take cuttings from healthy, non-flowering stems (look for new growth with leaves but no buds). If you’re unsure, ask the nursery for untreated, disease-free plants.
What’s the best way to overwinter hydrangea cuttings?
If your cuttings aren’t rooted by fall, move them indoors to a cool, bright spot (like a garage or basement) and reduce watering. Keep them dormant until spring, then resume care. Alternatively, root them in pots and bring them inside before the first frost. Pro tip: Label your cuttings to track progress!
Still stumped? Drop your questions in the comments—we’re happy to help your hydrangeas thrive!
Wrapping up and next steps
Starting a hydrangea from a cutting is a rewarding way to grow these stunning blooms—and you’ve got all the tools to succeed! With the right timing, sharp scissors, and a little patience, you’ll soon see roots forming and new growth sprouting. Don’t forget to cheer on your plant as it thrives!
Now that you’re ready to propagate, take that next step—place your cutting in its new home and watch your garden flourish. Happy planting! 🌱✨