
Pruning
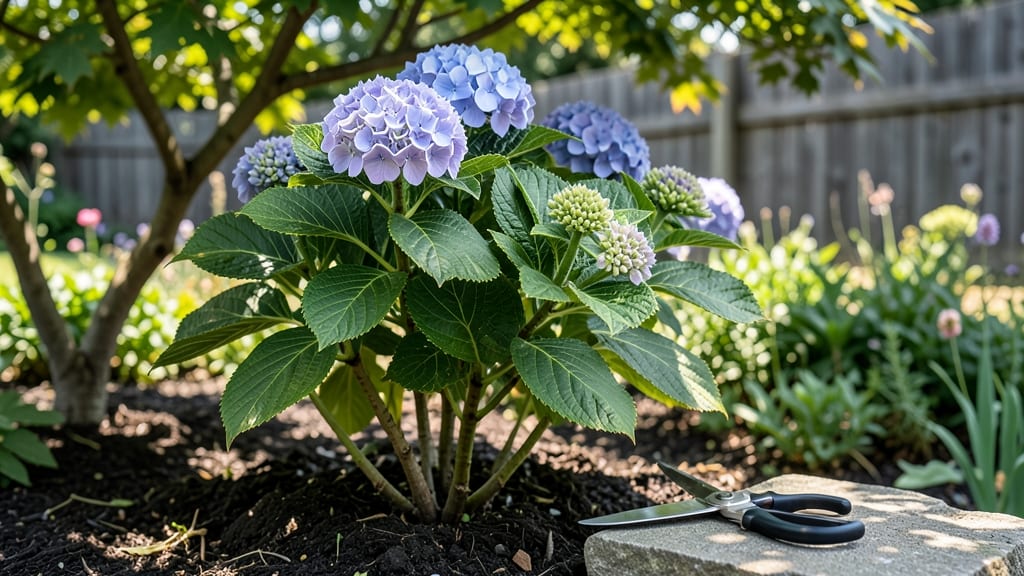
Trimming hydrangeas in summer isn't just about shaping—it's how you guarantee next year's biggest, showiest blooms. 🌸 I spent years watching my hydrangeas produce smaller flowers until I learned the right timing and technique.
The key is knowing when to cut and what to avoid cutting, because one wrong snip can rob you of next season's display.
You only need three things: sharp bypass pruners, clean gloves, and a clear head. Most people overcomplicate this—it's about removing spent blooms and shaping lightly, not hacking back like you're trimming a hedge.
The right cuts encourage new growth where you want it, while the wrong ones leave your plant struggling to recover.
By summer's end, you'll have hydrangeas that look fuller now and produce 30-50% more blooms next year. The flowers will be larger, the branches stronger, and your neighbors will be asking for your secret. Just remember: patience and precision pay off in spectacular color.
Works for all common varieties—mophead, lacecap, panicle—though each has slight differences. Let's get those blooms growing bigger than ever before.
📚 In This Guide
- What you need
- Instructions
- Tips and common mistakes
- Wrapping up and next steps
What you need
- ● Pruning shears or secateurs: Sharp, clean, and disinfected (bypass pruners work best for clean cuts).
- ● Garden gloves: Heavy-duty or cut-resistant (to protect your hands from thorns and blisters).
- ● Disinfectant (rubbing alcohol or bleach solution): 1 part bleach to 9 parts water (to sterilize tools and prevent disease spread).
- ○ Pruning saw (optional but helpful): For thicker stems (over ½ inch in diameter).
- ● Garden twine or plant ties: For securing heavy branches if needed.
- ● Bucket or trash bag: For collecting pruned branches.
- ● Hand lens or magnifying glass: To inspect buds and growth points closely.
- ● Marking spray (paint or flagging tape): To label branches if you’re unsure which to trim.
- ● Knee pads or stool: For comfort if your hydrangeas are tall or bushy.
- ○ Pruning sealant (optional): For large cuts to prevent disease.
- ● Know your hydrangea type! Bigleaf, panicle, or oakleaf hydrangeas each have unique pruning needs.
- ● Check the weather: Choose a calm, dry day to avoid spreading bacteria or fungus.
- ● Water nearby: A hose or watering can to clean tools and rinse off sap.
Step-by-step guide to trimming hydrangeas in summer
Summer pruning is your chance to shape hydrangeas and set up next year's show-stopping blooms.
✂️ Step 1: Identify Your Hydrangea Type and Last Year's Blooms
First, figure out which type you're working with—this makes all the difference. Bigleaf hydrangeas (Hydrangea macrophylla) and oakleaf hydrangeas (H. quercifolia) bloom on old wood, meaning their flower buds form the previous summer and winter. Cutting them back now removes next year's blooms. Look for last year's flower clusters—they're still attached as dried stems or brown seed heads.
Smooth hydrangeas (H. arborescens) and panicle hydrangeas (H. paniculata), on the other hand, bloom on new wood, so you can trim them more aggressively. These types produce flowers on current season's growth, so pruning in summer encourages bushier, fuller plants. If you're unsure, check the leaf shape and flower type: bigleaf and oakleaf have larger, flatter blooms, while panicle and smooth types have cone-shaped flowers.
🌿 Step 2: Remove Dead, Diseased, or Weak Growth
Grab your pruners and start by removing any stems that are dead, diseased, or crossing. Dead stems are brown and brittle, while diseased ones may have black spots, mold, or oozing sap. Cut these back to healthy wood—you'll know it's healthy if it's green underneath the bark and firm to the touch. This step improves airflow and prevents future problems.
Next, look for weak or spindly stems that aren't contributing to the plant's structure. These often grow in the center and compete with stronger branches for nutrients. Thin these out by cutting them back to the base. Real talk: hydrangeas can get leggy, so don't skip this step. You're shaping the plant for next year, and removing these weak stems now ensures energy goes to the strongest growth.
✂️ Step 3: Prune for Shape and Airflow (New-Wood Bloomers Only)
If you've confirmed your hydrangea blooms on new wood (like H. arborescens or H. paniculata), it's safe to trim back up to one-third of the plant's height. Start by cutting just above a set of leaves or a bud that faces outward. This encourages growth in the right direction and prevents a lopsided plant. I like to step back every few cuts to check the shape—it's easier to visualize the final form when you're a few feet away.
Focus on opening up the center of the plant. Hydrangeas can get dense, and too much shade in the middle leads to fewer blooms and more pests. Cut back the longest stems first, then trim smaller branches to create a natural, balanced shape. Avoid cutting into old wood—you'll know you've gone too far if you see last year's flower clusters still attached. These types of hydrangeas will reward you with bigger, fuller blooms next season if you prune them now.
💧 Step 4: Clean Up and Encourage New Growth
After pruning, rake up and dispose of all the clippings—especially if they show signs of disease. Don't compost diseased material, as it can spread to other plants. Once the area is clear, give the hydrangea a deep drink of water. Pruning stresses the plant, and watering helps it recover faster. I like to water in the early morning so the leaves dry quickly, reducing the risk of fungal issues.
Now, watch for new growth. Within a few weeks, you should see fresh shoots emerging from the pruned areas. This is a good sign! If you're growing panicle hydrangeas, you might even see flower buds forming on the new wood by late summer. For bigleaf and oakleaf types, resist the urge to prune further—you're preserving next year's blooms, so let the plant focus on storing energy for winter.
☀️ Step 5: Monitor and Adjust Light Exposure
Hydrangeas love sunlight but can get sunburned if they're suddenly exposed after years of shade. After pruning, keep an eye on the plant for the next few weeks. If new growth looks pale or crispy at the edges, it's getting too much direct sun. Move it to a spot with morning sun and afternoon shade if possible. Most hydrangeas thrive with 4-6 hours of sunlight daily, but they appreciate some afternoon relief, especially in hot climates.
This is also a great time to check the soil moisture. Hydrangeas need consistent watering, especially after pruning. Stick your finger 1-2 inches into the soil—if it feels dry, it's time to water. Overhead watering can lead to fungal issues, so water at the base instead. Mulch around the plant with 2-3 inches of organic mulch (like shredded bark) to retain moisture and keep roots cool. You'll see stronger growth and bigger blooms next season if you keep the roots happy now.
Tips & tricks for perfect summer hydrangea pruning
Summer pruning sets the stage for next year's blooms—here's how to avoid common mistakes and get the best results.
Hydrangea Type Knowledge: I can't stress this enough—knowing whether your hydrangea blooms on old wood or new wood is the foundation of everything else. For bigleaf and oakleaf types, treat them like delicate works of art: never cut back into last year's flower clusters (those dried stems are next year's blooms!). For smooth and panicle types, you've got more flexibility, but still avoid cutting into old wood. Pro tip: snap a quick photo of your plant before pruning—you'll thank yourself later when you're admiring those blooms next summer.
Pruning Technique: When shaping new-wood bloomers (Step 3), always cut just above a set of leaves or an outward-facing bud. This encourages growth in the right direction and prevents that awkward, lopsided look. I like to make my cuts at a 45-degree angle—it helps water run off the cut and reduces the chance of disease entering the plant. And here's what nobody tells you: if you're unsure where to cut, imagine you're drawing an invisible line from the base of the plant outward—your cuts should follow that line to create an open, airy center.
Tool Maintenance: Your pruners are your best friend during this process, so keep them sharp! Dull blades crush stems instead of making clean cuts, which can damage the plant and invite pests. After each use, wipe them down with rubbing alcohol to remove sap and prevent rust. I also like to store them with a drop of oil on the blades—this keeps them in top condition for next time. And if you're dealing with larger branches, consider using loppers for cleaner cuts on thicker stems.
Post-Pruning Care: After you've finished trimming, don't just walk away! The first 30 minutes after pruning are critical. Give your hydrangea a deep watering right away—this helps it recover from the stress of pruning. I like to water in the morning so the leaves have time to dry completely, which reduces the risk of fungal infections. Then, spread that 2-3 inches of organic mulch around the base to lock in moisture and protect the roots from temperature swings. This simple step makes all the difference in how quickly your plant bounces back.
Pro Tips for Trim Hydrangeas In Summer
- Summer pruning sets the stage for next year's blooms—here's how to avoid common mistakes and get the best results.
- Hydrangea Type Knowledge: I can't stress this enough—knowing whether your hydrangea blooms on old wood or new wood is the foundation of everything else.
- Pruning Technique: When shaping new-wood bloomers (Step 3), always cut just above a set of leaves or an outward-facing bud.
Frequently asked questions
Got questions about summer trimming? You’re not alone! Here are answers to the most common concerns—so you can prune with confidence and keep your hydrangeas thriving.
Can I trim hydrangeas in summer without hurting them?
Yes! Summer pruning is safe for most hydrangeas, especially mophead and lacecap varieties. Focus on removing spent blooms and overgrown stems to encourage bushier growth. Just avoid heavy pruning—stick to light shaping or deadheading to prevent stress. Pro tip: If your plant looks tired, a light trim in late summer (after blooming) can help it recover for next year!
What’s the best time of summer to trim hydrangeas?
The ideal window is late summer (August–September), after your hydrangeas have finished blooming. This gives them time to harden off before winter. Avoid pruning in early summer (June–July)—new growth won’t have time to mature before cold weather. For panicle hydrangeas, you can trim lightly in summer, but wait until fall for heavier cuts.
Do I need special tools to trim hydrangeas in summer?
Not necessarily! Basic tools like clean, sharp bypass pruners or hand pruners work great for summer trims. For larger stems, loppers or a pruning saw may help. Always sterilize tools with rubbing alcohol to prevent disease. Skip hedge shears unless you’re giving your hydrangea a neat, formal shape—they can damage stems.
What if my hydrangeas don’t bloom after summer pruning?
Don’t panic! Hydrangeas bloom on old wood (last year’s growth) or new wood (current year’s growth), depending on the type. If you trimmed too late or too aggressively, they may skip blooming this year—but they’ll rebound next season. For mopheads/lacecaps, avoid cutting back more than 1/3 of the plant. If blooms still don’t appear, check for over-fertilizing (too much nitrogen) or underwatering.
Can I trim hydrangeas if it’s really hot or humid?
Trim during early morning or late afternoon to avoid stressing the plant in extreme heat. If temps are above 90°F (32°C), wait for a cooler, cloudy day to prune. Humidity isn’t a dealbreaker, but sterilize tools and water the plant before/after to help it recover. If you must trim in heat, do it lightly—focus on deadheading rather than heavy shaping.
Wrapping up and next steps
Trimming your hydrangeas in summer isn’t just about tidying up—it’s your secret weapon for bigger, more vibrant blooms next season! 🌸 By following the right techniques (like deadheading spent flowers and shaping your plants), you’ll encourage healthier growth and stunning floral displays.
Don’t wait—grab those shears and give your hydrangeas the love they deserve!
Ready to take it further? Check out our guide on fertilizing hydrangeas for peak performance—your future blooms will thank you!