
Pruning
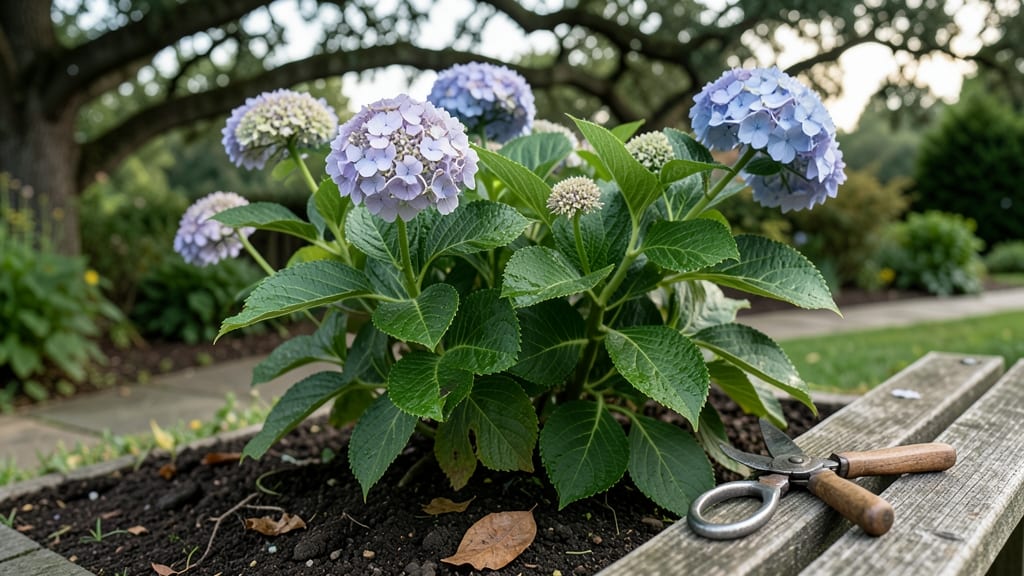
Mastering hydrangea plant care pruning isn’t just about trimming—it’s the secret to those showstopping blooms that last all summer. 🌸 I've learned the hard way that cutting at the wrong time or in the wrong way can leave you with bare stems and... no flowers, but the right approach transforms your bushes into lush, flowering powerhouses.
The key lies in understanding your hydrangea type and timing cuts to match its natural growth cycle.
Most people wait until spring, but that's only half the story. Mophead hydrangeas (like the classic bigleaf variety) need pruning right after they finish blooming, while panicle types (such as 'Limelight') bloom on new growth and can handle a late-winter trim.
You'll need sharp pruners, a ladder for taller bushes, and a clear day to work—no one enjoys sticky fingers from sap-covered tools. The goal is to shape the plant while encouraging next year's flowers.
After pruning, your hydrangeas will reward you with bold, vibrant blooms that last longer than store-bought bouquets. The plants stay healthier, grow fuller, and even resist pests better. Just remember: deadhead spent flowers in fall for cleaner growth, and feed with a balanced fertilizer in early spring.
The difference between a pruned and unpruned hydrangea is like night and day—trust me, your neighbors will notice.
This method works for both garden beds and container-grown hydrangeas, whether you're dealing with a single bush or a whole hedge. The only real mistake is not starting—so grab those shears and let's get those stems looking sharp for a season of stunning color.
📚 In This Guide
- What you need
- Instructions
- Tips and common mistakes
- Wrapping up and next steps
What you need
- ● Pruning shears (bypass or anvil type) – Sharp, clean blades (4-6" for small stems, 8-10" for thicker branches). Quantity: 1 pair (or 2 if pruning large bushes).
- ● Loppers – For thicker stems (½"–1.5" diameter). Quantity: 1 pair.
- ● Pruning saw – For stubborn, woody branches (1.5"+ diameter). Quantity: 1.
- ● Disinfectant (rubbing alcohol or 10% bleach solution) – To sterilize tools between cuts. Quantity: Small bottle or spray.
- ● Garden gloves – Cut-resistant or heavy-duty. Quantity: 1 pair.
- ● Twine or plant ties – For securing large branches post-pruning. Quantity: Small roll.
- ● Garden twine or rubber tree ties – To support branches if needed. Quantity: 5-10 pieces.
- ○ Mulch (optional but helpful) – 2-3 inches of shredded bark or pine straw to protect roots post-pruning.
- ● Hand pruners with a ratcheting mechanism – Reduces hand fatigue for long sessions.
- ● Ladder or step stool – For reaching higher branches safely.
- ● Plant food (balanced fertilizer, 10-10-10) – Apply 2-3 weeks post-pruning to boost recovery.
- ● Spray bottle with water – To dampen cuts on large branches to prevent splitting.
- ● Notebook & pen – To sketch your hydrangea’s shape before/after pruning.
Step-by-step instructions for pruning hydrangeas for year-round blooms
Precision cuts keep your hydrangeas lush and flowering—here’s how to time and shape them like a pro.
✂️ Step 1: Identify Your Hydrangea Type and Bloom Time
First, figure out if your hydrangea is a mophead (big, round blooms) or panicle (cone-shaped flowers). Mopheads bloom on old wood (last year’s growth), while panicles bloom on new wood (current season’s stems). Check your plant’s flowers—if they’re already open in early summer, it’s likely a mophead.
This matters because pruning at the wrong time can mean no blooms. I always mark my calendar: panicles get pruned in late winter, while mopheads wait until after flowering. If you’re unsure, snap a photo and compare it to online guides—mistaking one for the other means losing next year’s blooms.
✂️ Step 2: Prune at the Right Time for Your Variety
For panicle hydrangeas, prune 2-3 weeks after the first hard frost (or in late winter for mild climates). Cut back 1/3 of the oldest stems to the ground—this encourages fresh, vigorous growth. The goal is to open up the center so air circulates, preventing fungal issues. I like to make clean cuts just above a bud or leaf node (where new growth emerges).
For mophead hydrangeas, wait until after they finish blooming in summer. Prune spent flowers down to the first set of 5 leaf nodes below the bloom. Never cut into old wood—you’ll sacrifice next year’s flowers. If your plant looks leggy, you can lightly trim back some stems to encourage bushiness, but avoid heavy pruning.
✂️ Step 3: Shape and Thin for Airflow and Light
Step back and assess the plant’s structure. Remove crossing or rubbing branches first—they’ll damage each other and invite disease. Next, thin out weak, spindly stems growing inward. Aim for an open vase shape with sunlight reaching the center. I use sharp bypass pruners (never dull shears) to make clean cuts at a 45-degree angle just above a bud.
For largeleaf hydrangeas, avoid heavy pruning—they bloom on old wood too. Just remove dead or diseased stems and trim back 1/4 of the oldest stems to the ground. The key is selective thinning, not aggressive cutting. If your plant looks crowded, focus on removing 2-3 of the oldest stems each year to rejuvenate it.
🌿 Step 4: Clean Up and Fertilize for New Growth
After pruning, sterilize your tools with rubbing alcohol to prevent spreading disease. Remove all pruned material from the area—don’t leave clippings under the plant, as they can harbor pests. I like to rake up fallen leaves too, since hydrangeas hate soggy roots in winter.
Fertilize 4-6 weeks after pruning with a balanced, slow-release fertilizer (10-10-10 or similar). Water deeply to help roots recover, and mulch with 2-3 inches of organic mulch (like shredded bark) to retain moisture. Avoid high-nitrogen fertilizers—they encourage leafy growth at the expense of flowers.
⏰ Step 5: Monitor and Adjust Through the Growing Season
Check your hydrangeas monthly for new growth. If stems look leggy or sparse, they need more light—move them to a sunnier spot (but avoid harsh afternoon sun, which can scorch leaves). Pinch back new growth in early summer to encourage bushier, fuller plants. Just snip off the last few inches of the stem with your fingers or small pruners.
Watch for yellowing leaves—this usually means overwatering or poor drainage. Hydrangeas prefer moist but well-drained soil. If blooms fail to form, your pruning timing might be off. Adjust next year: panicles need winter pruning, while mopheads wait until summer. Keep notes on what worked (or didn’t)!
Tips & tricks for perfect hydrangea pruning
Here's what nobody tells you about keeping your hydrangeas thriving after the cut.
Timing Secret: The 2-3 week window after your first hard frost for panicle hydrangeas is non-negotiable. If you're in a mild climate where frost is unpredictable, I've found that pruning in late February works best—just check your local frost dates. For mopheads, wait until the flowers have completely faded and browned before cutting, or you'll be left with bare stems next season. This patience pays off with bigger, healthier blooms.
Cutting Technique: That 45-degree angle isn't just for looks—it prevents water from pooling on the cut, which can rot the stem. I always make my cuts just above a bud or leaf node, where new growth will emerge. For largeleaf hydrangeas, focus on removing only the oldest stems (about 1/4 of them) rather than hacking away indiscriminately. This selective approach maintains next year's blooms while rejuvenating the plant.
Pruning Mistake Rescue: If you accidentally pruned your mophead hydrangea too early, don't panic! The plant can still recover. Just be extra gentle with it this season—water consistently, fertilize lightly, and avoid heavy pruning next year. Sometimes the best thing you can do is nothing at all. The plant's natural resilience often surprises people with how quickly it bounces back.
Post-Pruning Care: Those 4-6 weeks before fertilizing are crucial. I've seen people rush to add fertilizer right after pruning, which can actually burn the fresh cuts. Instead, let the plant focus on recovering from the pruning stress first. The 2-3 inches of mulch you add creates a perfect moisture barrier—just make sure it doesn't touch the stems directly, which can cause rot.
Pro Tips for Hydrangea Plant Care Pruning
- Here's what nobody tells you about keeping your hydrangeas thriving after the cut.
- Timing Secret: The 2-3 week window after your first hard frost for panicle hydrangeas is non-negotiable.
- Cutting Technique: That 45-degree angle isn't just for looks—it prevents water from pooling on the cut, which can rot the stem.
Frequently asked questions
When is the best time to prune hydrangeas?
The ideal time depends on your hydrangea type! For mophead and lacecap varieties (which bloom on new wood), prune in late winter or early spring before new growth starts. For bigleaf and oakleaf types (which bloom on old wood), prune right after flowering to avoid cutting off next year’s blooms. Always avoid pruning in fall—it can stimulate tender growth that may freeze.
How do I know if I’ve pruned too much?
If you’ve cut back more than 1/3 of the plant’s stems or removed the oldest wood (thick, woody stems), you may have over-pruned. Signs include bare stems, no new growth by spring, or fewer blooms than usual. For severe cases, hydrangeas can recover, but it may take 1-2 seasons. Always err on the side of caution—less is often more!
Why aren’t my hydrangeas blooming after pruning?
Bloom issues usually stem from pruning at the wrong time or cutting back old wood (for new-wood bloomers) or over-pruning (for old-wood bloomers). Double-check your variety: Bigleaf hydrangeas (like Endless Summer) can rebloom on new wood, but mopheads like Nikko Blue need last year’s stems. Also, ensure they get 6+ hours of sun and consistent moisture.
Can I prune hydrangeas in summer?
Yes, but only lightly! Light summer pruning (removing dead or diseased stems) is safe, but avoid heavy cuts. For new-wood bloomers, summer pruning can stimulate more flowers if done early. For old-wood bloomers, wait until after flowering. Pro tip: Deadhead spent blooms to encourage reblooming in compatible varieties like Endless Summer.
What if my hydrangea looks sad after pruning?
Don’t panic! Hydrangeas are resilient. If it looks leggy or sparse, focus on watering deeply (1-2 inches per week) and feeding with acid-loving plant fertilizer in spring. Mulch around the base to retain moisture. New growth should appear in 4-6 weeks. If stems stay bare, it might need more sun or a soil pH adjustment (aim for 5.2–5.5 for blue blooms, 6.0+ for pink).
Wrapping up and next steps
Mastering hydrangea plant care and pruning is your ticket to vibrant, long-lasting blooms that turn heads year after year! 🌸 With the right timing, tools, and techniques—whether you’re deadheading, shaping, or rejuvenating—you’ll keep your hydrangeas thriving. Don’t wait: grab those shears and give your plants the love they deserve!
Ready to transform your garden? Start by observing your hydrangeas’ growth habits and experimenting with pruning styles. Check out our step-by-step guide for a refresher, then share your progress—we’d love to see your blooming success! 🌿