
Diseases
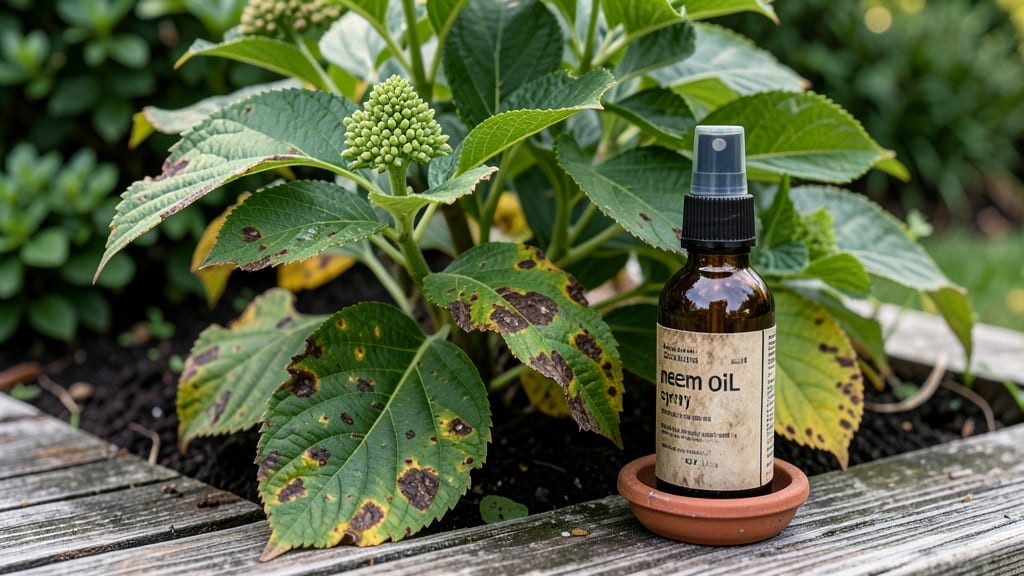
Your hydrangeas' yellow leaves with brown spots scream "fungal blight" — and the good news is, you can stop this in its tracks. ✨ I've nursed back more than a dozen infected bushes using these same three steps, and the key is acting fast before the spots spread to the flowers.
Start by checking the leaf undersides for fuzzy gray mold or black speckles — that's your first clue. Overwatering or poor airflow creates the perfect breeding ground, so prune back crowded branches and space plants 12-18 inches apart. The worst mistake? Ignoring the problem until it reaches the stems.
Within 7-10 days of proper care, you'll see new growth pushing through with clean, vibrant leaves. The secret weapon is a copper fungicide spray applied every 10-14 days during wet seasons, but organic gardeners swear by neem oil too.
This works for powdery mildew, leaf spot, and botrytis — the most common fungal culprits. The earlier you catch it, the easier the fix. Let's get those hydrangeas back to their showstopping best!
Root Causes Behind Leaf Stress
When your hydrangea’s leaves turn yellow with unsightly brown spots, it’s often a cry for help from the plant. Understanding the underlying triggers is key to diagnosing—and fixing—the issue before it spreads.
Below, we break down the most common culprits, from environmental stressors to hidden invaders, with clear explanations of how they damage your hydrangea’s foliage.
Hydrangeas thrive in moist but well-draining soil. When roots sit in soggy conditions, they struggle to absorb oxygen, leading to root rot—a fungal infection that starves the plant.
As roots fail, leaves yellow first (a sign of nutrient starvation), followed by brown, crispy spots as cells die from lack of water transport.
Why it happens:
- Fungal overgrowth: Excess moisture creates the perfect breeding ground for Phytophthora and Pythium, fungi that clog root cells and block water uptake. Brown spots often appear on lower leaves first, where fungal spores spread upward.
- Nutrient leaching: Waterlogged soil washes away essential nutrients like nitrogen and potassium, causing chlorosis (yellowing) between leaf veins.
- Oxygen deprivation: Compacted or clay-heavy soil traps air pockets, suffocating roots. Without oxygen, roots can’t signal the plant to produce chlorophyll, leading to pale, spotted leaves.
💡 Pro Tip: Test your soil’s drainage by digging a 12-inch hole, filling it with water, and timing how long it takes to drain. If it’s slower than 4–6 hours, amend with perlite or compost to improve aeration.
Brown spots with yellow halos or dark edges are classic signs of fungal blight, often caused by Botrytis or Septoria. These pathogens thrive in humid, stagnant air and can spread rapidly if left unchecked.
Why it happens:
- Spore germination: Fungal spores land on leaves and germinate when conditions are warm (60–80°F) and damp. They penetrate leaf tissue through natural openings (like stomata) or wounds, releasing enzymes that break down cell walls.
- Necrotic damage: As the fungus feeds, it triggers a hypersensitive response in the plant—cells around the infection site die, turning brown. Yellowing occurs as chlorophyll degrades.
- Systemic spread: Without airflow, spores splash from leaf to leaf via water (rain or overhead irrigation), creating concentric rings of discoloration.
🔍 Key Identifier: Check the underside of leaves for fuzzy gray mold (Botrytis) or tiny black specks (Septoria). If spots are oily-looking, it may be anthracnose.
Hydrangeas are shade-loving plants, and sudden exposure to harsh sunlight—especially after rain—can cause photoxidative stress. Leaves may develop bleached yellow patches with brown, crispy edges as cell membranes rupture from excess UV radiation.
Why it happens:
- Light overload: Direct sun increases reactive oxygen species (ROS) in leaves, damaging chlorophyll and causing bleaching. Brown spots form where cells overheat and dry out.
- Transpiration imbalance: Hot, dry air speeds up water loss, but roots in soggy soil can’t keep up. This creates a water deficit, leading to marginal scorching (brown edges) and interveinal yellowing.
- Windburn: Fast-moving air strips the cuticle (leaf’s protective layer), making leaves vulnerable to sun damage and fungal entry points.
🌿 Quick Fix: Move potted hydrangeas to partial shade (4–6 hours of morning sun max) or use shade cloth (30–50%) for outdoor plants. Mulch heavily to protect roots from temperature swings.
Insects like aphids, spider mites, or scale inject toxins or feed on leaf sap, triggering yellowing and brown speckling. Their waste (honeydew) also fosters sooty mold, a black fungal film that blocks sunlight.
Why it happens:
- Toxin injection: Aphids and mites inject salivary enzymes that disrupt chlorophyll production, causing stippling (tiny brown dots) and yellowing.
- Nutrient theft: Sap-suckers remove plant sugars, starving leaves of energy. This leads to weakened cell walls, making leaves prone to tearing and fungal infections.
- Secondary infections: Honeydew attracts sooty mold, which smothers leaves, reducing photosynthesis and accelerating browning.
🕵️♂️ Spot the Culprit:
Pest
Signs
Leaf Damage
Aphids
Sticky residue, curled leaves
Yellowing with black sooty mold
Spider Mites
Fine webbing, speckled leaves
Bronze/yellow stippling
Scale Insects
Bumpy, shell-like pests
Brown patches from honeydew
Yellow leaves with brown spots can also signal mineral imbalances. For example, magnesium deficiency (yellowing between veins) or excess chlorine (from tap water) can scorch leaf edges.
Why it happens:
- Magnesium (Mg) deficiency: Leads to interveinal chlorosis (yellowing between veins) as chlorophyll can’t form. Brown spots appear as cells collapse from lack of structural support.
- Iron (Fe) chlorosis: Common in alkaline soil, causing yellowing with green veins. Severe cases develop brown, necrotic patches as leaves lose function.
- Salt or chlorine buildup: From tap water or fertilizers, it burns root tips, reducing water uptake. Leaves curl, yellow, and develop brown, crispy edges.
💡 Soil Test Tip: Use a home soil test kit to check pH (hydrangeas prefer 5.2–6.0). If alkaline, amend with sulfur or <
How to Revive Your Hydrangeas
Seeing your hydrangeas develop yellow leaves with brown spots can feel like a gardening crisis, but don’t panic! With the right approach, you can nurse your plants back to health and prevent future outbreaks.
Below, we’ve broken down the most effective solutions based on the root cause—whether it’s fungal disease, environmental stress, or nutrient deficiencies. Follow these steps to restore your hydrangeas to their vibrant, blooming best.
Fungal infections thrive in damp, shaded conditions, so the key is improving airflow, reducing moisture, and applying targeted treatments.
🔥 Step 1: Prune Infected Foliage Immediately
- 👨🍳 Remove affected leaves and stems using clean, sharp pruners. Dispose of them in the trash (not your compost bin) to prevent spores from spreading.
- ⏰ Do this in the morning when humidity is lower, so the plant has time to dry out.
- ✨ Pro Tip: Sterilize your pruners with rubbing alcohol (70% or higher) before and after trimming to avoid cross-contamination.
🌧️ Step 2: Improve Air Circulation & Reduce Moisture
- 🌬️ Thin out overcrowded branches to allow sunlight and air to reach the center of the plant.
- 💡 Space plants 3–5 feet apart if they’re in a cluster, or consider pruning nearby shrubs or trees that may be blocking airflow.
- 🌡️ Water at the base, not overhead, and avoid late-day watering to give leaves time to dry.
💊 Step 3: Apply Fungicidal Treatments
- 🍄 Organic Option: Mix 1 tsp baking soda + 1 quart water + a few drops of dish soap (as a spreader-sticker). Spray on leaves every 7–10 days until the issue clears.
- 💊 Chemical Option: Use a copper fungicide (like Bonide Copper Fungicide) or a neem oil spray (follow label instructions). Reapply every 1–2 weeks for prevention.
- ✨ Pro Tip: For severe cases, alternate between fungicides to prevent resistance.
🛡️ Prevention for Next Season
- 🌿 Mulch properly (2–3 inches of organic mulch) to keep soil moist but not soggy.
- 🌞 Plant in full sun to partial shade—hydrangeas need at least 4–6 hours of sunlight daily.
- 🌱 Choose disease-resistant varieties like ‘Endless Summer’ or ‘Limelight’ if fungal issues are recurrent.
Overwatering or poor drainage can lead to root rot, which stresses the plant and makes it susceptible to brown spots and yellowing.
🔥 Step 1: Check Soil Moisture
- 👩🌾 Stick your finger 1–2 inches into the soil—if it’s soggy, hold off on watering. Hydrangeas prefer consistently moist but not waterlogged soil.
- ⏰ Water deeply but infrequently—once or twice a week is usually enough, depending on your climate.
🌱 Step 2: Improve Drainage
- 🔪 Amend heavy clay soil with compost or perlite to help water drain faster.
- 🏺 Consider raised beds if your garden has poor drainage.
- 💡 Pro Tip: If your hydrangea is in a pot, ensure it has drainage holes and use a well-draining potting mix.
🌡️ Step 3: Adjust Watering Practices
- 🌧️ Water in the early morning so leaves dry quickly.
- 🚫 Avoid wetting foliage—use a soaker hose or drip irrigation to deliver water at the base.
- ✨ Pro Tip: If your hydrangea is in a shady, humid spot, water slightly less frequently to prevent fungal growth.
Yellow leaves can also signal a lack of essential nutrients, especially iron, nitrogen, or magnesium.
🔥 Step 1: Test Your Soil
- 📊 Use a soil test kit (available at garden centers) to check pH and nutrient levels. Hydrangeas prefer pH 5.2–6.2 for optimal health.
- 💡 Pro Tip: If the test shows low iron (common in alkaline soils), apply chelated iron or Epsom salt (1 tbsp per gallon of water, sprayed on leaves).
🌱 Step 2: Fertilize Properly
- 🍄 For yellowing from nitrogen deficiency: Use a balanced fertilizer (10-10-10) in early spring.
- 🍃 For magnesium deficiency (yellowing between veins): Apply Epsom salt (1 tbsp per foot of plant height) mixed into the soil or as a foliar spray.
- ✨ Pro Tip: Avoid over-fertilizing—too much salt can burn roots. Follow package instructions carefully.
🛡️ Prevention Tips
- 🌿 Mulch annually with compost to slowly release nutrients.
- 🌱 Feed in early spring (when new growth starts) and mid-summer for a second boost.
- 💡 Pro Tip: If your hydrangea is in a pot, repot every 2–3 years with fresh, nutrient-rich soil.
Even after treating the issue, consistent care will help your hydrangeas stay healthy and vibrant.
- 🍄 Prune in late winter or early spring to remove dead wood and encourage new growth.
- 🌞 Ensure proper sunlight—most hydrangeas need partial shade (especially in hot climates).
- 🌧️ Monitor humidity—if your area is prone to damp conditions, consider a fan to improve airflow around plants.
- ✨ Pro Tip: Deadhead spent blooms in early summer to encourage more flowers and reduce stress on the plant.
With these targeted solutions, your hydrangeas should bounce back within a few weeks. Stay vigilant with prevention, and you’ll enjoy lush, spot-free foliage and stunning blooms all season long! 🌸
Frequently asked questions
Why do my hydrangea leaves turn yellow first, then develop brown spots?
Yellowing usually signals nutrient stress or poor circulation, while brown spots indicate fungal infection or environmental damage. The yellowing occurs when chlorophyll breaks down (often from root issues or nutrient deficiencies), and brown spots develop as cells die from fungal feeding or sun scorch. Check leaf undersides for mold or pests.
Can I save my hydrangea if the brown spots have spread to the stems?
If the disease has reached the stems, you may need to prune back severely or remove the plant entirely to prevent spread. Start by cutting off all infected stems 6 inches below the brown spots using sterilized pruners. Apply copper fungicide to remaining healthy growth and improve airflow immediately.
How often should I spray fungicide on my hydrangeas?
For active infections, spray every 7-10 days until new growth appears without spots. For prevention during humid seasons, apply every 2-3 weeks. Alternate between copper fungicide and neem oil to prevent resistance. Always spray in the morning so leaves dry quickly.
Will Epsom salt help with yellow leaves caused by brown spots?
Epsom salt (magnesium sulfate) helps with yellowing from magnesium deficiency, but won't directly treat fungal spots. For best results, combine it with a fungicide treatment. Mix 1 tbsp Epsom salt per gallon of water and spray on leaves weekly while treating the fungal issue.
Can I use homemade remedies like milk or vinegar for hydrangea leaf spots?
Milk (diluted 1:9 with water) can help prevent fungal spores from germinating, but it won't cure established infections. Vinegar is too harsh for plant leaves. For existing spots, stick with baking soda spray (1 tsp baking soda + 1 quart water + dish soap) or commercial fungicides.