
Aphids
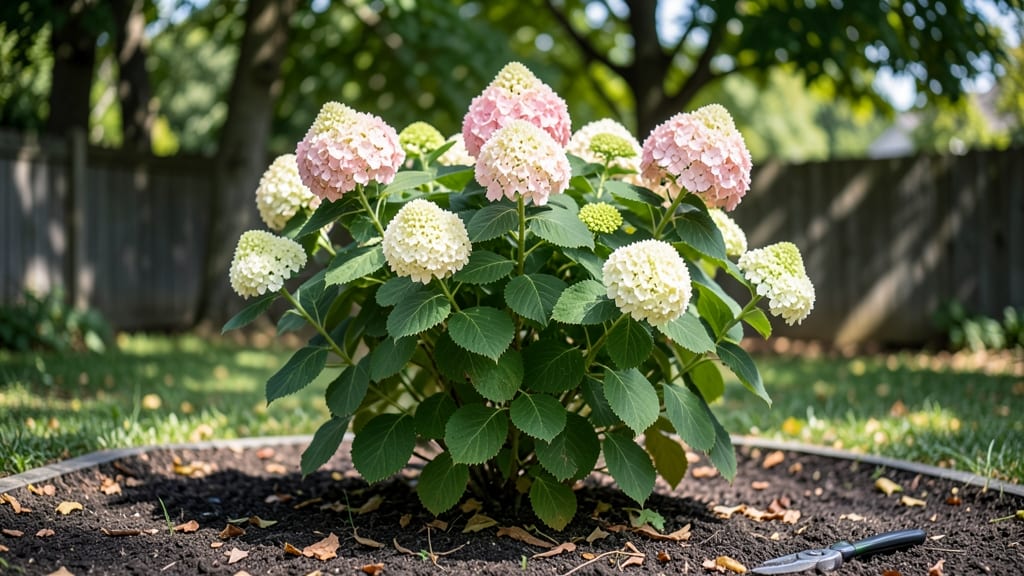
That panicle hydrangea shrub thrives where others fail—drought-tolerant, aphid-resistant, and blooming from summer through frost—so I planted mine last spring, and now they’re the showstopper of my shady border, with those iconic cone-shaped flowers that last when other hydrangeas fizzle. fade.
They’re low-maintenance but not lazy—panicle types need full sun to partial shade and well-draining soil. The real secret? Pruning in late winter or early spring (before new growth starts) to encourage those dramatic, long-lasting blooms. Skip this step, and you’ll end up with leggy shrubs and fewer flowers.
By midsummer, you’ll have football-sized blooms that transition from white to blush pink—plus, the dried flower heads add winter interest. They handle heat and humidity better than other hydrangeas, making them the ultimate carefree beauty. Perfect for beginners or busy gardeners—just plant, water occasionally, and prune once a year.
No fuss, all reward. Here’s how to get started without the common mistakes.
📚 In This Guide
- What you need
- Instructions
- Tips and common mistakes
- Wrapping up and next steps
What you need
- ● Panicle hydrangea plant (e.g., Hydrangea paniculata varieties like 'Limelight,' 'Little Lime,' or 'Vanille Fraise') – 1 healthy nursery-grown shrub (3-5 gallons in size).
- ● Well-draining potting soil – 5-10 gallons (look for a mix labeled for shrubs or hydrangeas).
- ● Garden gloves – 1 pair (to protect your hands from thorns and soil).
- ● Pruning shears – 1 pair (sharp, clean, and sanitized with rubbing alcohol).
- ● Watering can or hose with a gentle spray nozzle – 1 (for deep, even watering).
- ● Organic aphid deterrent – 1 bottle (e.g., neem oil, insecticidal soap, or horticultural oil).
- ● Mulch – 2-3 bags (shredded bark or pine straw to retain moisture and suppress weeds).
- ○ Stakes or garden ties – Optional but helpful (if planting in windy areas).
- ● Slow-release fertilizer (e.g., 10-10-10 or hydrangea-specific blend) – 1 bag (for nutrient boosts).
- ● Soil pH test kit – 1 (panicle hydrangeas prefer slightly acidic soil, pH 6.0-7.0).
- ● Beneficial nematodes or ladybugs – 1-2 packs (natural aphid predators!).
- ● Garden twine – 1 roll (for securing young plants).
- ● Rain gauge or moisture meter – 1 (to monitor watering needs).
Instructions for planting and cultivating panicle hydrangea shrubs
Here’s how to establish your panicle hydrangea for vibrant blooms and minimal pest issues.
Select the Perfect Planting Site
Panicle hydrangeas thrive in partial shade to full sun, but morning sun with afternoon shade prevents leaf scorch. I always choose a spot with at least 4 hours of direct sunlight—this ensures strong stems and abundant blooms. Test the soil by digging a 12-inch hole; if it drains poorly, amend with 2-3 inches of organic compost to improve aeration.
Check for existing roots or competing plants—hydrangeas need 3-4 feet of clear space in all directions. If your yard has heavy clay, mix in 1 part perlite to 3 parts native soil when backfilling to prevent root rot. The ideal soil pH for panicle hydrangeas is 5.5-6.5, but they’re more forgiving than mophead varieties.
Dig and Prepare the Planting Hole
Dig a hole twice as wide as the root ball but only as deep as the container’s root base. This prevents burying the stem too deeply, which can cause rot. Gently loosen the roots if they’re circling tightly in the pot—hydrangeas resent root-bound conditions. I use my fingers to tease apart any compacted soil at the edges of the root ball.
Place the plant in the hole so the top of the root ball sits level with the surrounding soil. Fill the hole with native soil mixed with 1 cup of balanced 10-10-10 fertilizer (panicle hydrangeas respond well to phosphorus for blooms). Press the soil firmly around the roots to eliminate air pockets, then water deeply to settle everything.
Water Thoroughly and Mulch Properly
Water immediately after planting, providing 1-2 gallons per shrub to encourage root expansion. Hydrangeas establish best with consistent moisture—aim for 1-2 inches of water per week, either from rain or supplemental irrigation. I check soil moisture by inserting my finger 3 inches deep; if it’s dry, it’s time to water.
Apply 2-3 inches of mulch (wood chips or shredded bark) around the base, keeping it 3 inches away from the stem to prevent rot. Mulch conserves soil moisture and regulates temperature, which is critical during summer heat. Replenish mulch annually as it breaks down—this keeps roots cool and reduces weed competition.
Prune for Shape and Seasonal Health
Panicle hydrangeas bloom on new wood, so pruning in late winter or early spring (before buds swell) is ideal. Remove dead or crossing branches first, then cut back last year’s stems to just above a strong outward-facing bud. I never prune more than 1/3 of the plant’s total growth in a single season—this maintains vigor.
For shaping, focus on opening the center of the shrub to improve airflow and sunlight penetration. This reduces humidity buildup, which deters aphids and fungal diseases. After pruning, apply a light layer of compost around the base to replenish nutrients lost during dormancy.
Monitor for Pests and Adjust Care
Panicle hydrangeas are aphid-resistant, but I still inspect leaves weekly for sticky residue (honeydew) or curled new growth—early signs of infestation. If needed, spray with neem oil (mix 1 tablespoon per gallon of water) to deter pests without harming beneficial insects. Avoid chemical sprays, as they can damage the plant’s natural defenses.
Fertilize lightly in early spring with a low-nitrogen formula (5-10-10) to encourage blooms over foliage. Over-fertilizing leads to weak stems and fewer flowers. Watch for yellowing leaves, which often signal overwatering or poor drainage—adjust your watering schedule or amend the soil if needed.
Tips & tricks for cultivating panicle hydrangea shrubs
Panicle hydrangeas reward patience with stunning blooms and minimal fuss—here’s how to maximize their potential without the common pitfalls. These insights will help you avoid overwatering, soil compaction, and seasonal pruning mistakes that sabotage growth.
Soil Preparation Secret: When amending heavy clay soil with the 1 part perlite to 3 parts native soil ratio, I recommend mixing in a handful of hydrated lime (about 1/2 cup) to help stabilize the pH over time. This prevents the soil from becoming too acidic, which can stress the roots. The 2-3 inches of organic compost should be well-aged—fresh compost can draw nitrogen away from your hydrangea during its first critical growing season.
Watering Wisdom: The 1-2 inches of water per week guideline assumes average rainfall conditions. In hotter climates, you may need to supplement with deep watering every 3-4 days rather than relying on weekly totals. I test soil moisture by pushing my finger 3 inches deep—if it feels dry at that depth, it's time to water. Morning watering is ideal because it reduces evaporation and fungal risks from prolonged leaf wetness.
Pruning Precision: When cutting back last year’s stems to just above a strong outward-facing bud in Step 4, I always make the cut at a 45-degree angle about 1/4 inch above the bud. This creates a larger surface area for new growth and prevents water from pooling on the cut. Avoid using hedge trimmers—they leave jagged edges that can attract pests. Instead, use clean, sharp pruners to make clean cuts that heal faster.
Pest Prevention: The weekly leaf inspection for sticky residue is your first line of defense against aphids, but I also recommend installing blue sticky traps near the plant in early spring. Aphids are attracted to blue, and these traps catch them before they establish colonies. If you do spot aphids, spray the undersides of leaves first—they tend to cluster there. Neem oil works best when applied in the late afternoon to avoid harming beneficial insects active during the day.
Pro Tips for Panicle Hydrangea Shrub
- Panicle hydrangeas reward patience with stunning blooms and minimal fuss—here’s how to maximize their potential witho...
- Soil Preparation Secret: When amending heavy clay soil with the 1 part perlite to 3 parts native soil ratio, I recomm...
- Watering Wisdom: The 1-2 inches of water per week guideline assumes average rainfall conditions. In hotter climates, ...
Frequently asked questions
Got questions about keeping your panicle hydrangea shrub thriving while warding off aphids? You’re in the right place! Here are answers to the most common queries—from care tips to pest troubleshooting.
How do I keep aphids off my panicle hydrangea naturally?
Start with a strong water spray—aphids hate it! Use a neem oil solution (1 tsp per quart of water) or introduce ladybugs, their natural predators. For heavy infestations, try insecticidal soap, but test on a small leaf first to avoid damage.
When is the best time to prune panicle hydrangeas to encourage blooms?
Prune in late winter or early spring (before new growth starts) to shape the shrub and promote bigger, fuller blooms. Avoid cutting back after mid-summer—this removes next year’s flower buds! Use clean, sharp shears and cut just above a bud or leaf node.
Why aren’t my panicle hydrangea flowers changing color like I expected?
Panicle hydrangeas don’t change color based on soil pH (unlike bigleaf types). Their hues shift naturally with sun exposure and maturity. For deeper pinks, plant in morning sun; for whites, full sun works best. Deadheading spent blooms can also encourage new, vibrant growth.
Can I grow panicle hydrangeas in containers, and what’s the best soil mix?
Use a well-draining potting mix with perlite or sand to prevent root rot. Add compost or peat moss for moisture retention. Choose a large container (15+ gallons) with drainage holes, and repot every 2–3 years to refresh nutrients.
How cold-hardy are panicle hydrangeas, and do I need to protect them in winter?
Most varieties (like ‘Limelight’ or ‘Little Lime’) tolerate USDA Zones 3–9. In Zone 3–4, mulch the base with 3–4 inches of shredded bark to insulate roots. Young shrubs may need burlap wraps in harsh winters, but established plants usually thrive without extra help!
Pro Tip: Mulch matters!
Apply 2–3 inches of mulch around the base (but not touching the stem) to retain moisture, regulate soil temp, and deter weeds. Shredded bark or pine straw work best—just refresh it annually!
Wrapping up and next steps
Adding a panicle hydrangea shrub to your garden isn’t just about aesthetics—it’s a smart, low-maintenance choice that naturally deters aphids while delivering year-round charm. With its hardy nature, vibrant blooms, and resistance to pests, this shrub proves that beauty and resilience go hand in hand. 🌿✨
Ready to transform your outdoor space? Start by selecting the perfect variety for your climate, then plant with confidence—your future self (and aphid-free garden) will thank you! 🌸💚
- Next step: Pick your favorite panicle hydrangea and get growing!