
Pruning
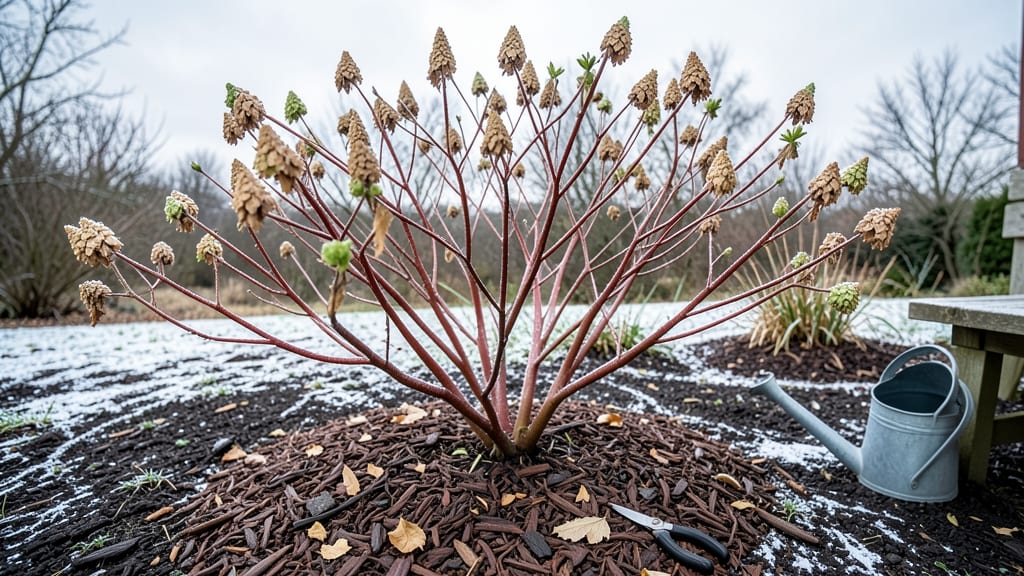
Winter is when your panicle hydrangea’s next year’s blooms start forming—cut too early, and you’ll lose half the flowers. ✂️ I’ve pruned mine for years, and the difference between a sparse spring and a lush one comes down to timing, technique, and a little frost protection.
The key is waiting until late winter (after the last frost but before new growth starts) to prune. This lets the plant set flower buds on old wood while removing dead stems.
A sharp pair of loppers, a bucket for clippings, and 3 inches of mulch are all you need to prep your shrub for spring. After pruning, you’ll see fresh green shoots by April, with blooms forming by June.
The plants stay healthier, bloom longer, and handle cold snaps better than unpruned neighbors. Just avoid heavy pruning in fall—it stresses the plant before dormancy. Works for zones 3-9, whether you’re dealing with snowy winters or just chilly nights. Here’s exactly how to do it without mistakes.
📚 In This Guide
- What you need
- Instructions
- Tips and common mistakes
- Wrapping up and next steps
What you need
- ● Pruning shears: Bypass pruners (sharp, clean, and bypass-style for clean cuts—1 pair). Avoid anvil shears, which crush stems.
- ● Loppers: For thicker stems (½-inch to 1-inch diameter)—1 pair with bypass blades.
- ● Hand saw: For stubborn, woody stems (over 1-inch thick)—1 small pruning saw with a fine-tooth blade.
- ● Gloves: Heavy-duty, cut-resistant gloves to protect from thorns and sap (1 pair).
- ● Disinfectant: 70% isopropyl alcohol or a pruning sealant to sterilize tools between cuts (small bottle).
- ● Rake or broom: To clear fallen leaves and debris (1 medium-sized).
- ○ Garden twine or tags: Optional, for labeling pruned branches if needed (5–10 feet).
- ● Mulch: Shredded bark or straw (2–3 inches deep) to insulate roots (1–2 bags).
- ● Plant food: Balanced fertilizer (e.g., 10-10-10) for early spring feeding (1 small bag).
- ○ Pruning paint: Tree wound sealant (optional for large cuts, though many pros skip this).
- ● Work boots or sturdy shoes: For comfort while kneeling or standing in wet areas.
Step-by-step instructions for pruning panicle hydrangeas in winter
Here's how I transform last year's hydrangeas into next year's showstopper blooms—no guesswork involved.
✂️ Step 1: Wait for the Right Time to Prune
Prune panicle hydrangeas in late winter or early spring, just as new growth begins but before buds swell. This timing ensures you don’t cut off next year’s blooms, which develop on new wood. I aim for February or March in most climates, but if you live in a warm zone, wait until after the last frost—new growth can’t handle freezing temperatures.
Look for dormant stems with no buds or leaves, but check for the faintest hint of green at the tips. That’s your cue. If you prune too early, you risk cutting healthy buds; too late, and you’ll encourage weak, leggy growth before summer. I always mark my calendar with the last frost date and schedule pruning two weeks after—that gives me a buffer for unpredictable winters.
✂️ Step 2: Remove Dead or Damaged Wood First
Start by inspecting each stem for dead, diseased, or broken branches. Dead wood is easy to spot—it’s brown, brittle, and snaps when bent. Diseased wood often has black spots or oozing sap. Grab your pruners and cut these stems back to the base of the plant. This step is non-negotiable: dead wood steals energy from healthy growth and invites pests.
I like to work methodically, branch by branch, so I don’t miss anything. If a branch is only partially damaged, prune it back to the last healthy bud or node. You’ll know it’s healthy if the stem feels firm and the bark is smooth. Never leave stubs—always cut just above a bud or node at a 45-degree angle to encourage water runoff and prevent rot.
✂️ Step 3: Thin Out Overcrowded Branches
Panicle hydrangeas bloom on new wood, so you can prune up to one-third of the plant without worry. Focus on thinning out the oldest, thickest stems first—these are the ones that produce the least flowers and take up valuable space. I target stems that are thicker than a pencil and have fewer buds along their length.
Use your pruners to cut these stems back to the ground, making sure to leave 3-5 of the youngest, thinnest stems per plant. These will become next year’s flowering branches. If you’re unsure which stems are oldest, look for thicker, woody growth—these are the ones to remove. Overcrowding leads to small, weak blooms, so don’t skip this step.
✂️ Step 4: Shape the Plant for Airflow and Light
Now it’s time to shape the hydrangea for better airflow and sunlight penetration. Step back and visualize the plant as a rounded mound—this is the natural shape of a panicle hydrangea. Start by shortening the remaining branches by about one-third to encourage bushier growth. Cut just above a bud that faces outward to maintain that rounded form.
I like to leave the topmost buds slightly higher than the lower ones to create a tiered effect. This not only looks great but also ensures sunlight reaches all parts of the plant. Avoid cutting back into old wood—always prune to new growth or buds. If you’re unsure where to cut, follow the strongest, healthiest buds on each branch. Finish by removing any crossing or rubbing branches to prevent damage.
🪴 Step 5: Clean Up and Mulch for Protection
After pruning, remove all debris from the area—this includes clippings, dead leaves, and any fallen branches. Hydrangea debris can harbor pests and diseases over winter. I rake up everything and dispose of it in the trash, not the compost pile, to avoid spreading potential problems.
Apply a 2-3 inch layer of mulch around the base of the plant, keeping it 2-3 inches away from the stem to prevent rot. Use organic mulch like shredded bark or wood chips—it insulates the roots, retains moisture, and breaks down to feed the soil. Water the plant deeply before mulching to help it establish roots for spring growth. This final step sets the stage for vibrant, healthy blooms next summer.
Tips & tricks for pruning panicle hydrangeas in winter
Avoid these common pitfalls—and transform your hydrangeas into next year's showstopper blooms with confidence.
Timing is Everything: Mark your calendar now for two weeks after your last frost date—this is your exact window for pruning. I've ruined blooms twice by pruning too early, so trust the frost date over guesswork. If you're unsure, check for that faintest hint of green at stem tips as your cue. Pro tip: Use a local frost date app to set reminders, because even a week off can mean the difference between vibrant blooms and leggy stems.
Tool Prep Makes All the Difference: Sharpen your pruners before you start—dull blades crush stems instead of cutting cleanly, which can damage the plant. I also like to disinfect my tools with rubbing alcohol between cuts to prevent spreading disease from any infected branches. For larger stems, I grab my loppers, but always make sure they're clean and sharp too. A well-maintained toolkit means less stress on your plants and cleaner cuts that heal faster.
Visual Cues for Perfect Pruning: When shaping in Step 4, imagine your hydrangea as a rounded dome. The topmost buds should be slightly higher than the lower ones to create that tiered effect we all love. For the one-third reduction mentioned, I like to hold my hand next to the branch—if it's thicker than my thumb, it's likely an older stem that should be removed. This visual trick helps me make consistent cuts without overthinking each decision.
Mulch Matters More Than You Think: That 2-3 inch layer of organic mulch isn't just decoration—it's insulation for your plant's roots. I always water deeply before mulching because moist soil conducts heat better than dry soil. For extra protection in cold climates, I add an extra inch of mulch around the base. Just remember to keep it 2-3 inches away from the stem to prevent rot—this is where many gardeners accidentally smother their plants.
Pro Tips for Panicle Hydrangea Winter
- Avoid these common pitfalls—and transform your hydrangeas into next year's showstopper blooms with confidence.
- Timing is Everything: Mark your calendar now for two weeks after your last frost date—this is your exact window for pruning.
- Tool Prep Makes All the Difference: Sharpen your pruners before you start—dull blades crush stems instead of cutting cleanly, which can damage the plant.
Frequently asked questions
Got questions about keeping your panicle hydrangea thriving through winter and beyond? Here are some of the most common ones—and their answers!
When is the best time to prune panicle hydrangeas for winter?
Prune your panicle hydrangeas in late winter or early spring (February to March) before new growth begins. This timing ensures you remove dead stems while leaving next year’s blooms intact. Avoid pruning in fall—it can stimulate tender growth that may not survive winter’s chill.
How much can I cut back my panicle hydrangea in winter?
You can prune up to ⅓ of the plant in late winter, but focus on removing dead, diseased, or weak stems first. For rejuvenation, cut back older stems to the ground while keeping 2-3 younger stems for new growth. Never prune more than ⅓ at once!
Do panicle hydrangeas need extra protection in cold climates?
In zones 5-6, mulch the base with 3-4 inches of shredded bark or leaves after pruning to insulate roots. Wrap young plants with burlap or frost cloth if temps drop below 10°F. Mature plants usually handle winter well, but a cozy blanket of mulch never hurts!
What if my panicle hydrangea doesn’t bloom after winter pruning?
Lack of blooms often means you pruned too late or cut back all the stems. Panicle hydrangeas bloom on new wood, so always leave at least 2-3 healthy stems. If no buds appear by spring, fertilize lightly with a balanced 10-10-10 mix to encourage growth.
Can I prune panicle hydrangeas in fall instead of winter?
While possible, fall pruning is risky. Cutting back too early can stimulate tender growth that may freeze. If you must prune in fall, do so after the first frost and avoid heavy cuts. Winter pruning (Feb-March) is always the safer bet for big, healthy blooms next season!
Wrapping up and next steps
With the right pruning techniques, your panicle hydrangea can thrive through winter and burst into even more spectacular blooms next season! 🌸 Remember, timing, sharp tools, and a strategic cut are your best friends—so don’t hesitate to roll up your sleeves and give your plant the care it deserves.
Ready to level up your gardening game? Grab those shears and start planning your spring prep now!
- Next step: Mark your calendar for early spring (just as new growth appears) to prune again and encourage fresh, vibrant blooms.
- Bonus tip: Snap a photo of your pruned hydrangea for a satisfying "before and after" comparison!