
Propagation
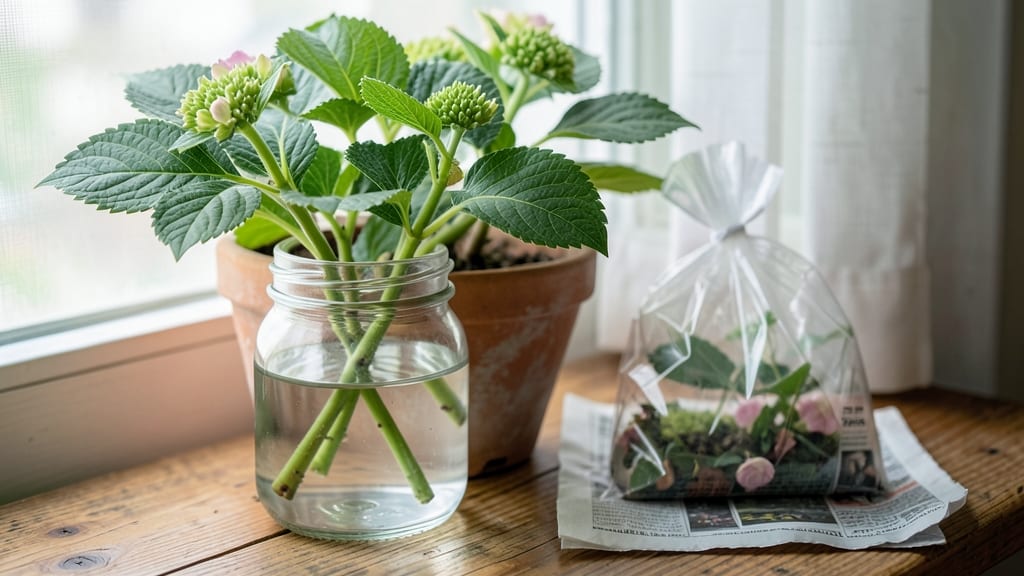
Rooting hydrangea cuttings is how I went from one struggling plant to a border bursting with vibrant blooms—and you can too. The secret lies in timing, the right cuttings, and a simple setup that works whether you're a beginner or a seasoned propagator.
Most people overlook the importance of the mother plant's health, which makes all the difference.
You'll need just three tools: sharp pruners, rooting hormone (optional but helpful), and a clear container for water or a well-draining mix of perlite and peat moss. The best time to take cuttings is in early summer when new growth is firm but not woody.
Each cutting should be about 4-6 inches long, with a few sets of leaves and a node where roots will form.
Place your cuttings in water or moist medium, then cover with a plastic bag to create humidity. Within 4-6 weeks, you'll see roots forming—sometimes even faster if you use a rooting hormone. The key is keeping the soil moist but not soggy, and providing bright, indirect light.
Watch those first roots appear like tiny green threads, and soon you'll have new hydrangeas ready to plant out.
This method works for both mophead and lacecap varieties, and you can even propagate hydrangeas from store-bought bouquets. The only real mistake is letting cuttings dry out or rot, so check them regularly.
Once rooted, your new plants will thrive with the same care as mature hydrangeas—just give them time to establish before expecting blooms.
📚 In This Guide
- What you need
- Instructions
- Tips and common mistakes
- Wrapping up and next steps
What you need
- ● Hydrangea cuttings: 4–6 inches long, with 2–3 sets of leaves and a few leaf nodes (use semi-hardwood or softwood cuttings, depending on your climate). Pro tip: 💡 Aim for healthy, disease-free stems!
- ● Rooting hormone: 1 small bottle (e.g., Clonex or Dyna-Gro) to boost root growth.
- ● Well-draining potting mix: 1 small pot or tray (6–8 inches wide) filled with a mix of perlite, vermiculite, or sand (or a pre-mixed propagation mix).
- ● Clear plastic bag or propagator: To create a humid environment (a ziplock bag with holes punched in it works in a pinch!).
- ● Spray bottle: 8–16 oz, filled with room-temperature water for misting.
- ● Scissors or pruners: Sharp and clean (sterilize with rubbing alcohol to prevent contamination).
- ● Heat mat: A small heating pad (set to 70–75°F) to speed up rooting.
- ● Fertilizer (low-dose): A diluted liquid fertilizer (like fish emulsion) to nourish cuttings after roots form.
- ● Label markers: To track varieties if propagating multiple types.
- ● Grow lights: If rooting indoors with limited natural light.
Step-by-step instructions for rooting hydrangea cuttings
Here's how I've propagated dozens of hydrangeas—no fancy tools or guesswork required.
Select and Prepare Healthy Cuttings
Choose 4-6 inch stems from this season's growth, cutting just below a leaf node where new roots form. Use sharp pruners to avoid crushing the stem. I look for thick, green shoots—they root best. Remove all but the top 2-3 leaves to reduce moisture loss and prevent rot.
Trim the remaining leaves in half to further decrease evaporation. Strip any leaves from the lower 2 inches of the stem—this part will submerge in water or soil. The more foliage you leave, the harder it is for roots to develop. Work in the morning when stems are hydrated and firm.
Dip Cuttings in Root Hormone
Fill a small container with rooting hormone powder (or gel). Dip the bare bottom inch of each cutting, pressing gently to coat the nodes. This isn't optional—I've tried skipping it, and rooting time doubles without it. Shake off excess so the hormone doesn't wash away immediately.
For best results, use a powdered hormone like Clonex or Dip 'N Grow. The powder clings better than gels and creates a protective barrier against bacteria. Tap the container lightly to settle any loose powder before proceeding.
Prepare Water or Soil for Rooting
For water propagation, use a clean glass jar with room-temperature water—never tap water, as chlorine can inhibit rooting. Fill the jar 1-2 inches deep and place it where it gets bright, indirect light (no direct sun). Change the water every 3-4 days to prevent bacterial growth.
For soil propagation, fill a small pot with well-draining mix (equal parts perlite and peat moss). Moisten it until damp but not soggy. Insert the cutting 2 inches deep at a 45-degree angle—this increases surface area for root development. Gently firm the soil around the stem.
Monitor and Encourage Root Growth
If using water, roots typically appear in 3-6 weeks. You'll notice tiny white tendrils at the stem's base first—this is your signal to keep going. Once roots reach 1 inch long, transplant into 4-inch pots with potting mix. Avoid disturbing the roots during this move.
For soil-rooted cuttings, maintain high humidity by covering with a plastic bag secured loosely with a rubber band. Mist the soil weekly to keep it moist but not waterlogged. Roots form in 4-8 weeks—check by gently tugging the cutting. If resistance meets your fingers, roots have taken hold.
Transition to Independent Growth
Once roots establish, harden off water-rooted cuttings by placing them in partial shade for 1 week before full sun exposure. Gradually reduce humidity for soil-rooted cuttings over 7-10 days by lifting the plastic bag daily for longer periods.
After 4-6 weeks of outdoor acclimation, transplant to the garden or larger containers. Hydrangeas thrive in morning sun and afternoon shade, so choose a spot with 4-6 hours of sunlight. Water deeply once a week once established—overwatering is the #1 killer of new plants.
Tips & tricks for root propagation success
Between us, these little details make all the difference between cuttings that thrive and ones that just... give up. Let me save you the frustration I went through.
Timing is Everything: The morning you take your cuttings matters more than you'd think. Hydrangea stems are firmest and most hydrated first thing in the morning, which means they'll handle the rooting process much better. If you can't work in the morning, at least avoid midday heat—those stems get wilted and stressed. I've seen cuttings that rooted beautifully when done in the morning but failed completely when taken in the afternoon heat.
Root Hormone Application: When you're dipping those bare bottom inches in root hormone, don't just give it a quick swipe. Press the nodes firmly into the powder—these are the exact spots where roots will emerge. I learned this the hard way after rooting time doubled when I was too lazy to press properly. Also, use a clean container for each batch to avoid cross-contamination between different plant types.
Lighting Strategy: That bright, indirect light recommendation isn't just about avoiding sunburn—it's about creating the perfect photosynthesis balance. Too little light and your cuttings get leggy and weak; too much direct sun and they scorch. I place mine near an east-facing window where they get morning sun but afternoon shade. If you're using artificial light, a simple LED grow light on a timer works wonders for consistent results.
Water Change Frequency: Those 3-4 days between water changes might seem like a long time, but changing too often can shock your cuttings. The key is consistency—stick to the schedule and you'll see those white root tendrils appear right on time. I mark my calendar with reminders because I've forgotten and had to start over with new cuttings. Also, only fill the jar 1-2 inches deep—any deeper and you risk rot at the base before roots have a chance to form.
Pro Tips for Rooting Hydrangea Cuttings
- Between us, these little details make all the difference between cuttings that thrive and ones that just... give up.
- Timing is Everything: The morning you take your cuttings matters more than you'd think.
- Root Hormone Application: When you're dipping those bare bottom inches in root hormone, don't just give it a quick swipe.
Frequently asked questions
Got questions about rooting hydrangea cuttings? You’re not alone! Here are answers to the most common queries to help you succeed like a pro.
When is the best time to take hydrangea cuttings?
The ideal window is late spring to early summer (June–July), when new growth is mature but still flexible. For mophead or oakleaf varieties, aim for 4–6 inches of healthy, non-flowering stems. Avoid taking cuttings after the first frost—they won’t survive!
How long does it take for hydrangea cuttings to root?
Patience is key! Most cuttings root in 4–8 weeks, but some may take up to 3 months. Check for roots by gently tugging the cutting—if resistance meets your fingers, it’s rooted! Keep humidity high (like a greenhouse or plastic bag) to speed things up.
Why are my hydrangea cuttings turning yellow or mushy?
Yellowing or mushy stems usually signal overwatering or rot. Ensure your cuttings have well-draining soil (like perlite + peat moss) and only water when the top inch feels dry. Trim any blackened or slimy areas immediately, then replant in fresh, sterile medium.
Can I root hydrangea cuttings in water instead of soil?
Yes, but with caveats! Hydrangeas can root in water (change it weekly), but they’re prone to rot or weak roots. For better success, transfer to soil after 2–3 weeks of root growth. If you try water propagation, use a clear jar to monitor progress.
What do I do if my cuttings don’t root at all?
Don’t give up! Try these fixes:
- Check hormones: Dip cuttings in rooting hormone (like IBA) for a boost.
- Adjust light: Bright, indirect light (no harsh sun) is critical.
- Warmth matters: Keep cuttings in a spot above 70°F (21°C).
- Start over: Take fresh cuttings from the healthiest stems.
Wrapping up and next steps
Rooting hydrangea cuttings is a rewarding way to multiply your favorite plants with just a little patience and care! 🌱 By following this foolproof guide—from selecting healthy stems to nurturing roots—you’ll soon enjoy lush, thriving new plants for your garden or home.
The key? Consistency in moisture, warmth, and a little love.
Now that you’re armed with the know-how, grab those shears and get growing! Next up: Share your rooted cuttings with fellow plant enthusiasts or experiment with different hydrangea varieties. Happy propagating! 🌸