
Fertilization
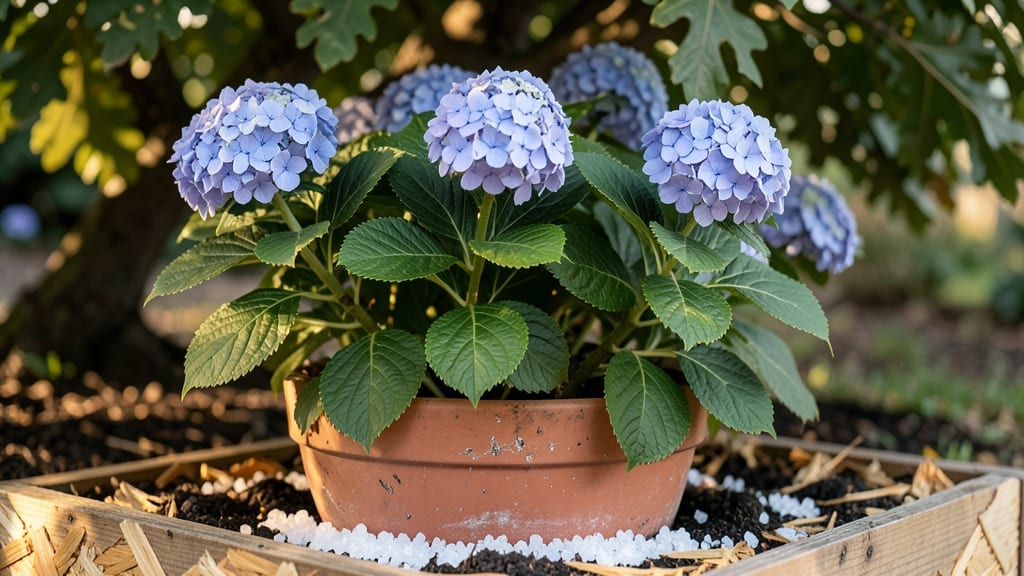
Putting Epsom salt on hydrangeas isn’t just about the salt—it’s about timing it with their growth cycles. ✨ The best time is early spring when you spot fresh green shoots, giving roots a magnesium boost before the main growing season kicks in.
This isn’t some vague "sometime in spring" advice; it’s about catching those first leaves, when the plant is hungry for nutrients to fuel its blooms.
Mid-summer is your second window, right when those buds form. That’s when hydrangeas need magnesium most to prevent yellowing leaves and keep the blue-purple hues vibrant. Think of it like a two-part strategy: spring for roots, summer for blooms.
The key is watching the plant—not the calendar—so you’re feeding it exactly when it needs it.
You’ll know it’s working when the foliage turns a deeper green and those flower buds swell faster. The color shift happens gradually, but by late summer, you’ll see hydrangeas that stand out in the garden with richer blooms and fewer brown edges.
No guesswork—just observe and feed at the right moments.
Dosage matters too: 1 tablespoon per foot of plant height in spring, then again in summer. Overdoing it won’t help, and hydrangeas can get stressed if the soil gets too salty. This isn’t a one-size-fits-all fix—it’s about matching the plant’s rhythm with precise timing and care.
📚 In This Guide
- What you need
- Instructions
- Tips and common mistakes
- Wrapping up and next steps
What you need
- ● Epsom salt (magnesium sulfate): 1 tablespoon per gallon of water. Opt for food-grade or garden-grade Epsom salt (e.g., Moss & Fossil Epsom Salt or Dr. T’s Epsom Salt).
- ● Water: 1 gallon (3.8 liters) of room-temperature or lukewarm water per treatment.
- ● Watering can or spray bottle: A spray nozzle attachment (for foliar feeding) or a rose-type watering can (for soil application) works best.
- ○ Gloves (optional but recommended): Protect your hands from skin irritation (nitrile or rubber gloves suffice).
- ● Measuring spoon or scale: For precise Epsom salt dosage (1 tbsp = ~17g).
- ● pH test kit: To check soil acidity (ideal pH for blue hydrangeas: 5.0–5.5).
- ● Cheesecloth or old sock: For making a tea bag to dissolve Epsom salt slowly in water.
- ● Garden hose with spray attachment: For rinsing leaves if residue builds up.
- ● Notebook: To track treatment dates and hydrangea responses!
Instructions for applying Epsom salt to hydrangeas
Here's the exact timing and method I use to boost hydrangea blooms naturally.
🌿 Step 1: Identify the Right Growth Stage
Apply Epsom salt only during active growth phases—never when plants are dormant. For spring-blooming varieties, begin treatment when new shoots emerge in early spring (around late March to April in most climates). You'll see fresh, vibrant green growth pushing through the soil, signaling it's time to act.
For summer-blooming hydrangeas, wait until after the first flush of flowers appears in mid to late spring (typically May to June). This timing ensures the salt enhances flower development rather than root establishment. Avoid applying when temperatures exceed 85°F, as magnesium uptake slows in heat.
⏰ Step 2: Schedule Applications Precisely
Make your first application 4-6 weeks before peak blooming season. For most hydrangeas, this means late spring (around May). Follow up with a second application 4 weeks later if you notice pale leaves or slow growth. I use a 1 tablespoon of Epsom salt per gallon of water solution—never exceed this concentration to prevent magnesium toxicity.
Apply in the early morning when temperatures are cool. This allows the leaves to absorb magnesium efficiently without stress. Water the base of the plant thoroughly before applying to ensure roots are hydrated and ready to uptake the solution.
💧 Step 3: Apply Correctly for Maximum Effect
Pour the Epsom salt solution directly onto the soil (not the leaves) and water thoroughly to distribute it. This root application method is far more effective than foliar sprays, which can burn tender leaves. You'll see the soil darken slightly as the magnesium integrates—this is a good sign.
For established plants, repeat the process once every 4-6 weeks during the growing season. If your hydrangeas are in containers, reduce the amount to 1 tablespoon per 2 gallons of water since potted plants have less root zone to absorb the solution.
☀️ Step 4: Monitor for Results and Adjust
Watch for darker green leaves and faster growth within 2-3 weeks of application. This indicates successful magnesium uptake. If leaves develop yellowing between veins (a classic magnesium deficiency symptom), increase applications to every 3 weeks until foliage improves.
For vibrant blue-purple blooms, ensure your soil has a pH between 5.2 and 5.5. Test your soil annually—Epsom salt alone won't shift pH, but it works best when combined with proper acidity. Over time, you'll notice larger, more abundant blooms and healthier stems as the plant benefits from balanced magnesium levels.
Tips & tricks for perfect hydrangea bloom enhancement
Timing is everything when it comes to maximizing your hydrangeas' potential—here's how to get it right without the guesswork.
Seasonal Timing: The 4-6 week window before peak blooming is non-negotiable for spring varieties. For example, if your hydrangeas bloom in June, start treatments in early May. Summer-blooming types get their second chance in late spring—wait until after that first flush of flowers appears to avoid stunting new growth. I've learned this the hard way after seeing stunted blooms from premature applications.
Temperature Matters: Never apply when temperatures exceed 85°F—magnesium uptake slows dramatically in heat. Early morning applications give your plants the best chance to absorb nutrients without stress. I always check the forecast before treating, especially in late spring when temperatures can fluctuate wildly. The soil should feel cool to the touch when you water.
Soil Preparation: Thoroughly water the base of your plants before applying the Epsom salt solution. This ensures the roots are hydrated and ready to uptake the magnesium efficiently. I make it a habit to water deeply the night before treatment—it makes all the difference in how well the salt integrates into the soil structure. You'll notice the soil darken slightly as the magnesium works its way in.
Monitoring Results: Watch for darker green leaves and faster growth within 2-3 weeks of your first application. This is your confirmation that the magnesium is working. If you see yellowing between the veins (a classic magnesium deficiency sign), it's time to increase applications to every 3 weeks until foliage improves. I've seen dramatic turnarounds in just 6 weeks with consistent monitoring.
Pro Tips for When To Put Epsom Salt On Hydrangeas
- Timing is everything when it comes to maximizing your hydrangeas' potential—here's how to get it right without the gu...
- Seasonal Timing: The 4-6 week window before peak blooming is non-negotiable for spring varieties. For example, if you...
- Temperature Matters: Never apply when temperatures exceed 85°F—magnesium uptake slows dramatically in heat. Early mor...
Frequently asked questions
about using Epsom salt on hydrangeas—because even experts need a little clarity!When is the best time of year to apply Epsom salt to hydrangeas?
The ideal times are early spring (just as new growth appears) and mid-summer (around July) to support blooming. Avoid applying in fall or winter—hydrangeas rest during these months, and extra magnesium won’t help. Think of it like giving them a mid-season energy boost!
How often should I use Epsom salt on hydrangeas?
Once or twice per year is plenty! Overdoing it can harm roots or soil chemistry. For most hydrangeas, one application in spring and another in summer keeps blooms vibrant without risking salt buildup. If your soil is already rich in magnesium, you might only need it once.
Can I use Epsom salt if my hydrangeas have yellow leaves?
Yellow leaves often signal magnesium deficiency, so Epsom salt can help—but don’t assume it’s the only issue! First, check for pH imbalances, pests, or overwatering. Mix 1 tablespoon of Epsom salt per gallon of water and spray it on leaves (not just the soil) for faster results. Monitor progress over 2–4 weeks.
What’s a good alternative to Epsom salt for hydrangeas?
If you’re out of Epsom salt, try these magnesium-rich options:
- Compost or worm castings (slow-release nutrients)
- Epsom salt substitutes like kelp meal or dolomitic lime (for magnesium + calcium)
- Balanced fertilizer (look for one with magnesium sulfate)
What if my hydrangeas look worse after using Epsom salt?
Overuse or poor soil conditions can cause burned roots, salt buildup, or nutrient lockout. If this happens, flush the soil with water and avoid Epsom salt for 3–6 months. Test your soil’s pH—hydrangeas thrive in acidic soil (5.2–6.2). If the problem persists, consult a local nursery for a soil test.
Wrapping up and next steps
Timing is everything when it comes to using Epsom salt on hydrangeas—apply it in early spring or mid-summer for the best results! 🌸 By following these simple steps, you’ll help your plants absorb magnesium and sulfur, leading to vibrant blooms and lush foliage.
Don’t wait—your hydrangeas will thank you with stunning color and health!
Ready to give your garden a boost? Grab your Epsom salt and get started today! Keep an eye on your plants, adjust as needed, and enjoy the beautiful rewards of your efforts. Happy gardening! 🌿