
Planting
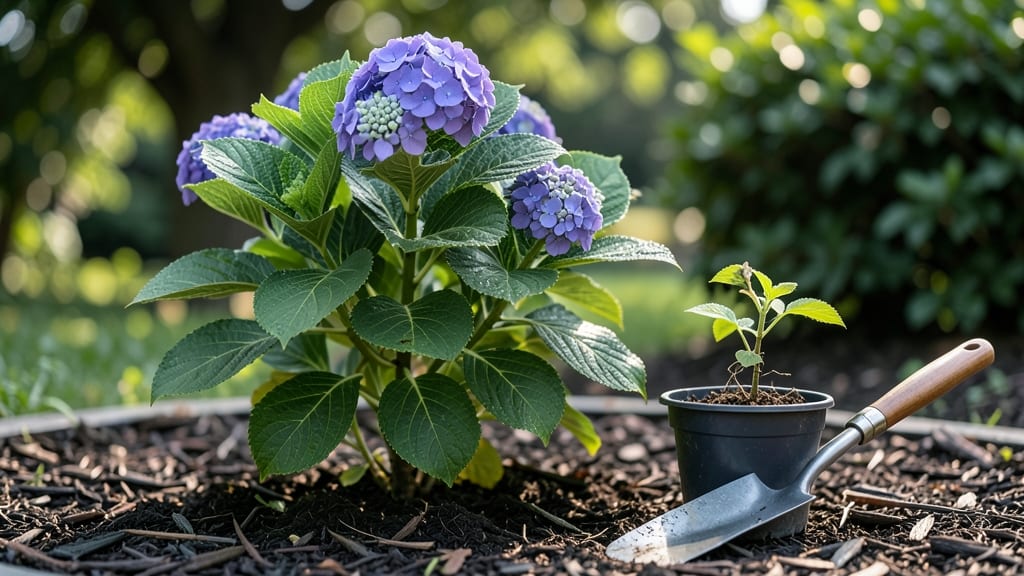
Where should hydrangeas be planted to flourish? Morning sun and afternoon shade—that’s the golden rule for their stunning blooms. 🌿 I learned this the hard way after my first plant wilted under relentless midday heat, only to recover when I moved it to... a spot with dappled light.
The key isn’t full sun or deep shade, but 4-6 hours of gentle sunlight that keeps leaves cool. Soil matters just as much: hydrangeas crave moist, well-draining, slightly acidic soil (pH 5.5-6.2). Amend heavy clay with compost, and mulch to retain moisture—these plants hate drying out.
In hot climates, afternoon shade isn’t optional; it’s survival. I’ve seen hydrangeas in full sun wither, while the same variety in partial shade thrives with larger, more vibrant blooms every season. The payoff? Lush foliage, abundant flowers, and plants that keep blooming from June through frost.
Even in containers, they’ll reward you with jewel-toned blooms if you nail the light and soil balance. Regional tweaks matter—cooler zones can handle more sun, while Southern gardens need afternoon shade. Here’s the secret: watch your plant’s leaves.
Yellowing or scorching means too much sun; pale, sparse blooms mean it’s getting too little. Adjust gradually, and you’ll have hydrangeas that steal the show year after year.
📚 In This Guide
- What you need
- Instructions
- Tips and common mistakes
- Wrapping up and next steps
What you need
- ● Hydrangea plants: Choose between mophead, panicle, or oakleaf varieties (1–3 plants, depending on desired size). Opt for container-grown or bare-root plants from a trusted nursery.
- ● Garden trowel or shovel: A 5–7 inch trowel for digging small holes or a round-point shovel for larger plantings.
- ● Well-draining potting mix or garden soil: 3–5 gallons of a blend with 50% native soil and 50% compost (or a peat-based mix for containers). For acid-loving varieties (like blue hydrangeas), add sulfur or pine bark fines.
- ● Organic mulch: 2–3 inches of pine straw, shredded bark, or wood chips to retain moisture and regulate soil temp.
- ● Watering can or hose with a gentle spray nozzle: 1–2 gallons of water per plant for initial watering.
- ○ Gloves (optional but recommended): Heavy-duty gardening gloves to protect hands from thorns (especially on oakleaf hydrangeas) and soil.
- ● Soil pH test kit: To check acidity (ideal range: 5.2–6.0 for blue blooms, 6.0–7.0 for pink/white).
- ● Slow-release fertilizer: Balanced 10-10-10 or acid-loving plant fertilizer (sprinkle lightly around roots).
- ○ Epsom salt (magnesium sulfate): 1 tbsp per gallon of water for green foliage (optional boost for nutrient-deficient soil).
- ● Plant supports (for large varieties): Stakes or cages (3–4 feet tall) for panicle or mophead hydrangeas that may need extra support.
- ● Container (if not planting in ground): A 15–20 gallon pot with drainage holes for patio or balcony planting.
How to choose the perfect spot for your hydrangeas
Here’s the science-backed approach to planting hydrangeas that will reward you with bold blooms year after year.
☀️ Step 1: Determine Your Hydrangea Variety’s Sunlight Needs
Hydrangeas fall into two broad categories: those that thrive in morning sun with afternoon shade (like the classic bigleaf hydrangea) and those that tolerate full sun (such as panicle or oakleaf types). Bigleaf hydrangeas, for instance, need at least 4 hours of morning sunlight but will scorch in hot afternoon rays—especially in southern climates. If you’re growing a panicle hydrangea, it can handle full sun all day, but its blooms will be most vibrant with at least 6 hours of direct light.
Here’s the trick: Observe your garden’s sun patterns for a week. Note where the sun hits fiercely after 10 AM—those spots are too intense for shade-loving varieties. If your yard has no afternoon shade, opt for sun-tolerant types like ‘Limelight’ or ‘Little Lime.’ For bigleaf hydrangeas, plant them where they’ll get bright morning light but dappled shade by noon. You’ll know you’ve got it right when the leaves stay deep green (not yellow or crispy) and the buds form plentifully in early summer.
🌱 Step 2: Test and Amend the Soil for Optimal Bloom Production
Hydrangeas are soil pH divas—they demand acidic to slightly acidic conditions (ideally pH 5.2–6.2) for vibrant blooms. Before planting, grab a soil test kit (available at garden centers) and test your soil. If your results show pH above 6.5, you’ll need to lower it with elemental sulfur or peat moss mixed into the planting hole. For alkaline soil (common in western states), pine bark fines or cottonseed meal can help acidify the root zone over time.
Dig a hole twice as wide as the root ball but only as deep—hydrangeas hate being planted too deeply. Loosen the native soil at the bottom of the hole and mix in 2–3 inches of organic matter (like compost or aged manure) to improve drainage while retaining moisture. If your soil drains poorly, add a 50/50 mix of potting soil and perlite to the backfill. The goal is well-draining yet moisture-retentive soil—hydrangeas despise soggy roots but need consistent hydration. You’ll see success when the plant’s new growth is lush and stems feel firm (not mushy).
💧 Step 3: Select a Sheltered Location for Wind and Winter Protection
Hydrangeas have delicate stems that can snap in strong winds or freeze in harsh winters. Choose a spot protected by a fence, building, or taller shrubs on the north or west side. If you’re in Zone 5 or colder, avoid planting near south-facing walls—the heat reflected off the wall can stress the plant in winter. Instead, opt for a location with indirect winter sun and a snowdrift nearby to insulate the roots.
For container-grown hydrangeas, plant them at the same depth they were in the nursery pot. Press the soil gently around the roots to eliminate air pockets, then water deeply to settle everything. Mulch with 3 inches of shredded bark or pine needles (which also acidifies the soil) and keep the mulch 2–3 inches away from the stem to prevent rot. In the first year, you’ll notice fewer wilting leaves and stronger stems—signs the plant is thriving in its new home.
⏰ Step 4: Time Your Planting for Seasonal Success
Spring and early fall are the best times to plant hydrangeas, giving roots 6–8 weeks to establish before summer heat or winter cold. If you’re planting in late spring, keep the root ball moistened daily until the plant shows new growth (usually within 2–3 weeks). Fall plantings benefit from cooler temperatures and natural rainfall, reducing the need for supplemental watering. Avoid planting in mid-summer—the heat stresses young roots, and the plant may struggle to bloom the following year.
Here’s the pro tip: If you’re transplanting an established hydrangea, prune back one-third of the foliage before moving it. This reduces stress and encourages faster root regrowth. Water the plant deeply every 2–3 days for the first month, then taper to once a week (or as needed) once the roots are settled. You’ll know it’s thriving when the leaves stay vibrant and the buds form by early summer—a clear sign the plant is happy in its new spot.
Tips & tricks for perfect hydrangea planting
A few strategic insights will help you avoid common pitfalls and maximize those show-stopping blooms.
Sunlight Strategy: For bigleaf hydrangeas, focus on that 4-hour morning sun window—this is non-negotiable for vibrant blooms. I always scout locations by observing how sunlight moves through my garden at 10 AM sharp. If your yard lacks afternoon shade, consider sun-tolerant varieties like panicle types which thrive with 6 hours of direct light. The key visual cue: leaves should remain deep green, not yellow or crispy by midday.
Soil Science: That pH 5.2-6.2 range isn't just a suggestion—it's where hydrangeas perform their magic. I've learned this the hard way after planting in alkaline soil and getting pale, lackluster blooms. For quick acidification, mix 2-3 inches of pine bark fines directly into the planting hole. Pro tip: Test your soil again in 6 months—hydrangeas are heavy feeders and can deplete soil acidity faster than you think.
Winter Protection: Don't underestimate how much wind and cold stress these delicate plants. I always plant mine near a north-facing fence that acts as a windbreak. For Zone 5 gardeners, create a snowdrift nearby—this natural insulation can mean the difference between winter survival and frost damage. Container-grown hydrangeas need extra protection: wrap the pot in bubble wrap and move to a sheltered location before temperatures drop below 20°F.
Planting Depth: This is one of those details that separates good plantings from great ones. Dig a hole twice as wide but only as deep as the root ball—hydrangeas hate being buried too deeply. I've seen gardeners plant them 2 inches too deep, which can cause root rot. After planting, press soil firmly around roots to eliminate air pockets, then give it a deep watering to settle everything. The goal is firm but not compacted soil.
Pro Tips for Where Should Hydrangeas Be Planted
- A few strategic insights will help you avoid common pitfalls and maximize those show-stopping blooms.
- Sunlight Strategy: For bigleaf hydrangeas, focus on that 4-hour morning sun window—this is non-negotiable for vibrant blooms.
- Soil Science: That pH 5.2-6.2 range isn't just a suggestion—it's where hydrangeas perform their magic.
Frequently asked questions
Got questions about planting hydrangeas? You’re not alone! Here are answers to the most common concerns—so you can grow lush, blooming shrubs with confidence.
What’s the best sunlight for hydrangeas?
Most hydrangeas thrive in partial shade (4–6 hours of sunlight daily). Bigleaf and oakleaf types prefer dappled light, while panicle hydrangeas tolerate more sun. Avoid harsh afternoon rays, which can scorch leaves.
Can hydrangeas grow in full sun?
Yes, but with caution! Panicle hydrangeas handle full sun best. For others, provide afternoon shade or mulch to retain moisture. If leaves turn yellow or crispy, they’re getting too much sun.
How do I fix poor soil for hydrangeas?
Hydrangeas love acidic, well-draining soil (pH 5.2–6.2). Amend clay soil with compost or peat moss. For alkaline soil, use sulfur or pine needles. Test your soil first—many nurseries offer kits!
When’s the best time to plant hydrangeas?
Plant in early spring or fall (4–6 weeks before frost). Avoid summer heat or winter cold, which stress roots. Bare-root hydrangeas can go in spring, while potted plants adapt year-round.
Why aren’t my hydrangeas blooming?
Check these fixes:
- Old wood bloomers (like bigleaf types) need winter chill—plant in cooler zones.
- New wood bloomers (panicle types) may need pruning in late winter.
- Ensure they get consistent moisture—drought stress stunts flowers.
Can hydrangeas grow in containers?
Choose a pot with drainage holes and use acidic potting mix. Water frequently (containers dry out fast). Dwarf varieties like ‘Little Lime’ thrive in containers—perfect for patios!
Wrapping up and next steps
Planting hydrangeas is all about finding the perfect balance—sunlight that’s bright but not scorching, soil that’s rich yet well-draining, and a spot that suits your climate.
Whether you’re growing mopheads, panicle, or oakleaf varieties, the right location will reward you with lush blooms and thriving plants for years to come. 🌸
Ready to transform your garden? Grab your gloves, pick a sunny (but not too sunny!) spot, and get planting! For extra confidence, test your soil’s pH and adjust it—your hydrangeas will thank you with vibrant, show-stopping flowers. Happy gardening!