
Pests and Diseases
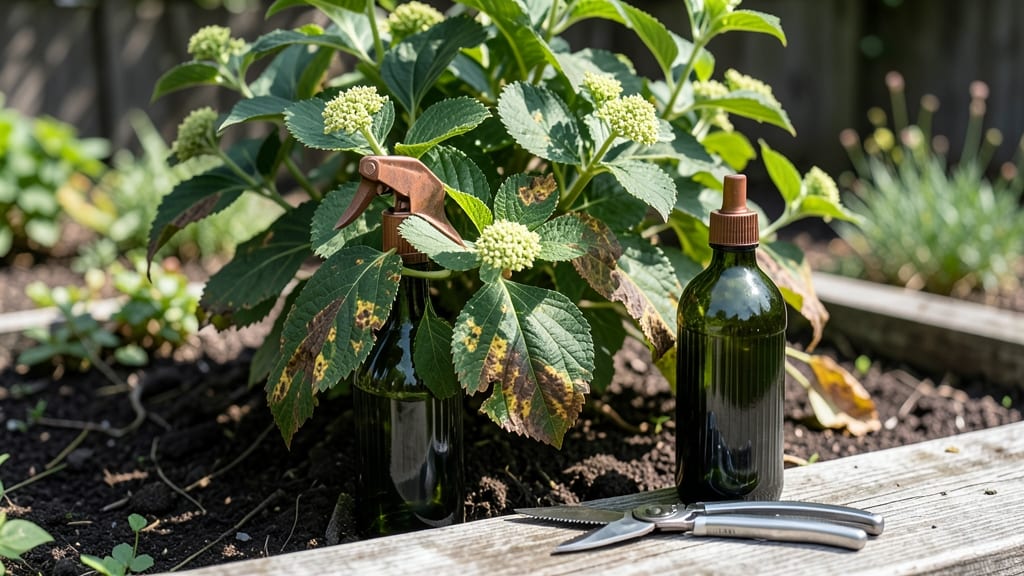
Before your hydrangeas succumb to the ugly brown crinkles of cercospora leaf spot, here’s the effective hydrangea treatment you need to stop it fast. I’ve seen this disease turn showstopping blooms into sad, skeletal remains, but the good news?
You can stop it in its tracks with three targeted steps—no fancy equipment required.
The fungus thrives when leaves stay wet for long stretches, especially in humid climates or shaded spots where airflow is poor. Last year, my Endless Summer hydrangea nearly lost all its foliage because I ignored the early spots—tiny brown specks with yellow halos—until they merged into massive dead patches.
The key is catching it early, before the spores spread to new leaves.
You’ll need copper fungicide for prevention, pruners for cleanup, and a 10-minute weekly check during rainy seasons. By mid-August, your hydrangeas will look like they just escaped a spa treatment: glossy, disease-free, and ready for their big fall show.
The secret? Removing infected leaves, improving airflow, and applying fungicide at the first sign of trouble.
Works for all hydrangea varieties, from mopheads to paniculatas, and prevents recurrence next season. Here’s exactly how to do it—no guesswork, just results.
Root Causes of Hydrangea Leaf Spots
Cercospora leaf spot isn’t just a random attack—it’s a fungal party crashers your hydrangeas didn’t RSVP for. Understanding why this disease strikes is the first step to stopping it in its tracks. Let’s break down the science behind the spots, so you can outsmart this pesky pathogen.
The Cercospora fungus thrives when conditions are perfect for its survival and spread. Think of it like a fungal Goldilocks: too hot or too dry, and it struggles, but just-right humidity and temperature? That’s its happy place.
- Ideal conditions: Temperatures between 75–85°F (24–29°C) with high humidity (70%+) or frequent leaf wetness (like morning dew or overhead watering).
- Why it matters: Warmth speeds up fungal growth, while moisture helps spores stick to leaves and germinate. Overcast days or shaded hydrangeas (where leaves stay damp longer) create the perfect breeding ground.
- Actionable insight: If your area has long, humid summers, your hydrangeas are at higher risk—especially varieties like Hydrangea macrophylla (bigleaf hydrangeas), which are particularly susceptible.
Healthy hydrangeas are like bodybuilders—they resist infections. But when they’re weak, run-down, or living in cramped conditions, they’re easy targets. Here’s what weakens your plants and invites Cercospora:
- Poor air circulation: Hydrangeas planted too closely together or near walls/fences trap moisture, creating a fungal sauna. Spores linger and reinfect leaves before they dry out.
- Nutrient deficiencies: Low nitrogen or phosphorus can stress plants, making them less resistant to pathogens. Yellowing leaves (chlorosis) or stunted growth are red flags.
- Compacted or waterlogged soil: Roots suffocate when soil doesn’t drain well, starving the plant of oxygen and nutrients. Weak roots = weak defenses.
- Recent transplant shock: Newly planted hydrangeas are vulnerable for the first year as they adjust to their environment.
Pro tip: 💡 Mulch properly (2–3 inches of organic mulch) to improve soil health and airflow at the base of the plant. Avoid piling mulch against the stem—this traps moisture and encourages rot.
The Cercospora fungus is a survivor. It can lie dormant in plant debris (like fallen leaves, stems, or old mulch) for years, waiting for the right moment to strike. Here’s how it sneaks back into your garden:
- Infected leaves or stems: If you didn’t clean up last year’s diseased foliage, spores overwinter in the debris and jump onto fresh leaves when conditions warm up.
- Contaminated tools or soil: Pruners, gloves, or even garden soil can carry spores from infected plants to healthy ones. Never reuse tools on different plants without sterilizing them!
- Wind or water spread: Rain splashes spores onto nearby plants, while wind carries them miles. That’s why outbreaks often hit entire gardens or neighborhoods simultaneously.
Actionable fix: 🔥 Fall cleanup is non-negotiable. Remove and dispose of (not compost!) infected leaves and stems. Sterilize tools with 70% isopropyl alcohol or a 10% bleach solution between uses.
Water is the fungus’s favorite delivery system. How you water your hydrangeas directly impacts whether Cercospora gets a foothold:
- Overhead watering: Sprinklers or hose-end sprays splash spores onto leaves, creating a perfect infection highway. Even morning dew can be enough if humidity is high.
- Late-day watering: Leaving leaves wet overnight (when temps drop) extends the fungal party. Spores germinate faster in the dark and damp.
- Inconsistent watering: Drought stress weakens plants, while sudden soaking can shock them—both scenarios make them more susceptible to infections.
Smart solution: 🌡️ Water at the base with drip irrigation or soaker hoses, early in the day (before 10 AM). Aim for 1–1.5 inches of water per week, adjusting for rain.
Now that you know why Cercospora leaf spot shows up uninvited, you’re ready to flip the script and protect your hydrangeas. The good news? Armed with this knowledge, you can starve out the fungus before it ruins your blooms!
Fixing Fungal Spots Fast
Cercospora leaf spot can turn your hydrangeas from lush and vibrant to spotted and sad—but don’t worry! With the right steps, you can stop the spread, heal your plants, and prevent future outbreaks. Below, we’ll break down cause-specific fixes and prevention tips to keep your hydrangeas thriving.
Problem: Too much moisture (from overwatering, heavy clay soil, or poor drainage) creates the perfect breeding ground for Cercospora fungi.
How to Fix It:
- ⏰ Reduce watering immediately – Let the top 2-3 inches of soil dry out between waterings. Stick your finger in the soil to check!
- 🌡️ Improve airflow – Space plants 3-4 feet apart to allow sunlight and air circulation. Thin out dense foliage if needed.
- 🏗️ Fix drainage issues – Amend heavy soil with compost or perlite to loosen it. If planting in containers, use pots with drainage holes.
- 🌧️ Water in the morning – Wet leaves stay damp longer at night, encouraging fungal growth. Water at the base instead.
💡 Prevention Tip:
- Mulch properly – Use 2-3 inches of organic mulch (like wood chips) to retain moisture without smothering roots. Keep mulch 6 inches away from the stem to prevent rot.
Problem: You’ve spotted dark, irregular lesions (with yellow halos) on leaves—classic Cercospora symptoms.
How to Fix It:
- 🧹 Remove infected leaves – Pick off and dispose of (don’t compost!) spotted leaves daily to stop spore spread.
- 🧴 Apply fungicide – Use a copper-based fungicide (like Copper Soap) or a baking soda spray (1 tsp baking soda + 1 quart water + a drop of dish soap). Spray every 7-10 days until new growth appears.
- 🌿 Prune for airflow – Trim back overlapping branches and deadheading spent blooms to reduce humidity in the plant.
- 🔄 Sterilize tools – Clean pruners with rubbing alcohol between cuts to avoid spreading spores.
💡 Prevention Tip:
- Rotate fungicides – If using chemical treatments, alternate between copper, neem oil, and sulfur-based sprays to prevent resistance.
Problem: Hydrangeas under stress (from nutrient deficiency, extreme heat, or transplant shock) are more susceptible to infections.
How to Fix It:
- 🌱 Feed with balanced fertilizer – Use a 10-10-10 or 20-20-20 fertilizer in early spring to boost growth. Avoid high-nitrogen fertilizers later in the season, which promote soft, fungus-loving foliage.
- 💧 Deep water deeply – Instead of light, frequent watering, give your hydrangeas 1-2 inches of water per week (including rainfall) to encourage strong roots.
- 🌿 Mulch to regulate soil temp – Mulch helps prevent soil temperature swings, reducing stress. Straw or pine needles work well.
- 🌞 Provide shade in extreme heat – If your area gets above 90°F (32°C), provide afternoon shade to prevent leaf scorch and stress.
💡 Prevention Tip:
- Choose resistant varieties – Some hydrangeas (like ‘Endless Summer’ or ‘Limelight’) are less prone to leaf spots. Check with local nurseries for disease-resistant options.
Problem: If your hydrangeas are already heavily infected by fall, you’ll need to winterize properly to avoid next year’s outbreak.
How to Fix It:
- 🍂 Rake up fallen leaves – Remove all debris from the base of plants and around the garden to eliminate overwintering spores.
- 🧼 Sterilize the area – Spray the soil with a 1:10 bleach-water mix (or hydrogen peroxide) to kill lingering fungi.
- 🌿 Prune diseased stems – Cut back any branches with lesions to 6 inches below the damage.
- 🛡️ Plan a spring treatment – Mark your calendar for early spring (before new growth appears) to apply a preventative fungicide.
💡 Prevention Tip:
- Rotate plant locations – If possible, move hydrangeas to a new spot next year to break the fungal cycle in the soil.
Final Thought: With consistent care, your hydrangeas can bounce back—healthier and stronger than before! 🌿✨ The key is acting fast when you spot the first signs and preventing future outbreaks with smart gardening habits.
Frequently asked questions
Can I still save my hydrangeas if most leaves already have brown spots?
Yes, but act fast! Remove all infected leaves immediately and apply a copper fungicide or neem oil spray to stop further spread. Focus on improving airflow by spacing plants 3-4 feet apart and watering at the base in the morning. With consistent care, new growth will emerge healthy by mid-summer.
Will baking soda really help treat cercospora leaf spot?
A homemade baking soda spray (1 tsp baking soda + 1 quart water + a drop of dish soap) creates an alkaline environment that inhibits fungal growth. Spray leaves thoroughly every 7-10 days during humid weather. For severe cases, combine with a copper fungicide for better results.
How do I know if my hydrangea has cercospora leaf spot vs. another disease?
Look for these key signs: dark brown, irregular spots with yellow halos on upper leaves, often starting at the bottom. Unlike powdery mildew (which looks like white dust), cercospora spots are crinkled and greasy-looking. Check the undersides of leaves for tiny black specks (fungal spores).
Is it safe to compost leaves with cercospora leaf spot?
No, never compost infected leaves! The fungus can survive composting and reinfect your garden. Instead, double-bag them in plastic and throw them in the trash. Remove all plant debris from the area to break the fungal cycle.
How often should I apply fungicide for prevention?
For prevention, apply a copper fungicide every 2-3 weeks during humid seasons (spring through fall). Start treatments before you see symptoms. If using organic options like neem oil, apply weekly during peak fungal activity. Always follow label instructions for best results.