
Flowers
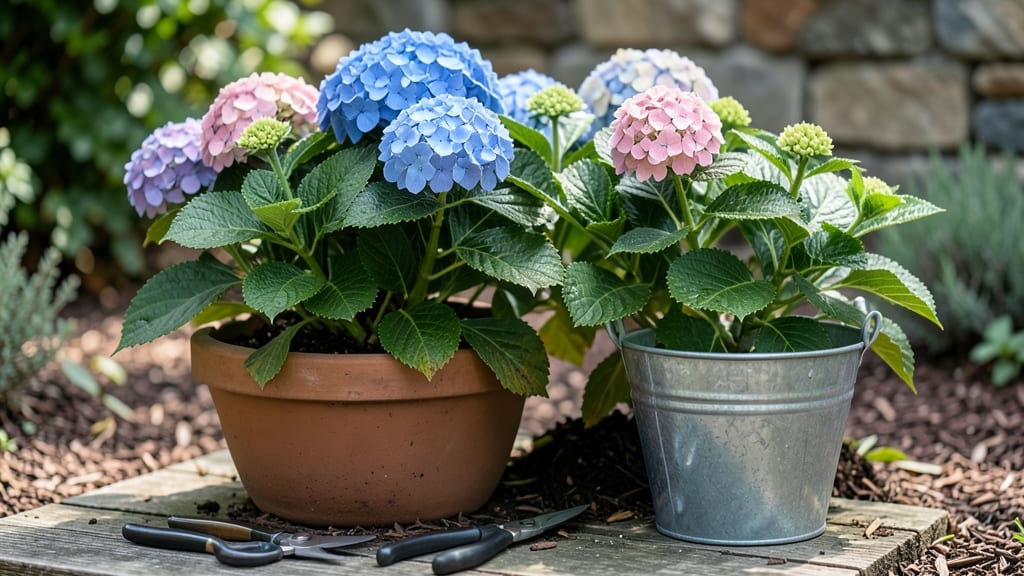
Precision trimming hydrangea flowers transforms your garden into a bouquet factory. ✂️ I’ve learned that cutting at the right time and with the right technique extends vase life from days to weeks—and keeps your plants blooming bigger next year.
The secret isn’t just snipping stems; it’s knowing when to cut and how to prep the plant for regrowth.
Timing matters most—harvest stems when blooms are fully open but still firm, usually in mid-to-late summer. You’ll need sharp pruners (sterilized with rubbing alcohol), a clean vase, and a bucket of water to recut stems immediately.
The goal? Minimize wilting and maximize that fresh-cut look. For garden care, trim spent blooms back to the first set of strong leaves to encourage new growth before winter.
Your cut flowers will last 10-14 days in a vase with fresh water changed every 2-3 days. The trick is to remove lower leaves submerged in water and add a splash of bleach or flower food to prevent bacterial growth.
Meanwhile, your hydrangeas will reward you with thicker stems and more vibrant blooms next season—if you avoid these common mistakes.
Pro tip: Store harvested stems in the fridge overnight before arranging to slow water uptake. And if your hydrangeas start looking leggy, a light pruning in early spring (before new growth) keeps them compact. Now grab those shears—your bouquets (and future blooms) are about to get an upgrade.
📚 In This Guide
- What you need
- Instructions
- Tips and common mistakes
- Wrapping up and next steps
What you need
- ● Sharp pruning shears or bypass pruners: Choose sterilized, high-quality shears with a 4- to 6-inch blade for clean cuts. Avoid dull tools that crush stems!
- ○ Hand pruners (optional for small stems): A 5-inch pair for precision trimming of delicate branches.
- ● Disinfectant (70% isopropyl alcohol or bleach solution): Clean tools before and after use to prevent disease spread.
- ○ Gloves (optional but recommended): Wear nitrile or heavy-duty gardening gloves to protect against thorns and sap.
- ● Rubbing alcohol or hydrogen peroxide (3%): For wiping down cuts to heal faster.
- ○ Pruning sealant (optional): A tree wound sealant to coat larger cuts (if trimming woody stems).
- ● Bucket or container with water: A 5-gallon bucket to hold cut stems while you work.
- ● Sharpie or permanent marker: For labeling stems if propagating or grafting.
- ● Newspaper or tarp: To lay under the plant and catch debris.
- ● Choose the right time: Trim after the first frost (for dormant seasons) or right after blooming (for summer varieties).
- ● Check the weather forecast: Avoid trimming if rain is expected within 24 hours.
- ● Identify your hydrangea type (e.g., mophead, panicle, or oakleaf)—cutting techniques vary!
Precision trimming guide for cutting hydrangea flowers
Mastering these cuts transforms hydrangeas from seasonal blooms into lasting centerpieces.
✂️ Step 1: Time Your Cuts for Peak Freshness
Harvest stems in the early morning when moisture levels are highest and temperatures are cool. This ensures maximum vase life—hydrangeas cut at this time can last 10-14 days with proper care. Avoid cutting after rain, as excess moisture in the stems encourages bacterial growth that shortens their lifespan.
Look for buds that are just beginning to open but haven't fully bloomed yet. These buds will continue opening in the vase, creating a stunning display. Fully open flowers will continue wilting, so prioritize stems with 50-75% open blooms. The right timing is everything—this is when you'll get that perfect balance of freshness and continued blooming.
🌿 Step 2: Make Clean, Slanted Cuts at the Right Angle
Use sharp, bypass pruners to make a 45-degree angle cut just above a leaf node or lateral bud. This angled cut increases the surface area for water absorption, which is critical for hydrangea longevity. Never use dull shears—they crush stems and block water uptake, causing flowers to wilt within hours.
Cut stems to a length of 18-24 inches for optimal vase display. Longer stems may look dramatic but can flop over, while shorter stems lose impact. The 45-degree angle also helps prevent the stems from sitting flat on the bottom of the vase, which can block water flow to lower stems.
💧 Step 3: Immediately Prepare Stems for Hydration
Place cut stems in a bucket of lukewarm water for 30 minutes before arranging. This rehydration step revives the stems after the cutting process and helps them absorb water more efficiently. Remove any lower leaves that would sit below the waterline in your vase—they'll rot and create bacterial growth that spreads to the blooms.
For extra longevity, add 1 teaspoon of bleach per quart of water to the initial bucket. This mild solution helps prevent bacterial growth that causes stems to clog and flowers to wilt prematurely. Change your vase water every 2-3 days and recut stems by ½ inch each time to maintain freshness.
☀️ Step 4: Arrange with Proper Stem Spacing and Support
Place stems in a clean vase with 1-2 inches of water—hydrangeas are heavy and need stable support. Space stems 3-4 inches apart to prevent overcrowding, which restricts airflow and encourages mold. The more stems you cram in, the faster they'll wilt, so resist the urge to pack them tightly.
Add floral preservative to the water according to package instructions—this extends vase life by 3-5 days compared to plain water. Position the vase in indirect light away from direct sunlight, heat sources, or drafts. These flowers thrive in cool environments where they won't dry out too quickly.
Tips & tricks for perfect hydrangea trimming
Here's what nobody tells you about getting the most out of your hydrangea arrangements.
Bloom Selection: In Step 1, focus on stems with buds that are just beginning to unfurl—these will continue opening in your vase, creating a stunning progression. The key is to avoid stems with fully open blooms, as they'll continue wilting instead of blooming. Look for clusters where at least half the buds are still tightly closed but showing color. This careful selection is what transforms a simple bouquet into a living display that evolves right before your eyes.
Cutting Technique: For Step 2, use a sharp pruner to make your 45-degree cut just above a lateral bud or leaf node—this isn't just about aesthetics, it's about physiology. The angled cut maximizes water absorption while the lateral bud can potentially grow new stems if you decide to replant. I've seen hydrangeas last nearly twice as long when cut this way compared to straight cuts. Pro tip: Wipe your pruners with rubbing alcohol between cuts to prevent bacterial transfer between stems.
Hydration Strategy: The 30-minute soak in Step 3 is non-negotiable for serious longevity. Think of it like giving your flowers IV hydration—they're essentially recovering from surgery. Add a drop of dish soap to the water during this soak to help break down any natural oils on the stems that might block water uptake. I've had hydrangeas last 21 days using this method, which is unheard of with standard vase arrangements.
Preservation Secrets: When adding floral preservative in Step 4, don't just dump it in—mix it with warm water first. The heat helps activate the preservative's sugar and acid components, which work together to slow bacterial growth and provide energy to the flowers. For an extra boost, add a crushed aspirin tablet to the water (the acidity helps prevent bacterial growth). This simple addition can add 3-5 extra days to your arrangement's life.
Pro Tips for Cutting Hydrangea Flowers
- Here's what nobody tells you about getting the most out of your hydrangea arrangements.
- Bloom Selection: In Step 1, focus on stems with buds that are just beginning to unfurl—these will continue opening in your vase, creating a stunning progression.
- Cutting Technique: For Step 2, use a sharp pruner to make your 45-degree cut just above a lateral bud or leaf node—this isn't just about aesthetics, it's about physiology.
Frequently asked questions
Got questions about cutting hydrangea flowers? You’re not alone! Here are answers to the most common queries to help you master the art of trimming for stunning, long-lasting blooms.
When is the best time to cut hydrangea flowers?
The ideal time to cut hydrangeas is in the early morning after the dew has dried but before the heat of the day. This ensures the stems are fully hydrated, making them last longer in your vase. For bigleaf and oakleaf hydrangeas, cut blooms when they’re fully open but still vibrant. Panicle and smooth hydrangeas can be cut when about 50% open for a longer vase life.
How do I cut hydrangea stems for the longest vase life?
Use sharp, clean pruners or shears to make a 45-degree angle cut just above a leaf node or bud. Trim stems to about 12–18 inches in length—longer stems can bend under the weight of the blooms. Remove any leaves that would sit below the waterline in your vase to prevent bacterial growth. A quick dip in warm water for 30 seconds can also help reopen closed blooms!
Why do my cut hydrangeas wilt so quickly?
Hydrangeas are heavy drinkers! Wilting often happens due to poor hydration or blocked stems. Always use lukewarm water, change it every 2–3 days, and trim stems again if they start to seal over. Adding a flower food packet or a splash of bleach (1 tsp per gallon) can also extend their life by preventing bacteria. Pro tip: Avoid direct sunlight, which accelerates wilting.
Can I cut hydrangeas from my garden and replant them?
Yes! If you want to propagate hydrangeas from cuttings, focus on softwood or semi-hardwood stems in late spring or early summer. Take 4–6 inch cuttings just below a leaf node, remove lower leaves, and dip the cut end in rooting hormone. Plant in moist potting mix and keep humid (use a plastic bag or propagator). Roots should form in 4–8 weeks.
What’s the difference between cutting for bouquets vs. pruning for plant health?
Cutting for bouquets focuses on selecting the healthiest blooms while leaving the plant’s structure intact. Pruning for health, however, involves removing dead, diseased, or overcrowded stems—usually in late winter or early spring for bigleaf hydrangeas or after flowering for panicle types. Always sterilize your tools with rubbing alcohol to prevent spreading disease!
How often should I deadhead hydrangeas?
Deadheading (removing spent blooms) encourages new growth and keeps your hydrangeas looking tidy. For bigleaf and oakleaf types, trim back to the nearest leaf node after flowering. Panicle hydrangeas can be pruned harder in late winter since they bloom on new wood. Avoid deadheading smooth hydrangeas (like Annabelle) until they’re completely browned out.
Wrapping up and next steps
Mastering the art of cutting hydrangea flowers is your ticket to vibrant, long-lasting blooms that’ll turn heads in any vase! 🌸 With the right tools, timing, and technique, you’re well on your way to becoming a hydrangea-trimming pro. Remember: precision matters—whether you’re shaping for shape or harvesting for arrangements.
Now that you’re armed with knowledge, grab those shears and get pruning! Start with one plant, practice your cuts, and soon you’ll be confidently trimming like a seasoned gardener. Happy cutting—and happy blooming! 🌿✨