
How To
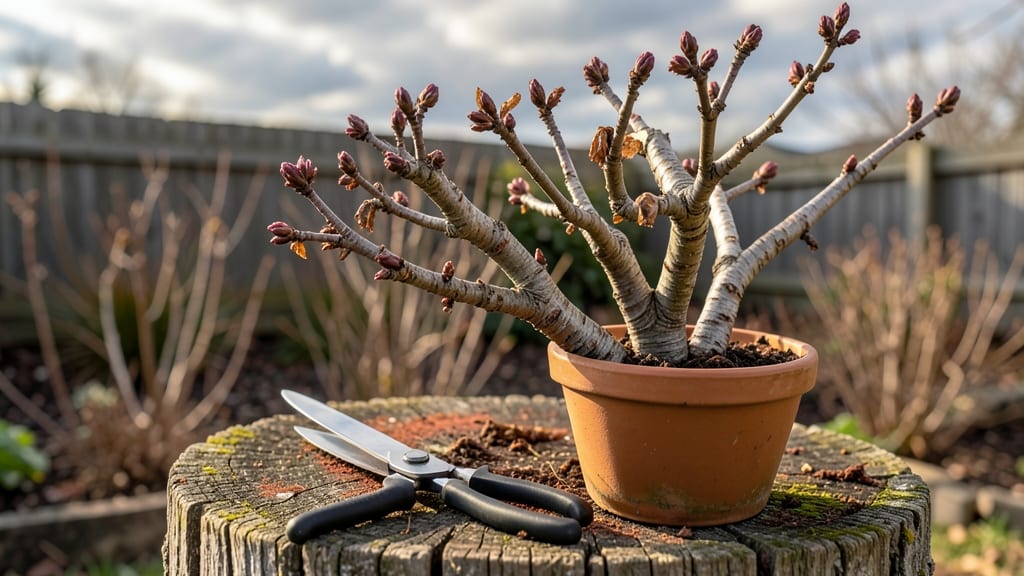
Cutting hydrangeas in spring isn’t just about trimming—it’s about setting up next year’s blooms. ✂️ I’ve pruned my mophead hydrangeas for years, and the difference between a bush bursting with flowers and one that barely bud comes down to timing and technique.
Most gardeners wait too late, missing the prime window when buds are just starting to swell but before new growth takes off.
The secret lies in watching for those tiny green buds along the stems—your cue to grab your pruners. You’ll need clean, sharp tools, a pair of gloves, and a disinfectant spray to prevent spreading disease between cuts.
Mophead types (like Endless Summer) bloom on old wood, so you only remove dead or crossing branches, while panicle hydrangeas (like Limelight) bloom on new growth and can be cut back harder.
What you end up with is a bush that looks like a well-groomed topiary in summer and explodes with vibrant blooms by next June. The flowers stay larger, the plant stays healthier, and you avoid the heartbreak of skipping pruning entirely.
The best part? It takes less than 30 minutes once you know what to look for.
Works for all hydrangea varieties in zones 3-9, and the same principles apply whether you’re dealing with a single plant or a full hedge. Here’s how to do it without a single guess.
📚 In This Guide
- What you need
- Instructions
- Tips and common mistakes
- Wrapping up and next steps
What you need
- ● Pruning shears or bypass pruners – Choose sharp, bypass-style pruners (not anvil) to avoid crushing stems. Size: 6-8 inches for medium-sized hydrangeas.
- ● Garden gloves – Protect your hands from thorns (especially on panicle or oakleaf varieties) and rough stems. Type: Heavy-duty, water-resistant gloves.
- ● Disinfectant (rubbing alcohol or 10% bleach solution) – Clean tools between cuts to prevent disease spread. Ratio: 1 part bleach to 9 parts water.
- ● Rag or paper towels – For wiping down tools and stems.
- ○ Garden twine or plant ties – Optional but helpful for securing large branches post-pruning.
- ● Hand pruners (for smaller cuts) – Great for trimming delicate stems or tight spaces.
- ● Loppers (for thick stems) – If your hydrangea has woody, mature branches over ½-inch thick.
- ● Pruning saw (for very thick branches) – Only needed for massive, overgrown hydrangeas (rare in home gardens).
- ● Garden hose or spray bottle – To rinse off sap or debris after pruning.
- ● Notebook or phone – Jot down notes on which stems you cut (helpful for tracking growth!).
Step-by-step instructions for pruning hydrangeas in spring
Revitalize your hydrangeas with this simple pruning routine—just a few cuts will transform next season's blooms.
✂️ Step 1: Identify Your Hydrangea Type First
Hydrangeas bloom on either old wood (last year's growth) or new wood (current season's stems). Bigleaf hydrangeas (H. macrophylla) bloom on old wood, while panicle and oakleaf types bloom on new wood. Cutting at the wrong time can mean no flowers next year.
Look for last year's flower heads—if they're still attached, you're dealing with an old-wood bloomer. New-wood types often have bare stems with buds forming at the tips. I always check this first; I've made the mistake of pruning old-wood types too late and ended up with no blooms!
✂️ Step 2: Prune Old-Wood Bloomers (Bigleaf Types)
For bigleaf hydrangeas, wait until after blooming—usually late summer to early fall—but you can do light shaping in spring. Cut back 1/3 of the oldest stems to the ground each year to encourage new growth. This prevents the plant from becoming overcrowded and ensures strong blooms.
Make clean cuts just above a set of 5 leaves or a visible bud. Avoid cutting into woody stems—always cut back to a leaf node. I like to use sharp pruners to make clean cuts that heal faster. If you see any dead or diseased stems, remove those completely first.
☀️ Step 3: Renew New-Wood Bloomers (Panicle & Oakleaf Types)
Panicle and oakleaf hydrangeas bloom on new growth, so you can prune them in late winter or early spring. Cut back 1/3 to 1/2 of the oldest stems to the ground. This encourages vigorous new growth that will produce more flowers.
For shaping, cut back other stems by half their height to maintain a balanced shape. Thin out crowded stems to improve air circulation, which prevents fungal diseases. I always step back and look at the plant from all sides before making final cuts—it helps visualize the shape.
✂️ Step 4: Clean Up and Fertilize
After pruning, remove all fallen leaves and debris from around the plant to reduce disease risk. Hydrangeas are heavy feeders, so apply a balanced fertilizer (10-10-10) in early spring to encourage strong new growth. Water deeply after fertilizing to help nutrients absorb into the soil.
Mulch around the base with 2-3 inches of organic mulch to retain moisture and regulate soil temperature. This is especially important in hot climates where soil can dry out quickly. I always water thoroughly after mulching to settle everything in place.
⏰ Step 5: Monitor and Adjust Through the Season
Watch your hydrangeas throughout spring and summer. If stems grow too leggy, you can do a light trim in early summer to encourage bushier growth. Deadhead spent blooms on new-wood types to redirect energy into new flowers.
For old-wood types, avoid heavy pruning until after they bloom. If you accidentally prune too much, don't panic—just focus on keeping the plant healthy, and it will recover. I've had seasons where I over-pruned, and the plant still bounced back with beautiful blooms the following year.
Tips & tricks for perfect spring hydrangea pruning
These simple tricks will help you avoid common mistakes and get your hydrangeas ready for their best blooming season yet.
Type Identification: I can't stress this enough—take 10 minutes to properly identify your hydrangea type before making any cuts. For bigleaf varieties, look for last year's flower heads still attached to the stems. If you see them, you're dealing with old-wood bloomers that need special care. I've seen gardeners accidentally prune these too early and end up with no flowers the next year—don't make that mistake!
Pruning Precision: When cutting back old-wood types, aim to remove exactly 1/3 of the oldest stems each year. This might sound tricky, but here's how I do it: count all the stems, then remove every third one starting from the oldest (usually the thickest ones at the center). For new-wood types, you can be a bit more aggressive with 1/3 to 1/2 of the oldest stems. Always make your cuts just above a set of 5 leaves or a visible bud—this ensures new growth will sprout from the right spot.
Tool Preparation: Before you start pruning, take 2 minutes to sharpen your pruners. Dull blades crush stems instead of making clean cuts, which can damage the plant and invite disease. I like to use a small file to sharpen the blades right before I begin. Also, disinfect your tools with rubbing alcohol to prevent spreading any potential diseases between cuts.
Seasonal Timing: While the instructions mention late summer/fall for old-wood types, you can do light shaping in spring as long as you're gentle. Just avoid heavy pruning until after they've finished blooming. For new-wood types, early spring is perfect timing. I always mark my calendar with these dates to avoid pruning at the wrong time—trust me, your future blooms will thank you!
Pro Tips for Cut Hydrangeas In Spring
- These simple tricks will help you avoid common mistakes and get your hydrangeas ready for their best blooming season yet.
- Type Identification: I can't stress this enough—take 10 minutes to properly identify your hydrangea type before making any cuts.
- Pruning Precision: When cutting back old-wood types, aim to remove exactly 1/3 of the oldest stems each year.
Frequently asked questions
Got questions about pruning hydrangeas in spring?
You’re not alone! Here are answers to the most common concerns—so you can confidently shape your shrubs for stunning blooms next season.
When is the exact best time to prune hydrangeas in spring?
For bigleaf and oakleaf hydrangeas, prune right after blooming (late spring to early summer). For panicle and smooth types, prune in late winter or early spring before buds swell. Pro tip: Check your variety—late pruning can cut off next year’s flowers!
What if I prune at the wrong time and cut off last year’s blooms?
Don’t panic! If you accidentally prune too early (e.g., on mophead hydrangeas), you’ve removed this year’s flowers—but the plant will still bloom next season. Just focus on shaping healthy stems for future growth. Panicle hydrangeas are more forgiving and bloom on new wood.
Should I remove dead or diseased branches now, or wait?
Always remove dead, diseased, or crossing branches immediately—regardless of season. Why? Dead wood harbors pests, and diseased stems can spread. Snip them back to healthy tissue (look for green, firm growth) to keep your hydrangea thriving.
How much can I cut back? Is there a “too much” rule?
For most hydrangeas, aim to prune 1/3 of the plant’s height max. Over-pruning stresses the shrub, reducing next year’s blooms. Reblooming types (like Endless Summer) can handle harder cuts, but old-wood varieties (like mophead) need gentle trims to preserve buds.
What if it rains or the weather is unpredictable—can I still prune?
Yes! Prune on a dry day (even if overcast) to avoid soggy soil or wet cuts that invite disease. If rain’s forecasted, prune 2–3 days ahead so wounds have time to callus over. Bonus: A light dusting of fungicide powder on cuts can prevent fungal infections.
Wrapping up and next steps
Pruning your hydrangeas in spring doesn’t have to be intimidating—just follow these simple steps, and you’ll reward yourself with vibrant blooms and healthier plants next season! 🌸 Whether you’re shaping mopheads, lacecaps, or panicle varieties, timing, technique, and confidence are your best tools.
Now that you’re armed with the know-how, grab those shears and give your hydrangeas the fresh start they deserve.
Ready to see the magic unfold? Mark your calendar for late spring or early summer to enjoy the fruits of your labor—literally! And if you’re feeling extra ambitious, why not experiment with container gardening or propagating cuttings? Your green thumb is about to shine brighter than ever. 🌿✨