
Picking
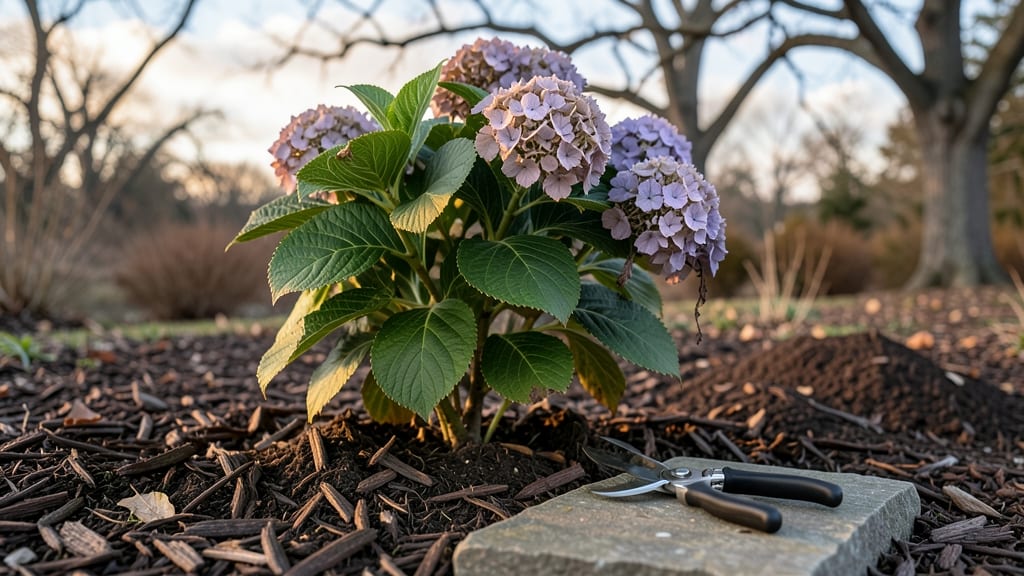
How to get hydrangeas ready for winter isn’t just about survival—it’s about setting them up for next year’s showstopping blooms. ✨ I’ve learned the hard way that skipping this step means shriveled stems and lost color, but with the right timing and care, your plants will thrive. will bounce back stronger than ever.
The key is protecting the roots from deep freezes while letting the plant rest naturally. Most hydrangeas need a light pruning in late fall to remove dead growth, but the real work is insulating the base with mulch and wrapping tender stems in burlap or frost cloth.
Even in mild winters, this extra layer makes all the difference. By spring, you'll see fresh green growth emerging from the base, and those iconic blooms will return bigger and brighter than ever. The secret is patience—hydrangeas reward careful winter prep with years of reliable color.
Whether you're in a cold zone or just need a little extra protection, these steps work for all varieties. Let's get your hydrangeas through the cold safely!
📚 In This Guide
- What you need
- Instructions
- Tips and common mistakes
- Wrapping up and next steps
What you need
- ● Pruning shears or sharp bypass pruners – 1 pair (sterilized with rubbing alcohol to prevent disease).
- ● Garden gloves – 1 pair (heavy-duty for protection against thorns and cold).
- ● Mulch – 3–4 inches (straw, shredded leaves, or pine needles—avoid fresh grass clippings).
- ● Burlap or frost cloth – Enough to wrap the plant base (breathable fabric to shield from harsh winds).
- ○ Garden twine or stakes – Optional but helpful (to secure wrapping materials).
- ● Watering can or hose with a gentle nozzle – 1 (for deep watering before winter).
- ● Anti-desiccant spray – 1 bottle (like Wilt-Pruf to protect leaves from drying).
- ● Plant ties or soft fabric strips – As needed (to loosely bundle stems if pruning heavily).
- ● Thermometer – 1 (to monitor ground temps in freezing zones).
- ● Compost or aged manure – Small amount (for spring feeding after dormancy).
Step-by-Step instructions for winterizing hydrangeas
Here's how I protect my hydrangeas every year—no guesswork, just reliable results.
🌿 Step 1: Prune Dead and Weak Growth
Start by examining each plant and removing any dead, diseased, or weak stems with clean, sharp pruners. I cut back to the nearest healthy bud or branch junction—this prevents pests and diseases from overwintering in damaged tissue. Focus on stems that look brown, mushy, or hollowed out.
For most hydrangeas, this is the only pruning you'll do before winter. The goal is to tidy up the plant without removing next year's flower buds. You'll know you've done enough when the plant looks open and airy, with only strong, healthy stems remaining.
✂️ Step 2: Apply a Layer of Mulch
Spread a 3-4 inch thick layer of organic mulch around the base of each hydrangea, keeping it 6 inches away from the stem. I use shredded bark or straw because they insulate roots while allowing moisture to pass through. The mulch should cover the root zone completely, protecting it from freezing temperatures.
Don't pile mulch against the stem—this can trap moisture and cause rot. Instead, create a gentle slope that funnels water away from the plant. If your hydrangeas are in a windy area, add a small windbreak made of burlap or evergreen branches to shield them from cold gusts.
🌱 Step 3: Wrap Tender Varieties for Extra Protection
If you have hydrangeas like Hydrangea macrophylla or Hydrangea paniculata that struggle in freezing temperatures, wrap their stems and canes with burlap or frost cloth. Start at the base and work upward, securing the wrap with twine or plant ties. This creates a protective barrier against harsh winds and sudden temperature drops.
For large mophead or lacecap hydrangeas, you can also bundle the stems together and wrap them like a bundle of firewood. This helps retain heat and prevents the wood from splitting in freezing conditions. Leave the tops exposed—they're tougher than you think!
💧 Step 4: Water Deeply Before the Ground Freezes
Give your hydrangeas a deep watering about 2 weeks before the first hard frost. This ensures the roots are hydrated and can draw moisture from the soil even as temperatures drop. Water slowly until it seeps 6-8 inches deep into the soil—you'll know it's enough when the water starts to pool on the surface.
After watering, let the soil dry slightly before the ground freezes. Wet soil that stays frozen can lead to root rot, so aim for a balance: moist but not soggy. If your area gets heavy snowfall, the weight can compress the soil—add a 1-2 inch layer of straw on top of the mulch to prevent compaction.
☀️ Step 5: Monitor and Adjust Through Winter
Check your hydrangeas once a month during winter, especially after heavy snowfall or ice storms. Gently brush off accumulated snow to prevent branches from breaking under the weight. If you notice any signs of frost damage—like blackened stems or mushy leaves—remove the affected parts immediately to prevent spread.
In late winter, as temperatures begin to rise, you can remove the protective wraps and mulch. I wait until mid-March in my zone before uncovering everything, giving the soil time to thaw naturally. This gradual approach helps the plants wake up slowly and avoids shocking them with sudden warmth.
Tips & tricks for perfectly winterizing hydrangeas
Here's what nobody tells you about keeping your hydrangeas thriving through the cold months.
Pruning Precision: In Step 1, when you're removing dead stems, look for the "V" shape where healthy buds form. Cut just above this bud at a 45-degree angle to promote better water runoff and prevent disease. I learned this the hard way after losing plants to fungal infections—always use clean, sharp pruners to avoid tearing the stems, which creates entry points for pests. Confession: I skipped sterilizing my pruners for years and wondered why my plants kept struggling!
Mulch Mastery: The 3-4 inch layer of mulch in Step 2 does more than just insulate—it's your hydrangea's winter blanket. For extra protection in colder climates, add a second layer of mulch after the first hard frost. I use shredded leaves on top of my bark mulch to create an even thicker barrier. Just remember to keep that mulch 6 inches away from the stem to prevent rot, which is a common mistake that leads to winter kill.
Timing the Deep Watering: The 2-week window before the first hard frost in Step 4 is crucial, but don't wait until the last minute. If your area gets unpredictable weather, aim for 3 weeks ahead. I test soil moisture by sticking my finger 6 inches deep—if it's dry, water again. The goal is hydrated roots that can handle freezing temperatures without stress. After watering, let the soil dry slightly before freezing to prevent ice crystals from damaging the roots.
Winter Monitoring: Those monthly checks in Step 5 are your early warning system. I keep a small broom handy to gently brush off snow—never shake branches, which can cause them to snap. If you notice any frost damage, remove affected parts immediately with sterilized pruners. The key is to act fast before diseases spread to healthy tissue. In late winter, wait until mid-March to uncover your plants, giving the soil time to thaw naturally and preventing shock from sudden warmth.
Pro Tips for Get Hydrangeas Ready For Winter
- Here's what nobody tells you about keeping your hydrangeas thriving through the cold months.
- Pruning Precision: In Step 1, when you're removing dead stems, look for the "V" shape where healthy buds form.
- Mulch Mastery: The 3-4 inch layer of mulch in Step 2 does more than just insulate—it's your hydrangea's winter blanket.
Frequently asked questions
Got more questions about winterizing your hydrangeas? Here are some common ones—and their answers—to help you prep like a pro!
When should I start preparing my hydrangeas for winter?
Start preparing your hydrangeas 6–8 weeks before the first frost (usually late summer to early fall). This gives plants time to harden off, and you can mulch, prune, and protect them gradually. For tender varieties (like Hydrangea macrophylla), begin earlier—around early September!
Do I need to cover my hydrangeas for winter, or is mulching enough?
It depends on your climate! In Zone 5 or colder, cover young plants or tender varieties with burlap, frost cloth, or straw after the ground freezes. In milder zones (6–8), mulching (3–4 inches of shredded leaves or bark) is usually enough. Avoid plastic—it traps moisture and can rot stems.
Can I prune hydrangeas in the fall? What’s the best time?
Pruning timing matters! For bigleaf (mophead/smooth) hydrangeas, wait until late winter or early spring (just before new growth). For oakleaf or panicle hydrangeas, prune in late fall or early winter (after leaves drop). Never prune in fall for macrophyllas—it removes next year’s blooms!
What if I missed mulching before the first frost? Can I still save my hydrangeas?
Don’t panic! If frost hits before mulching, pile 6–12 inches of leaves, straw, or pine needles around the base and gently bend canes to the ground (if possible). For extra protection, drape frost cloth loosely over the plant. Check periodically to prevent rot from trapped moisture.
Are slugs or pests a concern in winter? How do I protect my hydrangeas?
Slugs and pests are less active in winter, but overwintering eggs or larvae can still be a problem. After pruning, remove debris and fallen leaves (where pests hide). Apply diatomaceous earth or copper tape around the base in early spring for prevention.
What if my hydrangeas look dead in spring? Are they really gone?
Don’t assume the worst! Hydrangeas often look dormant until late spring (even into May). Wait until mid-May or after last frost to prune dead stems. If no new growth appears by June, the plant may have died—but check roots for signs of life before replanting.
Wrapping up and next steps
Getting your hydrangeas ready for winter doesn’t have to be stressful—just a little prep and love! 🌿 With the right steps, like pruning, mulching, and protecting tender stems, you’ll help them thrive when spring rolls around.
Remember, consistency is key, and soon your blooms will reward you with vibrant, healthy growth.
Now that you’re armed with the know-how, take action! Pick a calm weekend to tackle the prep—your hydrangeas will thank you. And if you’re feeling extra motivated, document the process (or share it with fellow plant lovers!) for a fun reminder next season. Happy gardening! 🌸