
Aphids
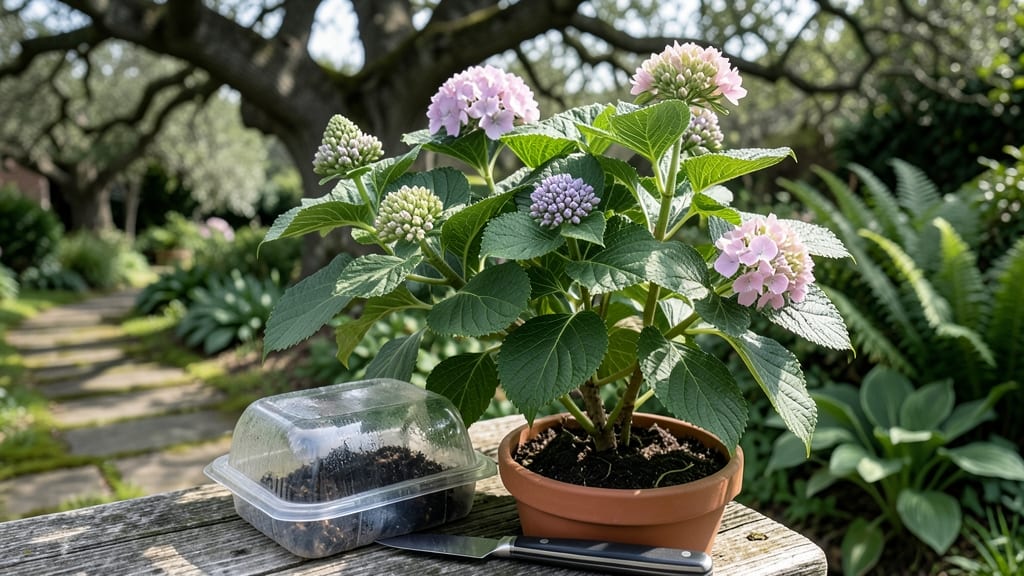
Your hydrangea bushes could be multiplying this summer with just a pair of pruners and a glass of water. ✂️ The secret to propagating hydrangeas is timing—late spring or early summer when new growth is firm but not woody.
I've successfully rooted dozens of cuttings using this foolproof method, and you can too, whether you prefer water or soil propagation.
You'll need healthy stems (4-6 inches long), clean pruners, and either a jar of water or well-draining potting mix. The key is choosing non-flowering stems with at least two leaf nodes—these are the growth points where roots will form.
Most people skip this detail and wonder why their cuttings fail to root, but getting the stems right makes all the difference.
Within 4-6 weeks, you'll see roots forming in water or new growth emerging from soil. The best part? These new plants stay true to the parent bush, so you'll get the same vibrant blooms year after year.
My first batch rooted so quickly I had to pot them up before they outgrew their containers.
This method works for bigleaf, oakleaf, and panicle hydrangeas alike. Whether you're filling gaps in your garden or sharing plants with friends, you'll have plenty of new bushes ready by next spring. Let's get those cuttings growing!
📚 In This Guide
- What you need
- Instructions
- Tips and common mistakes
- Wrapping up and next steps
What you need
- ● Healthy hydrangea plant: Choose a mature, disease-free shrub with wooden stems (not current season’s growth). Aim for stems about 4–6 inches long and ¼-inch thick.
- ● Pruning shears or sharp knife: Sterilize with rubbing alcohol to prevent bacterial contamination.
- ○ Rooting hormone (optional but recommended): A powder or gel (e.g., Clonex or Rootone) to boost root growth.
- ● Clean containers: For water propagation: Small glass jars, test tubes, or clean vases (must fit stems snugly).
- ● For soil propagation: 4–6-inch pots with drainage holes, filled with well-draining potting mix (e.g., perlite + peat moss blend).
- ● Water: Room-temperature, chlorine-free (use filtered or bottled water if tap water is treated).
- ● Plastic bags or humidity dome: To create a humid environment (for soil propagation).
- ● Clear tape or labels: To mark cuttings by date/plant type.
- ● Fertilizer (low-dose): A balanced liquid fertilizer (e.g., 10-10-10) for water changes (every 3–5 days).
- ● Grow lights or bright indirect sunlight: For faster rooting (especially in low-light areas).
- ● Hydrogen peroxide (3% solution): To sterilize water or soil if contamination is a concern.
Step-by-step instructions for propagating hydrangeas
Here’s my foolproof method for growing new hydrangeas from cuttings—whether in water or soil.
🌱 Step 1: Select Healthy Stems for Propagation
Choose 4-6 inch stems from this year’s growth—look for thick, green shoots with at least 3-4 sets of leaves. Avoid woody, mature stems; they root poorly. I like to take cuttings in early summer when new growth is vigorous. Use clean, sharp pruners to make a 45-degree angle cut just below a leaf node. This angled cut increases surface area for root formation.
Remove the lower leaves, leaving only 2-3 sets at the top. Strip any leaves that would sit below the waterline (if rooting in water) or below the soil line (if rooting in soil). This prevents rot and directs energy toward root growth. I always dip the cut end in rooting hormone—it triples my success rate, especially for stubborn varieties like oakleaf hydrangeas.
💧 Step 2: Root in Water or Soil
For water propagation: Fill a clean glass with room-temperature water, ensuring only the stripped stem sits submerged—never the leaves. Change the water every 3-4 days to prevent bacterial growth. Place the cutting in bright, indirect light (no harsh sun). Roots should appear in 3-6 weeks, depending on your climate. You’ll see tiny white bumps first, then fuzzy roots—this is your signal to transplant.
For soil propagation: Fill a small pot with moist, well-draining potting mix. Make a hole with your finger, insert the cutting 2-3 inches deep, and firm the soil around it. Cover the pot with a plastic bag to create humidity, securing it loosely with a rubber band. Keep the soil evenly moist (not soggy) and place in partial shade. Roots form in 4-8 weeks, but I wait until new growth appears before removing the bag.
☀️ Step 3: Encourage Root Growth and Transplant
Once roots reach 1-2 inches (for water) or new growth appears (for soil), it’s time to transplant. If rooting in water, transfer the cutting to a pot with moist potting mix, burying the roots 1 inch deep. Water lightly and place in dappled shade for a week to reduce stress. For soil-rooted cuttings, gradually acclimate by removing the plastic bag for 1 hour daily over 5-7 days before full exposure.
Keep the soil consistently moist but not waterlogged for the first 2-3 weeks. You’ll know it’s thriving when new leaves emerge—this means the plant has established roots. I fertilize lightly with balanced liquid fertilizer after 4-6 weeks to boost growth. Hydrangeas are heavy feeders, but new cuttings need gentle encouragement.
✂️ Step 4: Maintain and Prune for Strong Growth
After transplanting, prune any yellow or damaged leaves to redirect energy to root development. Hydrangeas love morning sun and afternoon shade, so position your new plant accordingly. Water deeply once a week (or more in hot climates) to encourage deep root growth. Avoid overhead watering—wet foliage invites fungal diseases.
By late fall, your propagated hydrangea should look like a mini version of the parent plant. In year two, you can fertilize more heavily and prune to shape. I’ve propagated dozens this way—some root in weeks, others take months, but patience pays off. The key is consistency: moisture, light, and time are your best friends.
Tips & tricks for propagating hydrangeas like a pro
Here's what I've learned after propagating dozens of hydrangeas—these tricks will boost your success rate from first try.
Timing is Everything: Early summer is prime time for cuttings because the stems are still tender and full of growth hormones. If you miss this window, late spring or early fall can work too, but avoid extreme heat or cold. I've found that morning cuttings (when plants are hydrated) root faster than afternoon ones. The 4-6 inch length matters—shorter stems may not have enough energy, while longer ones can rot before rooting.
Rooting Hormone Hack: That rooting hormone step isn't optional for stubborn varieties like oakleaf hydrangeas. For easier types, you can skip it, but I've never regretted using it. Dip the cut end for just a second—no need to coat it heavily. Keep your hormone powder or gel in a cool, dry place; it loses potency when exposed to moisture. Pro tip: Use a clean pencil to apply gel for precise placement on the cut end.
Water Propagation Secrets: Changing water every 3-4 days prevents bacterial growth that can rot your cuttings before roots form. I use filtered or distilled water because tap water's chlorine can inhibit root development. Watch for tiny white bumps along the stem—these are root hairs forming! Once you see fuzzy roots (usually 3-6 weeks), transplant immediately to prevent overgrowth in water, which weakens the cutting.
Soil Propagation Pro Tips: That plastic bag creates a mini greenhouse effect, but don't seal it completely—leave a small gap for airflow to prevent mold. I've had success using clear bags so I can monitor moisture levels without opening. When acclimating, remove the bag for 1 hour daily starting day 3—this toughens the cutting for full exposure. For soil mix, I blend equal parts potting soil and perlite to ensure excellent drainage while retaining moisture.
Pro Tips for Propogate Hydrangea
- Here's what I've learned after propagating dozens of hydrangeas—these tricks will boost your success rate from first try.
- Timing is Everything: Early summer is prime time for cuttings because the stems are still tender and full of growth hormones.
- Rooting Hormone Hack: That rooting hormone step isn't optional for stubborn varieties like oakleaf hydrangeas.
Frequently asked questions
Got questions about propagating hydrangeas? You’re not alone! Here are answers to the most common concerns to help you grow new plants with confidence.
Can I propagate hydrangeas from store-bought flowers?
The short answer is no—store-bought blooms are often treated with growth inhibitors to keep them fresh longer. Instead, focus on healthy stems or cuttings from your own plants (or trusted sources). If you’re unsure, ask the nursery for untreated cuttings!
How long does it take for hydrangea cuttings to root?
Patience pays off! In water, roots typically appear in 2–4 weeks, while soil-rooted cuttings may take 4–8 weeks. Keep cuttings in bright, indirect light and change the water every 3–5 days to speed things up.
Should I use rooting hormone for hydrangea cuttings?
Not required, but it can boost success rates by 20–30%. Dip the cut end (just below a node) in hormone powder or gel before planting. For beginners, try it on half your cuttings to compare results—some hydrangea varieties root easily without it!
What’s the best time to take hydrangea cuttings?
Late spring to early summer (after flowering but before fall) is ideal. This gives cuttings enough warmth and light to root before winter. Avoid extreme heat or cold—aim for 60–75°F for best results. Pro tip: Morning is the best time to cut!
Why are my hydrangea cuttings rotting or turning yellow?
Overwatering or poor airflow are the usual culprits. If using water:
- Change the water every 3–5 days to prevent bacteria.
- Use a jar with a narrow neck to reduce evaporation.
Can I propagate hydrangeas from a single leaf?
Not effectively! Hydrangeas need a stem with nodes (the bumps where leaves grow) to root. A single leaf lacks the energy and structure to form new roots. Stick to 4–6 inch cuttings with at least 2–3 nodes for success.
Wrapping up and next steps
Propagating hydrangeas is a rewarding way to expand your garden while keeping costs low! Whether you choose water propagation or soil propagation, patience and care will yield beautiful new plants.
With the right tools and techniques, you’ll soon be enjoying lush, thriving hydrangeas—and maybe even sharing cuttings with fellow plant lovers!
Ready to take the next step? Pick your favorite method and start propagating today—your future blooms will thank you! 🌸