
Aphids
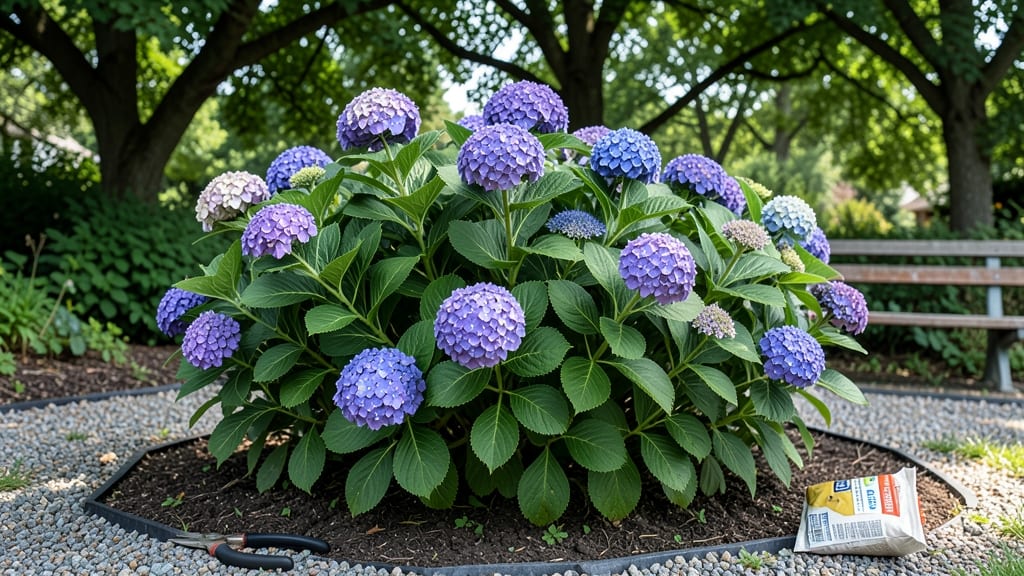
A hydrangea-lined driveway transforms your entrance from ordinary to unforgettable. 🌿 The secret lies in choosing the right varieties—like the Endless Summer for reliable blooms or the bold Oakleaf for seasonal color shifts—and spacing them just 4-6 feet apart for a lush, natural archway effect.
I learned this after my first attempt grew too sparse, but now my driveway looks like a romantic garden path every time I pull in.
The key is matching sunlight to your hydrangea type: Endless Summer thrives in partial shade, while Oakleaf handles full sun better. Amend your soil with compost for rich, moist conditions—hydrangeas hate dry roots—and mulch heavily to keep moisture consistent.
My first year was a struggle until I added a drip irrigation line along the base, which cut watering time by half.
By late summer, your driveway will burst with color, and in fall, the Oakleaf varieties add fiery reds and purples that last through winter. The fragrance alone—especially from Annabelle hydrangeas—makes every drive home feel like a celebration.
With proper pruning in late winter, these plants keep their shape and bloom abundance for years.
For extra impact, tuck in boxwoods or heuchera at the base for texture contrast, and string solar-powered fairy lights overhead for magical evenings. The best part?
This design works for any driveway length—whether you're framing a short city entrance or a long rural lane. Let's make your home's first impression unforgettable.
📚 In This Guide
- What you need
- Instructions
- Tips and common mistakes
- Wrapping up and next steps
What you need
- ● Hydrangea plants (10–20, depending on driveway length): Mature bushes (3–5 ft tall) for instant impact
- ● Smaller varieties (1–2 ft) for tighter spacing
- ● Arbor or trellis kits (10–15, matching driveway width): Metal, wood, or PVC (4–6 ft tall, 2–3 ft wide)
- ● Decorative options (e.g., lattice, wrought iron)
- ● Soil amendments (organic compost or peat moss, 2–3 bags)
- ● Mulch (pine straw or shredded bark, 5–10 bags)
- ● Stakes & ties (10–20, for support)
- ● Slow-release fertilizer (balanced 10-10-10, 1–2 bags)
- ● Shovel & trowel
- ● Wheelbarrow (for soil/mulch)
- ● Measuring tape & stakes (for layout)
- ● Pruning shears (for shaping)
- ○ Optional: Post-hole digger (if installing permanent arbors)
- ● Sunlight assessment (partial shade ideal for hydrangeas)
- ● Driveway clearance (ensure no obstructions like pipes)
- ● Water source (hose or drip irrigation nearby)
- ● Pro tip: Check local frost dates—plant after last frost! ❄️🌱
Step-by-Step instructions for creating a hydrangea-lined driveway
Transform your entryway into a lush, ever-changing gateway with these simple steps.
🌱 Step 1: Plan Your Hydrangea Arbor Layout
Start by sketching your driveway's length and marking where you'll place each arbor. Hydrangeas need 6-8 feet of space between plants for mature size, so space your supports 8-10 feet apart along the driveway. I like to use 4-foot-tall wooden or metal arbors—they're sturdy enough to support hydrangeas' weight while keeping the look elegant. Measure twice before marking spots with stakes.
Choose a mix of panicle hydrangeas (like 'Limelight') for summer blooms and oakleaf hydrangeas for fall color. Plant 4-5 hydrangeas per arbor—two on each side and one in the center—for a full, romantic look. This ensures year-round interest from spring foliage to winter seed heads.
☀️ Step 2: Prepare the Planting Sites
Dig holes twice as wide as the root ball but only as deep as the container's root base. Hydrangeas hate soggy roots, so if your soil drains poorly, amend with 2-3 inches of compost mixed into the bottom 12 inches of each hole. I always test drainage by filling the hole with water—if it doesn't drain within 30 minutes, add more organic matter.
Place each hydrangea in its hole, then backfill with native soil mixed with 1 part compost. Water deeply to settle the soil around roots, then add a 2-inch layer of mulch (like pine bark) to retain moisture. Keep mulch 6 inches away from stems—too much suffocates roots. This prep ensures your hydrangeas establish strong roots before summer heat arrives.
💧 Step 3: Train Vines and Install Supports
Install your arbors after planting so you don't disturb roots. Use 4-6 stakes per arbor—drive them 6 inches deep at a 45-degree angle into the ground, then secure the arbor with zip ties or soft garden wire. For hydrangeas, weave the stems gently through the arbor's structure in a spiral pattern, tying them loosely with soft plant ties every 12 inches.
Don’t pull vines tight—hydrangeas grow best when they can bend naturally. Water the base deeply every 2-3 days for the first 2 weeks, then taper to once a week once new growth appears. You'll see first true leaves within 3-4 weeks—that's your cue to reduce watering slightly. Too much moisture now causes root rot.
✂️ Step 4: Prune and Maintain for Year-Round Beauty
Prune panicle hydrangeas in late winter (before buds swell) by cutting back last year's stems to 12-18 inches above the ground. For oakleaf hydrangeas, prune in early spring—remove dead stems and shape lightly. Never prune after July—you'll cut off next year's blooms. I also deadhead spent flowers in fall to encourage next year's buds.
Fertilize in early spring with a balanced 10-10-10 formula—hydrangeas need moderate nutrients but hate rich soil. Test soil pH annually: blue hydrangeas love acidic soil (pH 5.5), while pink blooms prefer slightly alkaline (pH 6.5). Adjust with sulfur or lime as needed. Mulch again in fall to protect roots from winter temps below 20°F.
🌿 Step 5: Enjoy Your Living Driveway
Your hydrangea arbors will take 2-3 years to fully mature, but you'll see first blooms in year 2. Train new growth through the arbor each spring, and watch as the vines thicken and fill in. In fall, the oakleaf varieties turn stunning reds and purples, while panicle types develop cinnamon-colored seed heads that last through winter.
For extra drama, add string lights or solar-powered lanterns along the arbors. I also plant low-growing perennials (like ajuga or creeping thyme) beneath the hydrangeas to suppress weeds and add texture. With minimal effort, your driveway becomes a garden feature that welcomes guests year-round.
Tips & tricks for perfect hydrangea-lined driveway
Here's what nobody tells you about making your hydrangea arbors truly stunning.
Planting Strategy: In Step 1, when you're spacing your arbors 8-10 feet apart, consider adding a second row of shorter arbors (2-3 feet tall) along the driveway edges. This creates depth and frames your entry beautifully. I've found that placing these shorter arbors 3 feet back from the driveway edge prevents them from getting crushed by vehicles. The key is to create layers—tall arbors in the center, medium ones in the middle, and shorter ones at the edges.
Soil Prep Secret: The 30-minute drainage test in Step 2 is crucial, but here's what I do next: if your soil drains too quickly (water disappears in under 10 minutes), add 1 part peat moss to your compost mix. This helps retain moisture while still allowing good drainage. I've seen hydrangeas struggle in both soggy and bone-dry soil—aim for that sweet spot where water drains within 20-30 minutes. Also, avoid planting near downspouts—the extra water can drown roots.
Pruning Precision: When pruning panicle hydrangeas in late winter (Step 4), look for the largest, thickest stems—these are the ones that will produce the biggest blooms. Cut them back to 12 inches and leave the thinner stems at 18 inches. This creates a natural shape while maximizing flower production. For oakleaf varieties, I always leave 3-4 strong stems per plant—they develop the most spectacular fall color. Remember, you're shaping the plant's future growth pattern.
Winter Protection: The 20°F temperature warning in Step 4 is important, but here's how I go the extra mile: after your fall mulching, wrap the base of each arbor with burlap or frost cloth up to 2 feet high. This protects against cold winds that can damage tender new growth. I also add a 3-inch layer of straw mulch over the regular mulch—it insulates roots like a cozy blanket. In areas with harsh winters (below 0°F), consider using tree guards around the stems to prevent rodent damage.
Pro Tips for Hydrangea Lined Driveway
- Here's what nobody tells you about making your hydrangea arbors truly stunning.
- Planting Strategy: In Step 1, when you're spacing your arbors 8-10 feet apart, consider adding a second row of shorter arbors (2-3 feet tall) along the driveway edges.
- Soil Prep Secret: The 30-minute drainage test in Step 2 is crucial, but here's what I do next: if your soil drains too quickly (water disappears in under 10 minutes), add 1 part peat moss to your compost mix.
Frequently asked questions
Got questions about creating a stunning hydrangea-lined driveway? You’re not alone! Here are answers to the most common concerns—from planning to maintenance—so you can dive in with confidence.
When is the best time to plant hydrangeas for a driveway border?
The ideal time is early spring (after the last frost) or fall (4–6 weeks before the first frost). This gives roots time to establish before extreme temperatures. For container-grown hydrangeas, you can plant year-round in mild climates, but avoid winter planting in freezing zones.
Will aphids or pests ruin my hydrangeas along the driveway?
Aphids, spider mites, and slugs can target hydrangeas, but a hydrangea-lined driveway isn’t doomed! Use neem oil or insecticidal soap for soft-bodied pests, and diatomaceous earth for slugs. Prune affected areas promptly and encourage ladybugs (natural predators) by planting companion flowers like marigolds.
How much water do hydrangeas need in a driveway setting?
Hydrangeas thrive with 1–1.5 inches of water per week, including rainfall. Since driveway borders may have limited soil moisture, mulch heavily (3–4 inches) to retain moisture. Drip irrigation is ideal—avoid overhead watering to prevent fungal diseases like powdery mildew.
Can I use alternatives like roses or clematis instead of hydrangeas?
For a low-maintenance look, try clematis (fast-growing vines) or climbing roses (fragrant but thorny). Wisteria adds drama but needs strong support. Hydrangeas win for color versatility (blue/pink/purple) and year-round interest (evergreen varieties like Oakleaf), but mix-and-match to suit your style!
Do hydrangeas survive winter in a driveway border?
Most hydrangeas are hardy to USDA Zones 5–9, but mulch heavily (6+ inches) and wrap containers for extra protection. Bigleaf hydrangeas (like Endless Summer) may need winter burlap wraps in colder zones. Prune dead blooms in late winter (not fall!) to encourage spring growth.
What’s the easiest way to train hydrangeas along a fence or trellis?
Use soft ties (velcro straps or fabric strips) to gently guide stems along the structure. Avoid wire or tight bindings—hydrangeas need flexibility to grow. Prune in late winter to shape and remove crowded stems. For a lush look, space plants 4–6 feet apart and stake young plants until established.
Wrapping up and next steps
A hydrangea-lined driveway isn’t just a landscaping dream—it’s a year-round investment in beauty, privacy, and charm. 🌸 With the right variety, care, and a dash of creativity, you can transform your entrance into a romantic haven that turns heads (and neighbors green with envy!).
Ready to take the next step? Start small—pick one hydrangea type or section of your driveway to plant this season. Before you know it, your driveway will be the talk of the neighborhood, and you’ll be the proud gardener behind it all! 🌿