Propagation
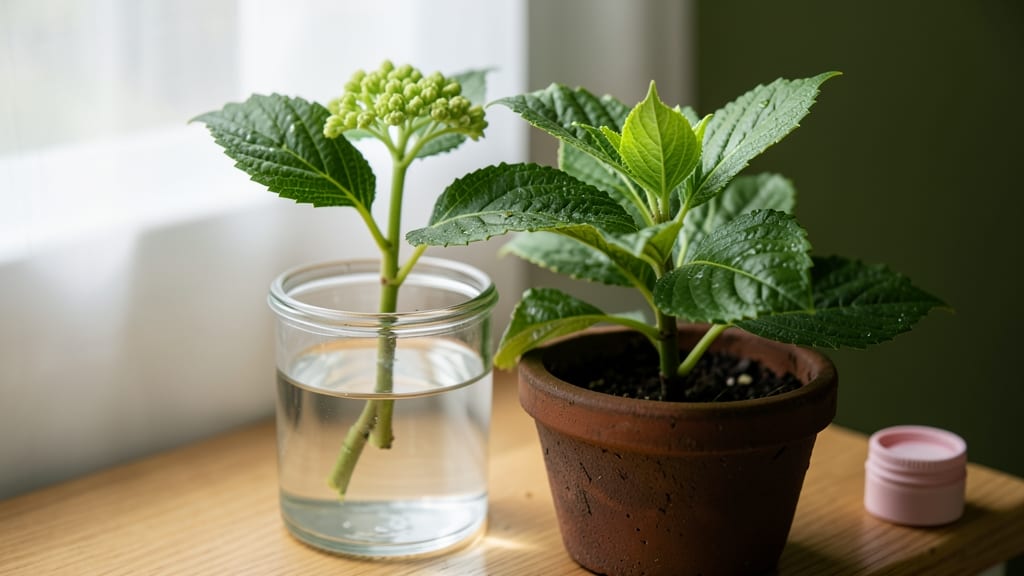
Propagating hydrangeas from cuttings is the easiest way to multiply your favorite plants for free. 🌿 I’ve turned one stunning shrub into a dozen thriving bushes by mastering this simple technique—no green thumb required.
The secret lies in selecting the right stems, timing it perfectly, and creating the ideal conditions for roots to form.
You’ll need sharp pruners, rooting hormone (optional but helpful), a well-draining mix of perlite and peat moss, and clear containers for water propagation—or just a pot for soil rooting. The best time to take cuttings is in early summer when new growth is firm but still flexible, not woody.
A 4-6 inch stem with at least two sets of leaves gives you the best chance of success.
Within 4-8 weeks, you’ll watch tiny roots form, and by late summer, your cuttings will be ready to transplant. The joy of seeing those first roots sprout is unmatched—it’s like watching a tiny forest grow from a single branch.
Just avoid overwatering (a common killer) and keep humidity high until they’re established.
This method works for all hydrangea types, from mopheads to lacecaps, and even lets you share plants with friends. Once rooted, they’ll grow into full-size bushes in just a couple of seasons—imagine the blooms you’ll have next summer!
📚 In This Guide
- What you need
- Instructions
- Tips and common mistakes
- Wrapping up and next steps
What you need
- ● Healthy hydrangea cuttings: 4–6 semi-hardwood cuttings (4–6 inches long, pencil-thick)
- ● From non-flowering stems (green but firm, not woody)
- ● Sharp pruning shears or clean knife: Disinfected with rubbing alcohol
- ○ Rooting hormone (optional but recommended): Powder or gel (e.g., Clonex or Hormex)
- ● Well-draining potting mix: 50% perlite or sand + 50% peat moss or coco coir (sterilized)
- ● Small pots or propagation tray: 4–6 individual cells (3–4 inches deep) or a shallow tray with drainage holes
- ● Clear plastic bag or humidity dome: To retain moisture (e.g., Ziploc bag with holes or a propagator)
- ● Spray bottle: With water (room temperature) for misting
- ● Rubbing alcohol or bleach solution: For sterilizing tools (1 part bleach to 9 parts water)
- ● Bottom heat mat: Set to 70–75°F to speed up rooting
- ● Grow lights or bright indirect light: 6+ hours/day (south-facing window works too)
- ● Fungicide (e.g., Mycorrhizal powder): Prevents rot in humid conditions
- ● Labels & markers: To track cutting dates and varieties
- ● Hydrogen peroxide (3% solution): For sterilizing water or cutting wounds
Step-by-step instructions for propagating hydrangea from cuttings
Here’s how I’ve successfully rooted hydrangeas from cuttings—no fancy equipment needed, just patience and the right timing.
🌿 Step 1: Select and Prepare Healthy Cuttings
Choose 4-6 inch stems from the current season’s growth—they should be pencil-thick and have 3-4 sets of leaves. Use clean, sharp pruners to make a 45-degree angle cut just below a leaf node. This angle increases surface area for root development.
Strip the lower leaves off the stem, leaving only the top 2-3 sets. Too many leaves mean more water loss and slower rooting. I like to dip the cut end in rooting hormone (optional but helpful for beginners) to encourage faster root growth. If you skip this, just make sure the cut is fresh—no dried edges.
💧 Step 2: Plant Cuttings in Moistened Growing Medium
Fill a small pot (4-6 inches deep) with a mix of 50% perlite and 50% peat moss—this combo drains well while holding enough moisture. Moisten it until damp but not soggy; squeeze a handful—it should feel like a wrung-out sponge. Hydrangeas hate soggy roots, so drainage is key.
Make a hole with your finger and insert the cutting 2 inches deep, firming the medium around it gently. If you’re rooting multiple cuttings, space them 2-3 inches apart to avoid overcrowding. Place the pot in a bright, indirect light spot—no direct sun yet. You’ll see new growth in 2-3 weeks if conditions are right.
☀️ Step 3: Maintain Humidity and Light for Root Development
Cover the pot with a clear plastic bag (like a gallon-sized zip-top) to trap humidity. Secure it loosely with a rubber band so air can still circulate. Mist the leaves every 2-3 days to keep everything damp inside. You’ll know humidity is right when condensation forms on the bag’s interior—like a mini greenhouse.
Keep the medium evenly moist but never waterlogged. Stick your finger in the soil—if the top ½ inch feels dry, give it a light watering. Avoid wetting the leaves to prevent fungal issues. After 4-6 weeks, check for roots by gently tugging on the cutting. If resistance means roots have formed, it’s time to transition.
🪴 Step 4: Transition to Independent Growth
Once roots form, remove the plastic bag gradually—start by uncovering it for 30 minutes daily, then increase time over 5-7 days. This hardens the cuttings for life outside the humid environment. Move them to a shadier spot for the first week to reduce stress.
After 2 weeks of acclimation, transplant to individual pots with regular potting mix. Hydrangeas love slightly acidic soil (pH 5.5-6.2), so a mix with peat moss or compost works well. Water deeply once planted, then keep the soil consistently moist but not soggy. You’ll see new leaves in 3-4 weeks—that’s your sign they’ve taken root!
Tips & tricks for propagating hydrangea cuttings
Here's what nobody tells you about making those hydrangea cuttings actually take root—these simple tricks will save you from the most common pitfalls.
Timing Secret: Take your cuttings in early summer when new growth is still tender but established enough to support rooting. I learned this the hard way after trying in late summer—those cuttings just wilted without putting down roots. The 4-6 inch length is perfect because it balances leaf surface area for photosynthesis with enough stem to develop roots.
Medium Matters: That 50% perlite, 50% peat moss mix isn't just arbitrary—it creates the perfect balance. Perlite prevents compaction while peat moss holds moisture without suffocating roots. Pro tip: Sterilize your mix by baking it in the oven at 200°F for 30 minutes before use to kill any fungal spores lurking in old potting soil. This single step can mean the difference between success and failure.
Root Check: When testing for roots after 4-6 weeks, don't just tug—gently wiggle the cutting. If it feels like it's anchored (even slightly), roots have formed. I've seen cuttings that passed the tug test but had no roots—this method gives you a more accurate read. For extra confirmation, remove a cutting and inspect the base for tiny white root hairs.
Transition Strategy: The 30-minute daily acclimation period is your friend, but don't rush it. Some cuttings handle the full week of gradual exposure beautifully, while others need an extra day or two. Watch for wilting as your signal to slow down—this is your plant's way of saying "not so fast!" Once you've removed the plastic, keep them in that shadier spot for at least 10 days before considering full sun exposure.
Pro Tips for Propagate Hydrangea From Cutting
- Here's what nobody tells you about making those hydrangea cuttings actually take root—these simple tricks will save you from the most common pitfalls.
- Timing Secret: Take your cuttings in early summer when new growth is still tender but established enough to support rooting.
- Medium Matters: That 50% perlite, 50% peat moss mix isn't just arbitrary—it creates the perfect balance.
Frequently asked questions
Got questions about propagating hydrangeas from cuttings?
You’re not alone! Here are answers to the most common queries to help you grow lush new plants with confidence.
When is the best time to take hydrangea cuttings?
The ideal window is late spring to early summer (May–June), when new growth is firm but still pliable. Avoid taking cuttings after the first frost or during extreme heat, as these conditions stress the plant and reduce rooting success. For mophead or lacecap varieties, aim for semi-hardwood stems—thick but not woody.
How do I know if my cutting is healthy enough to root?
Look for stems that are green, flexible, and pencil-thick (about ¼-inch in diameter). Avoid cuttings with flowers, buds, or yellowing leaves—they drain energy. Healthy cuttings should have 2–3 sets of leaves and no signs of disease (like brown spots or mold). Trim just below a leaf node at a 45-degree angle for maximum rooting potential.
Why aren’t my hydrangea cuttings rooting? Troubleshooting tips
If your cuttings refuse to root, check these common issues:
- Poor humidity: Use a plastic bag or propagator to trap moisture—hydrangeas thrive in 70–80% humidity.
- Over/underwatering: Keep the soil consistently moist (not soggy) and mist leaves daily.
- Wrong stem type: Softwood cuttings (too tender) or hardwood (too woody) won’t root well—stick to semi-hardwood.
- Low light: Place cuttings in bright, indirect light (e.g., a north-facing window or grow lights).
If all else fails, try rooting hormone or a water propagation method as a backup!
Can I propagate hydrangeas from cuttings in water first?
Yes! Water propagation is a great way to test root growth before planting. Use room-temperature water and change it every 3–5 days to prevent bacteria. Place cuttings in indirect light, and roots should appear in 4–8 weeks. Once roots are 2–3 inches long, transplant to soil. Pro tip: Use a jar with a narrow neck to keep leaves dry and avoid rot.
How long does it take for hydrangea cuttings to root?
Patience is key! Most hydrangea cuttings root in 6–12 weeks, depending on variety, care, and environmental conditions. Check for success by gently tugging the cutting—if resistance is felt, roots are forming. Oakleaf hydrangeas may take longer (up to 3 months), while panicle types often root faster. Keep them cozy until new growth appears!
Wrapping up and next steps
Propagating hydrangeas from cuttings is a rewarding way to expand your garden with minimal effort—and now, you’ve got all the tools to succeed! 🌱 Whether you’re a beginner or a seasoned gardener, this method is simple, cost-effective, and yields stunning results.
Once your cuttings root and thrive, why not share the love? Graft your newfound knowledge by gifting rooted cuttings to fellow plant enthusiasts or experimenting with other propagation techniques.
Ready to dive deeper? Try your hand at layering or dividing hydrangeas next! Your green thumb is growing—keep nurturing it. 🌸