
Diseases
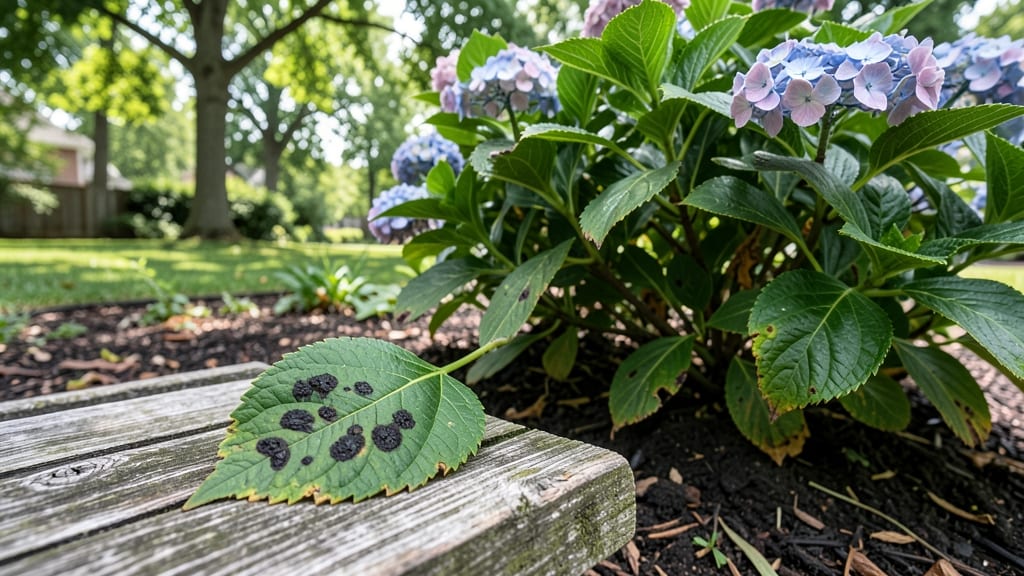
Your hydrangeas’ dark spots might not be iron deficiency—they’re likely fungal leaf spot, and it’s spreading faster than you think. 🌿 I’ve battled this exact problem, and the key isn’t guessing treatments but identifying the real cause first.
Most gardeners waste time on soil fixes when the issue is airborne spores or bacterial infections hiding in wet foliage.
Here’s the hard truth: those black or brown spots with yellow halos? That’s fungal leaf spot, thriving in humid summers. Bacterial leaf spot looks similar but spreads faster, often with water-soaked patches.
Both love hydrangeas because their thick leaves trap moisture—perfect breeding grounds. The moment you see these spots, act fast: remove infected leaves immediately (don’t compost them!) and avoid overhead watering.
Your hydrangeas can bounce back in 2-3 weeks with the right approach. Start with a copper fungicide spray (organic and effective) or a baking soda mix (1 tsp baking soda + 1 quart water + a drop of dish soap) for prevention.
Prune for airflow—crowded branches trap moisture, so thin out stems by 20-30% to let sunlight dry leaves faster. This isn’t just a band-aid; it’s a reset for your plants.
Once the spots stop appearing, shift to preventive care: water at the base (never leaves), mulch to reduce soil splash, and choose resistant varieties like ‘Endless Summer’ if this keeps happening.
The goal isn’t perfection—it’s keeping your hydrangeas lush and spot-free for years to come. Trust the process, and your blooms will thank you.
Root Causes of Hydrangea Discoloration
Dark spots on hydrangeas aren’t just an eyesore—they’re often a cry for help from your plant. Understanding the why behind these blemishes is the first step to restoring your hydrangea’s vibrant health. Let’s break down the most common culprits, backed by science and actionable insights.
Fungi thrive in damp, humid conditions, and hydrangeas—especially those with dense foliage—are prime targets. The most common fungal offenders include:
- Leaf Spot Diseases (e.g., Septoria or Phyllosticta) These fungi create dark, irregular spots with yellow halos, often appearing in wet seasons.
They spread via water splashes or infected debris, weakening leaves and reducing photosynthesis. Why it happens: High humidity (above 75%) and poor air circulation create the perfect breeding ground.
- Powdery Mildew While powdery mildew typically presents as white, fuzzy patches, it can also cause darkened, crinkled leaves as the infection progresses. Why it happens: Fungal spores germinate when leaves stay wet for prolonged periods, especially in shaded or crowded plantings.
- Botrytis Blight ("Gray Mold") This fungus targets stressed hydrangeas, causing water-soaked spots that turn brown or gray with a fuzzy texture. Why it happens: Overhead watering, poor drainage, or sudden temperature drops (below 60°F) trigger outbreaks.
💡 Pro Tip: Early morning watering (before 10 AM) and pruning for airflow can drastically reduce fungal risks. If spots appear, remove infected leaves immediately—don’t compost them!
Hydrangeas are heavy feeders, and deficiencies—especially in iron, magnesium, or nitrogen—can manifest as dark, necrotic spots. Here’s the science:
- Iron Chlorosis (Yellowing with Dark Spots) Iron deficiency causes interveinal yellowing (leaves stay green only along veins), but in severe cases, dark brown or black spots develop as cells die from oxidative stress. Why it happens: High soil pH (above 7.0) locks out iron, even if it’s present.
Hydrangeas also struggle in alkaline or compacted soils where roots can’t access nutrients.
- Magnesium Deficiency (Brown Spots on Older Leaves) Magnesium is crucial for chlorophyll production. When deficient, leaves develop dark brown or purple spots between veins, starting on older foliage. Why it happens: Over-fertilization with nitrogen (without potassium/magnesium), poor organic matter, or leaching in sandy soils deplete magnesium over time.
- Nitrogen Burn (Dark, Crusty Spots) Too much synthetic nitrogen fertilizer (especially ammonium-based) can cause dark, leathery spots as leaves scorch. Why it happens: Excess salts in soil disrupt water uptake, leading to cellular damage.
🔥 Action Step: Test your soil pH (ideal: 5.5–6.2 for hydrangeas). For chlorosis, use chelated iron supplements (like iron sulfate) or apply sulfur to lower pH. For magnesium, try Epsom salt (magnesium sulfate) in water every 4–6 weeks.
Hydrangeas are resilient, but extreme or inconsistent conditions can trigger dark spots as a stress response:
- Sunburn (Sudden Heat or Wind Exposure) If hydrangeas are transplanted in summer or exposed to intense afternoon sun, leaves can develop dark, crispy spots from cellular damage. Why it happens: Thin or waxy leaves lack protection against UV radiation or desiccating winds.
- Cold Damage (Frost or Freeze Injury) In late spring or early fall, dark, water-soaked spots may appear after temperatures dip below 32°F. Why it happens: Ice crystals rupture cell walls, causing necrosis. Evergreen hydrangeas (like Hydrangea macrophylla) are especially vulnerable.
- Chemical Burn (Over-Fertilization or Herbicide Drift) Dark, bleached, or curled spots can signal fertilizer burn (too much salt) or herbicide damage (like glyphosate drift). Why it happens: Herbicides disrupt cell membranes, while excess salts dehydrate roots, starving leaves of water.
✨ Prevention Tip: Acclimate hydrangeas gradually to full sun (harden off for 2–3 weeks). Use mulch to protect roots from temperature swings, and avoid fertilizing in extreme heat (water first to dilute salts).
While less common than fungal issues, pests can create dark spots as they feed or inject toxins:
- Japanese Beetles or Slugs These pests skeletonize leaves, leaving behind dark, ragged holes and sticky honeydew (which fosters sooty mold). Why it happens: Beetles feed on leaf tissue, while slugs leave irregular, slime-covered holes that darken as the leaf dries.
- Spider Mites (Brown Spots with Webbing) Heavy infestations cause tiny yellow or brown stippling that darkens into necrotic patches. Why it happens: Mites pierce cells to feed, injecting toxins that disrupt chlorophyll production.
👨🍳 Quick Fix: Spray leaves with neem oil or insecticidal soap for beetles/mites. Set up beer traps for slugs or use diatomaceous earth as a barrier.
| Symptom | Fungal Disease | Nutrient Deficiency | Environmental Stress |
|---|---|---|---|
| Spot Shape | Irregular, often with halos or spores | Uniform, between veins or on leaf edges | Crusty, dry, or water-soaked |
| Location | Lower leaves, clustered | Older leaves first | New growth or exposed areas |
| Additional Signs | White/powdery growth, leaf drop | Yellowing (chlorosis), stunted growth | Scorch marks, wilting, or curling |
| Season | Wet springs/falls | Any season (worse in alkaline soils) | Sudden temperature changes |
🎯 Key Takeaway: If spots spread rapidly or ooze, it’s likely fungal. If they’re static and paired with yellowing, check nutrients. For crispy or sunken spots, environmental stress is the culprit.
Revive Your Hydrangeas Naturally
Dark spots on your hydrangeas don’t have to mean the end of their beauty—with the right approach, you can restore their lush, vibrant look. Below are targeted solutions based on the most common causes, from fungal infections to environmental stress.
Each fix is designed to be easy, effective, and preventative, so your hydrangeas stay healthy for seasons to come.
If your hydrangeas show yellowing leaves with dark brown or black spots (especially on new growth), iron deficiency is likely the culprit. Hydrangeas thrive in slightly acidic soil (pH 5.5–6.2), and alkaline conditions lock out iron, causing these unsightly marks.
Step-by-Step Solution:
🔥 Test Your Soil First
- Grab a soil pH test kit (available at garden centers) or send a sample to your local extension office for analysis.
- Ideal pH for hydrangeas: 5.5–6.2. If it’s above 6.5, your plants can’t absorb iron.
🍳 Amend the Soil for Acid-Loving Plants
- Mix sulfur or peat moss into the top 6 inches of soil to lower pH gradually (this takes 4–6 weeks).
- Alternative quick fix: Sprinkle chelated iron granules (like Ironite or Sequestrene) around the base and water deeply.
👨🍳 Feed with Iron-Rich Fertilizers
- Use a liquid iron supplement (like Iron Sulfate) and apply every 2–3 weeks during growing season.
- Organic option: Coffee grounds (acidic) or fish emulsion (rich in micronutrients).
⏰ Monitor & Repeat
- Reapply iron treatments every 4–6 weeks until new growth shows healthy green leaves.
- Prevention tip: Mulch with pine needles or oak leaves to maintain soil acidity long-term.
If the dark spots are irregular, spreading, and often accompanied by a white or gray powdery coating, a fungal disease (like leaf spot, powdery mildew, or botrytis) is likely at fault. Fungal infections thrive in humid, poorly ventilated conditions.
Step-by-Step Solution:
🔥 Prune Infected Leaves Immediately
- Remove and destroy (don’t compost!) all spotted or discolored leaves to prevent spread.
- Sterilize pruners with rubbing alcohol between cuts.
🍳 Improve Air Circulation
- Space plants 3–5 feet apart to allow airflow.
- Thin out crowded branches to reduce humidity buildup.
👨🍳 Apply Fungicide (Organic or Chemical) - Baking soda spray: Mix 1 tsp baking soda + 1 tbsp oil + 1 tsp mild soap in 1 gallon of water.
Spray every 7–10 days. - Neem oil or copper fungicide: Follow label instructions for preventative sprays (apply every 2 weeks in humid climates). - For severe cases: Use fungicides with myclobutanil or chlorothalonil (follow safety guidelines).
⏰ Water Wisely to Prevent Fungus
- Water at the base (not overhead) to keep leaves dry.
- Water early in the day so foliage dries quickly.
- Avoid mulching too close to stems (keep 2–3 inches away).
If dark spots appear suddenly after hot days or strong afternoon sun, your hydrangeas may be suffering from sun scorch or environmental stress. Most hydrangeas prefer partial shade, especially in hot climates.
Step-by-Step Solution:
🔥 Provide Shade Cloth or Dappled Light
- Install 30–50% shade cloth if your hydrangeas get more than 4–6 hours of direct sun.
- Alternative: Plant near taller trees or shrubs for natural shade.
🍳 Mulch & Hydrate Deeply
- Apply 2–3 inches of mulch (wood chips or straw) to retain moisture and protect roots.
- Water deeply 2–3 times per week (1–1.5 inches per session) during dry spells.
👨🍳 Adjust Fertilizer for Heat Stress
- Reduce nitrogen (which promotes leafy growth but weakens heat tolerance).
- Switch to a balanced fertilizer (like 10-10-10) or compost tea for stress recovery.
⏰ Prune for Better Airflow & Light Penetration
- Thin out dense growth to allow cool air to circulate.
- Remove dead or damaged branches to redirect energy to healthy growth.
✨ Preventative Care Checklist: - Spring: Test soil pH and amend if needed. Apply chelated iron as a precaution. - Summer: Monitor for powdery mildew (common in humid areas). Spray neem oil monthly. - Fall: Rake up fallen leaves (fungal spores hide here!).
Add compost to enrich soil. - Winter: Mulch heavily (4–6 inches) to protect roots from freeze-thaw cycles.
🌡️ Quick Fix Reminder:
| Problem | Fast Solution | Prevention |
|---|---|---|
| Iron deficiency | Chelated iron + sulfur soil amendment | Mulch with pine needles, avoid lime |
| Fungal spots | Prune + neem oil spray | Improve airflow, water at base |
| Sunburn/stress | Shade cloth + deep watering | Plant in partial shade, mulch well |
With these targeted fixes, your hydrangeas should bounce back in weeks—showcasing rich green leaves and those iconic blooms you love. 🌸 The key is acting fast and preventing recurrence with smart gardening habits. Happy reviving!
Frequently asked questions
Why do my hydrangea leaves develop dark spots even after pruning?
If spots reappear after pruning, it’s likely a fungal infection like leaf spot or powdery mildew. Pruning alone won’t stop fungal spread—you must also improve airflow (space plants 3–5 feet apart) and apply a copper fungicide or neem oil spray every 2 weeks. Fungi thrive in damp, crowded conditions, so water at the base (not overhead) to prevent reinfection.
Can I save my hydrangea if dark spots cover most of the leaves?
Yes, but act fast! Prune back 20–30% of the plant to remove infected foliage (don’t compost it!) and focus on root health. Apply a balanced fertilizer (10-10-10) to rebuild strength, and use mulch (2–3 inches) to protect roots. If spots are fungal, a baking soda spray (1 tsp baking soda + 1 gallon water + soap) can help. With consistent care, new growth should emerge in 4–6 weeks.
How do I tell if dark spots are from disease vs. nutrient deficiency?
Check the spot pattern and leaf location:
- Fungal disease: Irregular spots with yellow halos, often on lower leaves. May see white/powdery growth or leaf drop.
- Nutrient deficiency: Dark spots paired with yellowing between veins (chlorosis), usually on older leaves first. No fungal growth or rapid spread. Test your soil pH—if it’s above 6.5, iron deficiency is likely. For fungal issues, spots spread quickly and may ooze.
Will my hydrangeas bloom next year if I treat dark spots now?
Treating dark spots now ensures healthy foliage, which directly supports next year’s blooms. Hydrangeas set flower buds in late summer/fall, so focus on:
- Removing infected leaves (prevents fungal spread).
- Balanced fertilization (avoid excess nitrogen, which weakens plants).
- Pruning for airflow (reduces humidity, a fungal magnet). With proper care, your hydrangeas will reward you with vibrant blooms in spring/summer 2025.
Is it safe to use vinegar as a fungicide for hydrangea spots?
White vinegar (5% acetic acid) can help prevent fungal growth when used diligently, but it’s not a cure-all. Mix 1 tbsp vinegar + 1 gallon water + 1 tsp soap and spray every 7–10 days. However, vinegar can burn leaves if overused or in hot weather. For active infections, neem oil or copper fungicide are safer and more effective. Always test a small leaf first!