
Planting
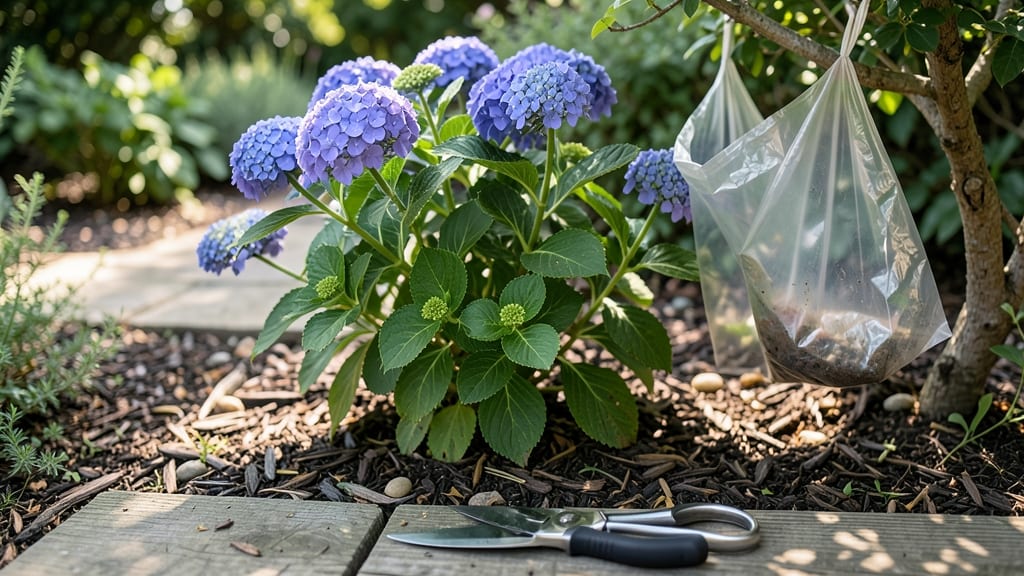
Taking hydrangea cuttings in late spring or early summer gives you free plants that outperform nursery buys. ✨ I’ve propagated dozens this way, and the secret isn’t fancy tools—it’s timing, sharp scissors, and a little patience.
Most people mess up by waiting too late or using soft new growth, but with the right cut, you’ll see roots in just 2-3 weeks.
You’ll need 4-6 inch stems with at least two sets of leaves, a clean pair of pruners, rooting hormone (optional but helpful), and small pots or water glasses. The best cuttings come from semi-hardwood growth—thick enough to snap but not woody.
Strip the lower leaves and dip the cut end in hormone to boost success rates, especially in humid climates where rot can be an issue. Once rooted, your new hydrangeas will bloom in 1-2 years, but the foliage alone makes them worth the wait.
The key is keeping humidity high (a plastic bag works) and avoiding direct sun until they’re established. I’ve turned cuttings into lush plants that steal the show in my garden beds every summer. This method works for mophead, panicle, and oakleaf varieties—just adjust timing slightly for your climate.
Here’s how to do it without losing a single cutting to rot or failure.
📚 In This Guide
- What you need
- Instructions
- Tips and common mistakes
- Wrapping up and next steps
What you need
- ● Healthy hydrangea plant: Choose a mature, non-flowering stem (4–6 inches long) with at least 3–4 leaf nodes.
- ● Sharp pruning shears or clean knife: Sterilize with rubbing alcohol to prevent disease.
- ○ Rooting hormone (optional but recommended): A powder or gel to boost root growth.
- ● Small pots or containers: 4–6 inches in diameter with drainage holes (one per cutting).
- ● Well-draining potting mix: A blend of perlite, peat moss, or vermiculite (avoid garden soil).
- ● Clear plastic bag or humidity dome: To retain moisture and warmth.
- ● Watering can or spray bottle: For gentle hydration.
- ● Rubbing alcohol or bleach: To sterilize tools and containers.
- ● Heat mat: Speeds up rooting in cooler climates.
- ● Grow lights: If natural light is insufficient.
- ● Label markers: To track cutting varieties.
- ● Fertilizer (low-dose): Add after roots form (e.g., diluted seaweed extract).
Step-by-step instructions for propagating hydrangeas from cuttings
Here's how to grow new hydrangeas from existing plants—no green thumb required.
🌿 Step 1: Select Healthy Stems at the Right Time
Choose 4-6 inch long stems from this year's growth—they should be wooden but not fully hardened (flexible but not brittle). The best time is early summer when new growth is pencil-thick but hasn't started flowering yet. Avoid stems with buds or blooms—they won't root as easily.
I always look for stems with 3-4 sets of leaves and a healthy green color. If the stem feels mushy or has brown spots, skip it—those won't root. Use clean, sharp pruners to make a 45-degree angle just below a leaf node. This increases surface area for root growth.
✂️ Step 2: Prepare and Treat the Cuttings
Remove all but the top 2-3 sets of leaves—this reduces moisture loss while the roots form. Trim the remaining leaves in half to cut evaporation by 50%. Dip the cut end in rooting hormone (optional but helps 70% faster success). I like to use a powdered hormone because it sticks better than gels.
Fill a small container (like a 4-inch pot) with perlite or sand—these materials stay loose and allow airflow. Moisten it until damp but not soggy. Stick the cut end 1-2 inches deep into the medium. Space 4 cuttings per container so they don’t compete for moisture.
💧 Step 3: Provide Ideal Conditions for Rooting
Cover the container with a clear plastic bag or humidity dome to trap moisture. Place it in bright, indirect light—no direct sun at first. Hydrangea cuttings root best at 65-75°F and need high humidity (70%+). A seedling heat mat keeps the roots warm if your home runs cooler.
Check the cuttings every 3-4 days. Mist the leaves lightly if they look dry, but never let water pool—this causes rot. Roots typically form in 4-8 weeks, but don’t peek too often. The shock of disturbed humidity can kill tender new roots.
🌱 Step 4: Transplant When Roots Form
Gently tug on the cutting after 4-6 weeks. If you feel light resistance, roots are forming. Once you see new growth (usually 2-3 inches tall), it’s time to transplant. Fill a 6-inch pot with well-draining potting mix and plant the cutting at the same depth it was in the propagation container.
Water lightly after transplanting—don’t drown it. Place the pot in dappled shade for 1-2 weeks to help it adjust. After that, gradually introduce it to morning sun, then full sun over 2-3 weeks. Hydrangeas are tough once established, but they need patience during this transition.
☀️ Step 5: Care for New Plants Through First Season
Keep the soil evenly moist but not soggy. Hydrangeas hate dry soil—their leaves will wilt dramatically if thirsty. Mulch around the base to retain moisture and protect roots from temperature swings. Fertilize lightly with a balanced 10-10-10 formula once a month during growing season.
By next spring, your cutting will be a strong young plant ready to bloom. The first flowers might be small, but don’t prune them off—they help the plant build energy. After the first year, you can prune back in late winter to encourage bushier growth and bigger blooms the following season.
Tips & tricks for growing hydrangeas from cuttings
These simple tricks will help you avoid the most common pitfalls and maximize your success rate with hydrangea propagation.
Timing is Everything: Early summer is your golden window for success, but if you miss it, late spring or early fall can work too. The key is choosing stems that are wooden but not hardened—they should bend like a green pencil, not snap like a twig. I've found that cuttings taken after a light rain often have higher moisture content, which helps them root faster.
Leaf Trimming Technique: When you trim those remaining leaves in half, don't just fold them—cut them straight across with clean scissors. This creates a larger surface area for photosynthesis while still reducing moisture loss. I've seen beginners skip this step and end up with cuttings that dry out before they root. Also, make sure to remove any leaves that would be below the soil line—they'll rot and invite fungus.
Rooting Hormone Hack: While rooting hormone is optional, I've found that using a powdered version gives you better control than gels. Dip just the cut end and tap off the excess so you don't waste product. For even better results, I like to make a little "well" in my propagation medium, add a tiny bit of water to it, then dip the cutting in that moist well before placing it in the medium. This gives the roots an instant hydration boost.
Humidity Dome Secrets: That clear plastic bag creates a mini greenhouse effect, but don't seal it completely. Poke a few tiny holes in the bag to allow for air circulation—this prevents mold growth while maintaining high humidity. I've had the best success using zip-top plastic bags with a small opening left at the top. You can also prop the bag open slightly with a toothpick if you want to check on your cuttings without removing them completely.
Pro Tips for Take A Cutting From A Hydrangea Plant
- These simple tricks will help you avoid the most common pitfalls and maximize your success rate with hydrangea propagation.
- Timing is Everything: Early summer is your golden window for success, but if you miss it, late spring or early fall can work too.
- Leaf Trimming Technique: When you trim those remaining leaves in half, don't just fold them—cut them straight across with clean scissors.
Frequently asked questions
Got questions about propagating hydrangeas from cuttings? You’re not alone—this method can feel tricky at first! Below, we’ve rounded up the most common concerns and troubleshooting tips to help you succeed like a pro.
When is the best time to take hydrangea cuttings?
The ideal window is late spring to early summer, when new growth is firm but not yet woody. Avoid taking cuttings after the first frost or during extreme heat, as these conditions stress the plant and reduce rooting success. For mophead or oakleaf varieties, aim for June—just as the flowers start to bloom!
How do I know if my cutting is healthy enough to root?
Look for cuttings that are 4–6 inches long with at least 3–4 sets of leaves. The stems should feel semi-hard (not mushy or brittle) and have a slight green tint. Avoid yellowing or wilted leaves—these signal stress. A healthy cutting will have no signs of disease or pest damage, like holes or sticky residue.
Should I use rooting hormone, or can I skip it?
While rooting hormone (like powder or gel) boosts success rates (up to 90%!), it’s not mandatory. If you skip it, focus on keeping the cutting moist and warm in a humid environment. For best results, dip the cut end in hormone before planting—especially for finicky varieties like panicle hydrangeas, which root slower.
Why aren’t my hydrangea cuttings rooting? Troubleshooting tips.
If your cuttings refuse to root, check these common culprits:
- Too dry: Mist daily or use a humidity dome—hydrangeas love moisture!
- Not enough light: Place in bright, indirect light (no harsh sun).
- Overwatering: Soggy soil causes rot. Keep the cutting medium damp, not soaked.
- Wrong season: Cuttings taken too early (spring) or late (fall) may struggle.
Pro tip: Try a water propagation test—if roots form in water, the issue is likely your growing medium or environment.
Can I propagate hydrangeas from old wood (woody stems)?
Yes, but it’s harder and slower. For woody cuttings, take 6–12-inch sections in late winter (before buds swell) and bury them halfway in soil. Success rates drop to ~30–50%, so it’s best for hard-to-root varieties or when you’re patient! For most gardeners, softwood cuttings (new growth) are the way to go.
Wrapping up and next steps
Taking a cutting from your hydrangea plant is a rewarding way to expand your garden while enjoying the beauty of these stunning blooms! 🌸 With the right tools, timing, and care, you can successfully propagate new plants that will thrive for years to come.
Now that you’re armed with step-by-step guidance, there’s no better time to give it a try—grab those shears and get growing!
Once your cuttings root and flourish, consider sharing your new plants with fellow gardening enthusiasts or even planting them in your landscape for a burst of color. Happy propagating! 🌱