
Diseases
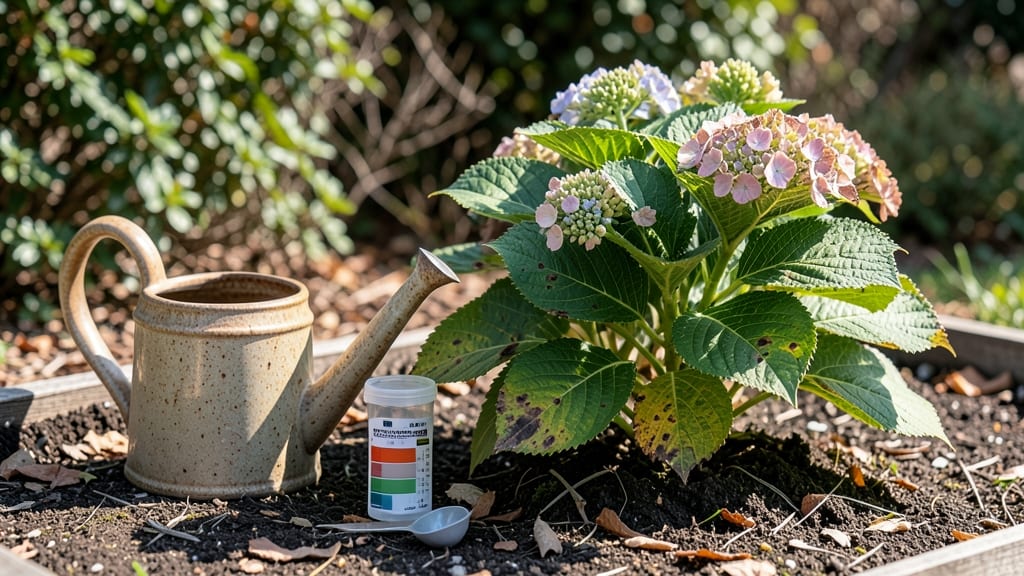
Hydrangea leaves turning dark can turn your showstopper shrub into a sad, droopy mess—but it’s fixable. 🌿 I’ve seen this happen after years of overwatering, poor soil, or iron deficiency, and the good news is, you can reverse it with just a few targeted steps.
The first clue is often the undersides of leaves: dark spots, yellowing, or a crispy texture mean you’re dealing with either fungal issues or nutrient stress. Check your watering routine—hydrangeas hate soggy roots—and test your soil pH, because iron becomes unavailable when soil gets too alkaline.
With the right care, you’ll see fresh green growth within 4-6 weeks. The blooms will return bigger and brighter, and your plant will look like it did in its glory days. Here’s how to diagnose and fix it—no guesswork, just results.
Start by pruning any severely damaged leaves to improve airflow and reduce fungal spread. Then, feed your hydrangeas with an iron supplement (like iron chelate) or compost to restore nutrients. If you suspect overwatering, let the soil dry out between waterings—hydrangeas prefer consistently moist but not waterlogged conditions.
The key is consistency: stick with your new routine for at least two growing seasons, and you’ll break the cycle of dark leaves for good. Your hydrangeas will thank you with lush, vibrant foliage and those iconic blooms you love.
Prevention is easier than fixing—so once you’ve got your plant back on track, keep an eye on soil moisture, mulch to retain nutrients, and avoid heavy fertilizers that throw off the pH balance. A little maintenance now means fewer struggles later.
This works for bigleaf, panicle, and oakleaf hydrangeas alike, so no matter what variety you grow, these steps will bring them back to life. Let’s get those leaves glowing green again!
Root Causes Behind Darkening Leaves
Understanding why your hydrangea leaves are turning dark starts with identifying the hidden triggers lurking in soil, water, or environmental conditions. Darkened leaves—whether deep green, purple-black, or brown—are often your plant’s SOS signals. Let’s break down the most common culprits with science-backed explanations and actionable insights.
Hydrangeas thrive in moist but well-drained soil, and when roots sit in soggy conditions, they suffocate.
This leads to: - Oxygen deprivation: Roots can’t absorb nutrients efficiently, causing leaves to darken as a stress response. - Fungal growth: Excess moisture invites pathogens like Phytophthora, which clogs root cells and disrupts chlorophyll production. - Toxic buildup: Overwatering flushes away essential minerals (like iron) while leaving harmful salts or aluminum in the soil, which hydrangeas are sensitive to.
💡 Pro Tip: Stick your finger 2 inches into the soil—if it’s damp, hold off on watering. Ensure pots have drainage holes, and raised beds prevent waterlogging.
Darkening leaves with yellowing veins (interveinal chlorosis) scream "iron crisis!" Hydrangeas need iron to produce chlorophyll, and deficiency turns leaves dusky green or purple-black. Common triggers: - Alkaline soil (pH > 7.0): Iron binds tightly to soil particles, making it unavailable to roots.
Hydrangeas prefer pH 5.5–6.2 for optimal iron uptake. - Compacted or clay soil: Poor root penetration limits access to iron deposits. - Over-fertilizing with lime: Raises pH and locks out micronutrients.
✨ Fix It Fast: Amend soil with chelated iron (like Iron Chelate 138) or sulfur to lower pH. For container plants, use acid-loving potting mix and fertilizers labeled for azaleas/rhododendrons.
Hydrangeas are sensitive to extreme conditions, and sudden changes can trigger darkening: - Temperature swings: Cold snaps or heatwaves disrupt nutrient uptake.
Leaves may darken as a protective measure. - Windburn: Desiccated leaf edges turn brown-black, especially in exposed locations. - Sun scorch: Too much direct sun (especially after transplanting) causes oxidative stress, leading to dark, crispy patches.
🌡️ Actionable Fix: Move plants to partial shade (morning sun + afternoon shade) if in hot climates. Use mulch to regulate soil temp and protect roots.
Hidden invaders can silently drain your hydrangea’s vitality:
- Scale insects or spider mites: Sap-sucking pests weaken leaves, causing them to darken prematurely.
- Root rot (from overwatering): Fungal infections like Pythium block nutrient flow, turning leaves black and mushy.
- Bacterial leaf spot: Dark, water-soaked spots spread quickly in humid conditions.
🔥 Spot Treatment: Inspect leaves for sticky residue (aphids), webbing (mites), or fungal spores. Prune affected areas and apply neem oil or copper fungicide as needed.
While iron steals the spotlight, other deficiencies can mimic darkening: - Magnesium deficiency: Dark spots between veins (often with yellow edges) signal low magnesium. Amend with Epsom salt (magnesium sulfate). - Potassium deficiency: Weak stems and dark, curled leaves may appear.
Use a balanced fertilizer (like 10-10-10) during growing season. - Toxic aluminum/manganese: In acidic soils, these metals can accumulate, causing dark discoloration. Test soil and adjust pH if needed.
📊 Test Your Soil: A simple home soil test kit ($10–$20) reveals pH and nutrient levels—critical for targeted fixes.
| Symptom | Likely Cause | Fast Fix |
|---|---|---|
| Dark purple-black leaves | Iron deficiency (alkaline soil) | Chelated iron + sulfur |
| Yellow veins, dark edges | Overwatering + root rot | Improve drainage + fungicide |
| Brown-black crispy edges | Sun scorch or windburn | Relocate to shade + mulch |
| Dark spots with yellow halos | Bacterial/fungal infection | Prune + copper spray |
| Uniform dark green (no yellow) | Magnesium/potassium deficiency | Epsom salt or balanced fertilizer |
💡 Remember: Dark leaves are rarely a death sentence—they’re a conversation starter. Pinpoint the cause, adjust one factor at a time, and watch your hydrangea rebound with vibrant, healthy foliage.
Quick Fixes for Darkened Leaves
Now that you know why your hydrangea leaves are turning dark, it’s time to take action! Each cause requires a slightly different approach, but the good news is that most solutions are simple, cost-effective, and can restore your plant’s vibrant health in no time.
Let’s dive into the fixes—tailored to the root of the problem—along with some smart prevention tips to keep your hydrangeas thriving.
If your hydrangea leaves are yellowing with dark green veins (a classic sign of iron deficiency), here’s how to revive them:
1. Apply Iron Supplement (Fast Relief) 💊
- Use a chelated iron product (like iron sulfate or iron EDTA) to ensure the plant can absorb it quickly.
Avoid plain iron, which can harm soil pH. - Mix 1 tsp of chelated iron per gallon of water and spray it directly on the leaves (foliar feed) or water the soil at the base. - Repeat every 2–4 weeks until new growth appears.
2. Adjust Soil pH (Long-Term Fix) 🌡️
- Test your soil’s pH—hydrangeas prefer 5.5–6.5. If it’s too alkaline (above 7), iron becomes locked away.
- Lower pH naturally by adding sulfur, peat moss, or pine needles to the soil.
For a quick fix, use vinegar (1 cup per gallon of water)—but monitor closely to avoid over-acidification. - For container plants, repot with acidic potting mix designed for azaleas or rhododendrons.
3. Improve Drainage & Aeration 💧
- Compacted or waterlogged soil worsens iron uptake. Amend the soil with perlite or compost to improve airflow and drainage.
- Avoid overwatering—hydrangeas hate soggy roots. Let the top 1–2 inches of soil dry out between waterings.
If dark, mushy patches or blackened edges signal fungal/bacterial issues, act fast to prevent spread:
1. Prune Infected Leaves Immediately ⏰
- Cut off all dark, spotted, or wilting leaves with sterilized pruners (wipe with rubbing alcohol between cuts).
- Dispose of infected debris in the trash—not the compost—to stop reinfection.
2.
Apply Fungicide or Bacterial Spray 🛡️ - For fungal infections (like leaf spot or powdery mildew): - Spray with neem oil (1 tbsp per quart of water + a drop of dish soap) or copper fungicide. - Reapply every 7–10 days until new growth is healthy. - For bacterial issues (like bacterial leaf spot): - Use a copper-based bactericide (follow label instructions). - Remove and destroy infected leaves immediately to prevent spread.
3. Boost Air Circulation & Reduce Moisture 🌬️
- Space plants properly—crowding traps humidity, inviting fungi.
- Water in the morning (not at night) so leaves dry quickly.
- Avoid overhead watering—use a soaker hose or drip irrigation instead.
If your hydrangea’s leaves are dark, limp, and falling off (signs of root rot), it’s time to rescue those roots:
1.
Check the Roots & Trim the Damage 🔪 - Gently remove the plant from the soil and inspect the roots. - Healthy roots are firm and white; rotted roots are mushy, black, or smell foul. - Trim away all diseased roots with clean pruners, leaving only firm, white roots.
2.
Repot in Fresh, Well-Draining Soil 🏺 - Choose a pot with drainage holes (if repotting). - Use a mix of: - 50% peat moss or coconut coir (for acidity) - 30% perlite or pumice (for drainage) - 20% compost or worm castings (for nutrients) - Water lightly after repotting and keep the soil slightly moist (not soggy).
3. Adjust Watering Habits 💧
- Water only when the top 1–2 inches of soil are dry.
- Use the “finger test”: Stick your finger in the soil—if it’s damp below 1 inch, wait before watering.
- Ensure the pot has drainage—no standing water!
Once your hydrangea is back on track, keep it happy with these proactive tips:
- 💡 Test soil every 6–12 months—especially if your area has alkaline soil.
- ✨ Feed with iron-rich fertilizers (like fish emulsion or iron chelate) twice a year (spring and early summer).
- 🎯 Mulch with pine bark or compost to maintain soil acidity and moisture.
- 🌿 Prune in late winter/early spring to improve airflow and remove weak growth.
- 🚫 Avoid chemical fertilizers high in phosphorus—they can worsen iron deficiency.
With the right care, you should see new, healthy growth in 4–8 weeks.
If the problem persists: - Re-evaluate soil pH—it might need more adjustment. - Check for hidden pests (like spider mites) that could be stressing the plant. - Consider a soil replacement if root rot was severe.
Your hydrangea is tougher than you think—with these fixes, it’ll bounce back with lush, vibrant foliage in no time! 🌿✨
Frequently asked questions
Why do my hydrangea leaves turn dark purple-black?
This is almost always a sign of iron deficiency caused by alkaline soil (pH above 7.0). Hydrangeas need acidic soil (pH 5.5–6.2) to absorb iron. The deficiency prevents chlorophyll production, turning leaves dark purple or black. Test your soil and amend with sulfur or chelated iron to restore proper nutrient uptake.
Can overwatering cause dark leaves on hydrangeas?
Overwatering leads to root rot and fungal infections, both of which cause leaves to darken. If the soil stays soggy, roots suffocate and can't absorb nutrients. Check for mushy, black roots and improve drainage by using well-draining soil mixes with perlite or sand. Water only when the top 1-2 inches of soil are dry.
How do I tell if dark leaves are from pests or disease?
Look closely: Pests (like spider mites or scale) cause dark, stippled leaves with webbing or sticky residue. Diseases (like fungal leaf spot) create dark spots with yellow halos. Prune infected areas immediately and treat with neem oil (pests) or copper fungicide (diseases). Always sterilize pruners between cuts to prevent spread.
Will Epsom salt help my hydrangea's dark leaves?
Only if the issue is magnesium deficiency—not iron. Epsom salt (magnesium sulfate) helps with dark spots between veins, but it won’t fix iron problems. For true iron deficiency, use chelated iron supplements instead. Test your soil first to identify the exact nutrient gap before treating.
How long does it take to see improvement after treatment?
With proper care, you should notice new growth in 4-6 weeks. Iron supplements show results faster (2-4 weeks), while soil pH adjustments may take longer. Consistency is key—keep watering habits and fertilizing routines steady. If no improvement after 8 weeks, re-evaluate soil conditions or check for hidden pests.