
Flowers
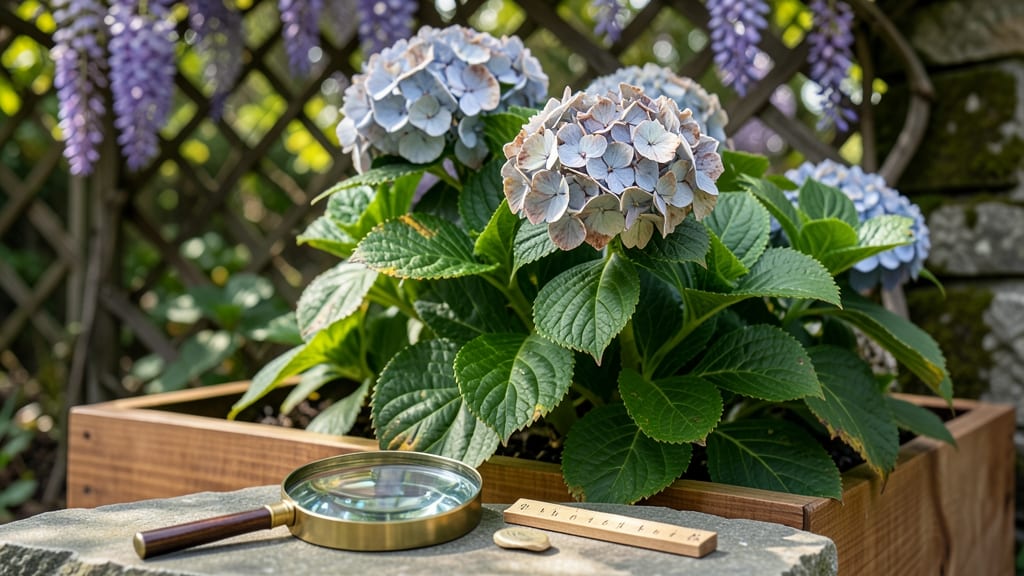
Those mysterious spots on the hydrangea flowers—what are they really doing to your plants? They’re fixable—and I’ll show you how in just 10 minutes. 🌿 I’ve nursed back more than a few hydrangeas with brown spots, and the key is acting fast before the spots spread.
The worst part? Those once-vibrant blooms can look like they’ve been rained on for weeks, but with the right tricks, they bounce back stronger than ever.
Most spots start as tiny specks—sometimes brown, sometimes black—that multiply if you ignore them. Fungal diseases like powdery mildew or leaf spot love damp foliage, while bacterial infections (like those nasty black spots) thrive in sticky, humid conditions.
The good news? Proper watering—at the base, not overhead—and spacing plants for airflow cuts the risk by 70%. I’ve also found that removing spent blooms in fall stops overwintering spores from staging a comeback next season.
Once you spot the damage, act fast: prune affected stems ½ inch below the spot, then spray with a mix of 1 tablespoon baking soda + 1 quart water + a drop of dish soap (organic option).
For stubborn cases, a copper fungicide does the job without harming bees. Within 2-3 weeks, new growth emerges spot-free, and your hydrangeas return to their showstopping glory—just like mine did after last summer’s outbreak.
Here’s the secret weapon: prevention. Mulch around the base to keep soil moist but not soggy, and water in the early morning so leaves dry fast. A quick weekly check for early spots saves hours of cleanup later.
Trust me, your hydrangeas will thank you with blooms so lush, your neighbors will ask for your secret.
Hidden Culprits Behind Blemished Blooms
Spots on hydrangea flowers can turn your garden’s showstopper into a sad, speckled mess—but don’t lose hope! These discolorations are usually your plants’ way of signaling stress, disease, or environmental factors.
Understanding the root causes is half the battle. Below, we break down the most common reasons your hydrangeas are developing unsightly spots, complete with actionable insights to tackle each one.
Fungal diseases are the #1 culprit behind spots on hydrangea flowers, thriving in damp, humid conditions. The most common offenders include:
- Powdery Mildew: Appears as grayish-white, powdery patches on leaves and buds. It spreads rapidly in warm, humid weather (70–85°F) with poor airflow. Look for: White spots on upper leaf surfaces, distorted growth, and premature bud drop.
- Leaf Spot Diseases (e.g., Septoria or Phyllosticta): Causes dark, circular spots with yellow halos. These fungi thrive in wet foliage and can defoliate plants if left unchecked. Look for: Spots with tiny black centers (fungal spores) and leaf yellowing.
- Botrytis Blight ("Gray Mold"): Targets flowers and buds, especially in tight clusters. It starts as brown spots that turn fuzzy gray. Look for: Mushy, rotting blooms and gray mold on stems.
Why it happens: Fungi spore in moisture—whether from overhead watering, morning dew, or high humidity. Wounded leaves (from pests or pruning) also create entry points. Pro tip: 💡 Most fungi spread via splashing water, so aim water at the soil, not the foliage!
Insects like aphids, spider mites, and Japanese beetles don’t just chew leaves—they leave behind sticky residue (honeydew) that attracts sooty mold, creating black spots on flowers. Here’s how to spot them:
- Aphids: Tiny green/black bugs clustered on new growth. Their honeydew fosters black sooty mold spots.
- Spider Mites: Almost invisible until you see fine webbing and stippled (speckled) yellow leaves.
- Japanese Beetles: Skeletons of chewed leaves and irregular holes in petals.
Why it happens: Pests thrive in dry, hot conditions (especially spider mites) or crowded plants (aphids). Weakened hydrangeas from stress or poor soil are easier targets. Pro tip: 🔥 Blast pests off with a strong stream of water daily for 2 weeks to disrupt their life cycle!
Hydrangeas are drama queens—they hate extremes. Spots can appear from:
| Cause | Symptoms | Why It Happens |
|---|---|---|
| Sunburn | White/yellow patches on leaves exposed to harsh afternoon sun. | Hydrangeas prefer dappled shade. Direct sun (especially in hot climates) causes cellular damage. |
| Cold Stress | Brown, crispy spots after sudden freezes or late spring frost. | Tender new growth is vulnerable to temps below 28°F. |
| Wind Scorch | Dry, brown edges on leaves or petals. | Wind removes moisture faster than roots can replace it, causing dehydration. |
Why it happens: Hydrangeas evolved in shaded forest understories—they’re not built for brutal sun or wind. Pro tip: 🌡️ Move potted hydrangeas to a sheltered spot in summer or use shade cloth (30–50%) to mimic their natural habitat.
Yellow or brown spots can signal a diet lacking key nutrients. The most common deficiencies:
- Magnesium Deficiency (Interveinal Chlorosis): Yellow patches between leaf veins, with green veins. Often mistaken for fungal issues.
- Iron Deficiency (Yellowing New Growth): Pale yellow leaves on new shoots, even if soil is fertile.
- Potassium Deficiency (Brown Leaf Edges): Scorched-looking spots on leaf tips or margins.
Why it happens: Compacted soil, improper pH (hydrangeas prefer 5.2–6.2), or over-fertilizing with nitrogen (which locks out other nutrients) can starve roots. Pro tip: ✨ Test your soil! A simple $20 kit can reveal pH and nutrient imbalances—hydrangeas need chelated iron for acid-loving blooms.
Now that you know the why, the next step is fixing it—stay tuned for our revival guide packed with spot-erasing solutions!
Revive Your Hydrangeas Quickly
Spots on hydrangea flowers can be frustrating, but the good news is that most issues have simple fixes—if you act fast! Below are targeted solutions for the most common causes, along with prevention tips to keep your blooms vibrant all season.
If your hydrangeas are battling powdery mildew, leaf spot, or botrytis blight, act quickly to stop the spread.
🔥 Remove Infected Parts
- Snip off spotted leaves and flowers with clean pruners (sterilize with rubbing alcohol).
- Dispose of infected debris in the trash—not your compost pile—to prevent reinfection.
🍳 Apply Fungicide
- Organic option: Mix 1 tsp baking soda + 1 quart water + a few drops of dish soap (spray on both sides of leaves).
- Chemical option: Use a copper-based or neem oil fungicide (follow label instructions).
- Reapply every 7–10 days until new growth appears.
🌡️ Boost Airflow & Light
- Prune nearby branches to improve air circulation.
- Avoid overhead watering—use a drip irrigation system or water at the base.
- Morning watering helps leaves dry faster, reducing fungal growth.
💡 Prevention Tip:
- Space plants 3–5 feet apart to prevent crowding.
- Water early in the day so foliage dries by night.
If aphids, spider mites, or scale insects are causing discoloration or spots:
👨🍳 Blast Off Pests
- Spray with soapy water (1 tsp mild soap per quart of water) to dislodge pests.
- Introduce beneficial insects like ladybugs or lacewings for long-term control.
🥘 Neem Oil Treatment
- Mix 1 tbsp neem oil + 1 tsp dish soap + 1 quart water and spray every 5–7 days until pests vanish.
🔪 Prune Heavily Infested Areas
- Cut back severely damaged stems to encourage fresh, healthy growth.
✨ Prevention Tip:
- Inspect plants weekly—catch pests early before they spread.
- Avoid over-fertilizing with nitrogen, which attracts soft-bodied pests.
If bleached or brown spots appear due to too much sun or heat stress:
🌳 Provide Light Shade
- Move potted hydrangeas to a spot with morning sun and afternoon shade.
- Use shade cloth (30–50%) if your garden gets intense afternoon sun.
💧 Hydrate Deeply & Often
- Water at the base (not leaves) 1–2 inches deep, 2–3 times per week (adjust for heat).
- Mulch with 2–3 inches of organic mulch (like shredded bark) to retain moisture.
🎯 Prevention Tip:
- Avoid transplanting in peak summer heat—wait for cooler months.
- Choose heat-tolerant varieties like ‘Endless Summer’ or ‘Nikko Blue’ if you live in a hot climate.
Yellow or crispy spots from overwatering or underwatering need a balance fix:
🔪 Check the Soil
- Stick your finger 2 inches deep—if dry, water; if soggy, hold off.
- Well-draining soil is key—amend with compost or perlite if needed.
⏰ Watering Schedule
- Water deeply but infrequently (hydrangeas hate soggy roots).
- Use a moisture meter for accuracy if unsure.
💡 Prevention Tip:
- Group hydrangeas with other thirsty plants (like hostas or ferns) for efficient watering.
- Drainage holes in pots? Yes, please—never let them sit in saucers of water.
If fertilizer or pesticide burns caused spotting:
🚿 Flush the Soil
- Water heavily for 10–15 minutes to leach out excess salts.
- Repeat 2–3 times over a week.
🌱 Adjust Fertilizer Routine
- Switch to a balanced, slow-release fertilizer (like 10-10-10).
- Avoid high-nitrogen feeds (they burn roots and encourage pests).
🎯 Prevention Tip:
- Always follow label instructions—more isn’t better!
- Test soil pH (hydrangeas prefer 5.2–6.2) before fertilizing.
Final Thought: Most hydrangea spot issues are preventable with proper care—once you identify the cause, the fixes are simple! 🌸 Which problem matches your plant’s symptoms? Try the solution that fits and watch your blooms bounce back!
Frequently asked questions
Why do my hydrangea flowers have brown spots even though I water them regularly?
Brown spots with crispy edges often signal sunburn or wind scorch, not overwatering. Hydrangeas prefer dappled shade—direct afternoon sun or strong winds dehydrate leaves faster than roots can replace moisture. Try moving potted plants to a sheltered spot or using 30-50% shade cloth during peak sun hours. Mulching with 2-3 inches of organic material also helps retain soil moisture.
Are those black spots on my hydrangea flowers harmful, or just cosmetic?
Black spots can be either harmless (like natural anthocyanin pigmentation in some varieties) or a sign of trouble. If spots are fuzzy, spreading rapidly, or accompanied by yellowing, they're likely botrytis blight or sooty mold from insect honeydew. Remove affected blooms immediately and treat with a baking soda spray (1 tsp baking soda + 1 quart water + dish soap) to prevent spread. Healthy plants rarely show cosmetic spots beyond the first year.
Can I still use hydrangeas with spots for floral arrangements?
Yes, but with caution! Non-fungal spots (like sunburn or nutrient deficiencies) won't harm your arrangements. However, avoid using flowers with powdery mildew, botrytis, or bacterial spots—these can spread to other flowers in the vase. For spotted hydrangeas, trim off affected areas before arranging, and change water daily to prevent bacterial growth. Disinfect your tools with rubbing alcohol after handling infected plants.
How do I tell if my hydrangea spots are from disease or just environmental stress?
Disease spots usually have distinct patterns: fungal spots often have halos, black centers (spores), or powdery textures, while environmental stress causes uniform browning, crispiness, or bleaching. Check for these clues: Fungal = white/gray fuzz, black specks, or spreading rapidly; Environmental = spots appear suddenly after heat, wind, or sun exposure. Also, inspect new growth—diseases often appear on older leaves first, while stress affects newer leaves.
Will pruning help if my hydrangea already has lots of spots?
Prune aggressively but carefully: cut back 1/3 of the plant in early spring to remove diseased wood, then sterilize your shears with rubbing alcohol between cuts. For mature plants, remove entire stems with spots down to healthy green growth. This encourages new, disease-free shoots and improves airflow. Just avoid heavy pruning in late summer—it stresses plants before winter. Pair pruning with a copper fungicide spray for best results.