
Pests and Diseases
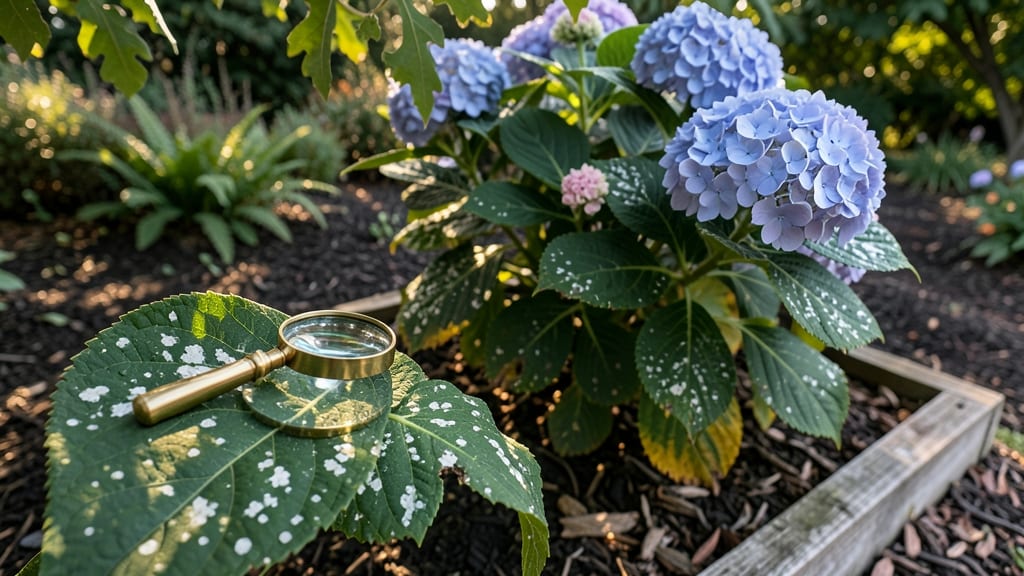
White spots on hydrangea leaves are the first sign your plants are fighting powdery mildew—this fungal infection spreads like wildfire if you don't act fast.
I've seen healthy bushes turn into sad, dusty shadows in just two weeks, but the good news is you can turn things around with the right steps. The key is catching it early, when the spots are still small and white, not when the leaves start yellowing and curling.
This isn't just about spraying something random—it's about understanding why it happens. Too much shade, poor airflow, or wet leaves from overhead watering create the perfect fungal party. My hydrangeas used to struggle until I swapped my sprinkler for a drip system and pruned for better airflow.
Once you fix those issues, treatments work way better. The most effective organic cure? A mix of baking soda, water, and a drop of dish soap—it's cheap, safe, and works fast if you apply it every 7-10 days.
You'll see new growth pushing through within days of starting treatment, with leaves staying green and firm instead of turning crispy. The powdery white coating disappears, and your hydrangeas bounce back with vibrant blooms.
The secret weapon is consistency—don't skip applications, and always treat both the top and undersides of leaves where the fungus hides. For severe cases, a fungicide labeled for powdery mildew gives faster results, but organic methods work just as well with patience.
Prevention is easier than cure: space plants properly, water at the base, and prune for airflow. I've kept my hydrangeas mildew-free for three seasons now using these simple habits.
The best time to act is at the first sign of white spots—don't wait until the leaves look like they've been dusted with flour.
Root Causes Behind Leaf Spots
White spots on hydrangea leaves aren’t just a cosmetic issue—they’re often a sign of underlying stress or infection. Understanding the why behind these spots is the first step to fixing them.
Below, we break down the most common culprits, backed by science, so you can diagnose and treat the problem like a pro. 🌱🔍
Fungal diseases are the #1 reason for white spots on hydrangea leaves. These microscopic organisms thrive in warm, humid conditions and can spread rapidly if left unchecked.
Powdery Mildew: The Fluffy White Culprit
Powdery mildew (Erysiphe or Sphaerotheca species) is the most infamous fungal cause. It appears as white, powdery patches on leaves, stems, or even flower buds. Unlike other fungi, it doesn’t require water to spread—just high humidity (70%+) and moderate temperatures (60–80°F).
- How it spreads: Spores float through the air and land on susceptible plants. Once established, they reproduce quickly, creating a thick, chalky layer that blocks sunlight and weakens the plant.
- Why hydrangeas are vulnerable: Hydrangeas have soft, broad leaves that trap moisture, and their dense foliage creates the perfect humid microclimate for fungal growth.
- Tell-tale signs: Look for spots that start small and spread outward like a snowball. Infected leaves may yellow, curl, or drop prematurely.
Leaf Spot Fungi: The Hidden Destroyers
Other fungi, like Septoria or Cercospora, cause small, circular white or grayish spots with dark borders. Unlike powdery mildew, these often have water droplets or black specks (fruiting bodies) in the center.
- How it starts: Spores splash onto leaves from water (rain, overhead irrigation, or dew). Warm, wet conditions (60–85°F with high humidity) trigger outbreaks.
- Why it’s sneaky: These fungi overwinter in plant debris or soil, meaning last year’s infected leaves could be this year’s problem.
- Red flags: Spots may merge into larger lesions, causing holes or leaf drop. Severe cases can stunt growth or kill buds.
Not all white spots are fungal. Sometimes, environmental factors weaken hydrangeas, making them more susceptible to infections—or even causing spots on their own. Here’s what’s likely at play:
Overwatering or Poor Drainage
Hydrangeas hate wet feet. When soil stays soggy, roots suffocate, and leaves develop white, mushy spots (often with yellowing edges)—a sign of edema (waterlogging stress).
- Science behind it: Excess water forces roots to take up more H₂O than the plant can process. Leaves swell and burst, creating white, corky bumps.
- Common in: Clay soil, containers without drainage holes, or after heavy rain.
- Quick fix: Improve drainage with organic matter (compost or perlite) and water only when the top 1–2 inches of soil are dry.
Sunburn or Heat Stress
Hydrangeas love shade but can get white, crispy spots if suddenly exposed to intense afternoon sun. This is called solar injury.
- Why it happens: Leaves overheat when sunlight hits them faster than they can photosynthesize, leading to bleached or white patches.
- At-risk areas: Newly planted hydrangeas, those moved from shade to sun, or varieties like Oakleaf hydrangeas in hot climates.
- Prevention tip: Gradually acclimate plants to sun (a process called "hardening off") or use light shade cloth in peak heat.
Chemical Burn from Fertilizers or Sprays
Too much salt (from fertilizers) or harsh chemicals (like herbicides) can leave white, crusty deposits on leaves. This is especially common with:
- Over-fertilizing: High nitrogen or salt buildup (from synthetic fertilizers) can scorch leaf edges, turning them white.
- Herbicide drift: Glyphosate or other broadleaf herbicides can bleach spots if they land on leaves.
- Hard water sprays: Minerals in tap water (like calcium or fluoride) can accumulate as white residue.
While less common, insects can also cause white spots—either directly or by weakening plants and inviting fungi. Here’s how:
Spider Mites: The Silent Leaf Miners
These tiny arachnids (not insects!) suck plant sap, leaving white, stippled patterns on leaves. Severe infestations cause leaves to turn yellow and dry out.
- How they work: Mites pierce cells, causing white speckling. Their fine webbing (usually on undersides of leaves) is a dead giveaway.
- Trigger factors: Drought stress makes hydrangeas more attractive to mites.
- Action step: Blast leaves with water to dislodge them or use neem oil (miticides).
Scale Insects: The Sticky White Bumps
Scale insects attach to leaves/stems as small, white, shell-like bumps. While they don’t directly cause spots, their honeydew secretion (a sticky sap) attracts sooty mold—a black fungus that coats leaves in a grayish-white film.
- Why it’s a problem: Sooty mold blocks sunlight, reducing photosynthesis and causing yellowing.
- How to spot them: Look for white, immobile "bumps" on stems or leaf undersides.
- Solution: Scrape off scales with a soft brush dipped in soapy water or use horticultural oil.
White spots can also signal mineral imbalances. While rare, these deficiencies weaken plants, making them more prone to infections.
Magnesium or Calcium Deficiency
Yellowing between leaf veins (chlorosis) or white, necrotic spots can indicate:
- Magnesium deficiency: Causes interveinal yellowing (white spots in severe cases). Common in acidic or sandy soils.
- Calcium deficiency: Leads to white, dead spots on leaf edges (called "tip burn"). Often happens in waterlogged or alkaline
Quick Fixes for Hydrangea Leaf Spots
If your hydrangeas are battling white spots, don’t panic—these practical solutions will help restore their health. The key is identifying the root cause (like fungal infections, pests, or environmental stress) and applying the right treatment.
Below are targeted fixes for each common culprit, plus preventive tips to keep your plants thriving.
Fungal diseases like powdery mildew or leaf spot thrive in humid, shaded conditions. Here’s how to tackle them:
🔥 Remove Infected Foliage
- ✂️ Trim away heavily spotted leaves with clean pruners.
- 🗑️ Dispose of them in the trash (not compost)—fungi can linger in yard waste.
🍳 Apply Fungicidal Sprays
- 🌿 Organic option: Mix 1 tbsp baking soda + 1 tsp dish soap + 1 gallon water. Spray leaves undersides too (fungi love hiding there).
- 💊 Chemical option: Use a copper-based fungicide or neem oil spray (follow label rates). Reapply every 7–14 days until new growth appears.
🌡️ Improve Airflow & Light
- ✨ Prune overgrown branches to allow sunlight and air circulation.
- 🌞 Move pots to a sunnier spot (4–6 hours of direct light daily).
- 💨 Space plants 2–3 feet apart if growing in the ground.
🎯 Prevent Future Outbreaks
- 💡 Water in the morning (avoid evening dampness).
- 🌱 Mulch with straw (not thick layers) to reduce soil moisture near leaves.
- 🌿 Rotate fungicides if using chemicals to prevent resistance.
Tiny pests like spider mites or aphids can cause white speckling. Here’s how to evict them:
👨🍳 Blast Off Pests with Water
- 💦 Spray leaves with a strong hose stream (early morning works best).
- 🕷️ Repeat every 3–4 days until pests vanish.
🔪 Introduce Beneficial Insects
- 🐞 Ladybugs or lacewings devour aphids—buy them online or attract them with dill or fennel plants.
- 🕸️ Release predatory mites (like Phytoseiulus persimilis) for spider mite control.
🥘 Use Insecticidal Soap
- 🧼 Mix 2 tbsp castile soap + 1 quart water. Spray directly on pests (test on a small leaf first).
- ⚠️ Reapply after rain—soap washes off quickly.
🌡️ Adjust Care to Deter Pests
- 💡 Reduce stress—overwatering or drought weakens plants, making them pest magnets.
- 🌿 Avoid broad-spectrum pesticides (they kill beneficial bugs too).
White spots from sun exposure or over-fertilizing need gentle adjustments:
🌞 Gradually Acclimate to Sun
- 🌿 If recently moved outside, shade hydrangeas for 1–2 weeks before full sun.
- 🏠 Use shade cloth (30–50%) if direct sun is unavoidable.
🍎 Flush the Soil
- 💦 Water deeply for 10–15 minutes to leach out excess salts (common with tap water or fertilizers).
- 🌱 Switch to rainwater if your area has hard water.
💪 Fertilize Smarter
- 📊 Use a slow-release, acidic fertilizer (like 10-10-10 or hydrangea-specific food).
- ✨ Avoid overdoing it—hydrangeas prefer soil with pH 5.2–6.2, not nitrogen overload.
🎯 Long-Term Protection
- 💡 Mulch with pine needles (acidic) to maintain soil pH.
- 🌿 Monitor water quality—test soil pH annually with a kit.
For severe cases, combine these fast-acting fixes:
- 🌿 Prune + spray fungicide (same day) to stop spread.
- 💦 Water at the base (not overhead) to keep leaves dry.
- 🌞 Move to partial shade immediately if sunburn is suspected.
- 📅 Check weekly—early action prevents permanent damage.
With consistent care, your hydrangeas will bounce back—healthier and more vibrant than ever! 🌸
Frequently asked questions
Are white spots on hydrangea leaves always caused by fungus?
Not always! While fungal diseases like powdery mildew are the most common culprits, white spots can also result from sunburn, pest damage (like spider mites), or even chemical burns from fertilizers or hard water. Always check for other symptoms like webbing, sticky residue, or leaf curling to narrow down the cause.
How do I know if my hydrangea has powdery mildew vs. sun damage?
Powdery mildew appears as fluffy white patches that spread outward and can be wiped off with your finger. Sun damage, however, creates crispy, dry white patches that don't wipe away and often occur on leaves exposed to intense afternoon sun. Check the plant's location—shady spots suggest mildew, while sunlit areas point to sunburn.
Can I use regular dish soap to treat white spots?
Yes, but only mild dish soap mixed with water (1 tsp per quart) works as an insecticidal soap for pests like spider mites. For fungal issues, use a baking soda solution (1 tbsp baking soda + 1 tsp dish soap + 1 gallon water) instead. Never use heavy-duty cleaners—they can damage leaves and worsen the problem.
Will pruning help stop the spread of white spots?
Prune away heavily infected leaves immediately to prevent spores from spreading. Focus on removing leaves with more than 50% white spots and dispose of them in the trash (not compost). Thin out dense foliage to improve airflow, which reduces humidity—the perfect breeding ground for fungal growth.
How often should I apply fungicide treatments?
For organic options like baking soda or neem oil, apply every 7-10 days until new growth appears. Chemical fungicides may require 7-14 day intervals—always follow label instructions. Consistency is key: treat both leaf surfaces and apply in the early morning so leaves dry quickly. Stop treatments once you see healthy new leaves emerging.