
Diseases
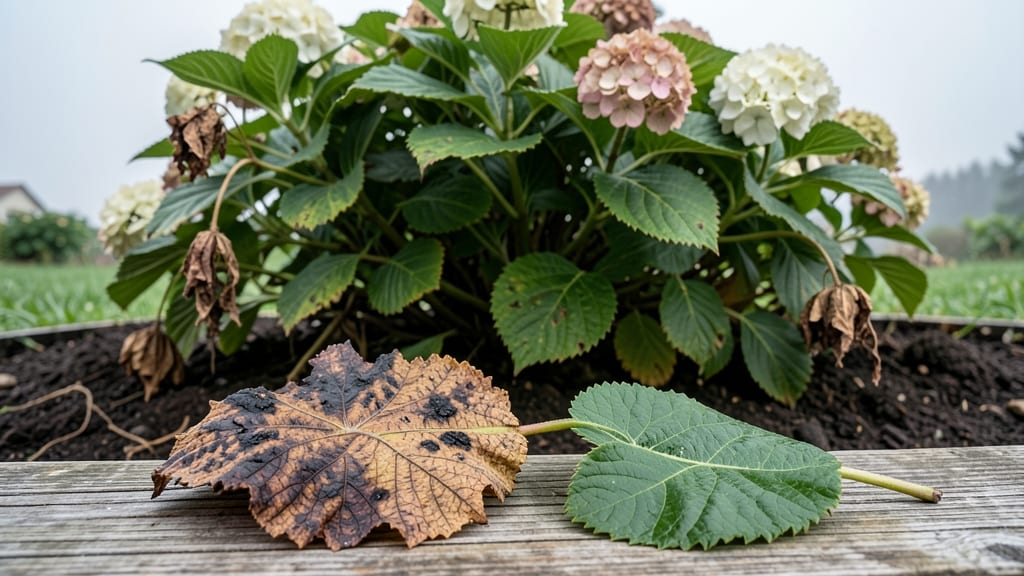
Hydrangea blight turns your lush blooms into sad, spotted messes—fast. 🌿 I’ve seen it ruin a perfectly healthy plant in just two weeks, and the good news is you can stop it before it spreads.
The secret lies in knowing the right treatments and prevention steps that actually work, without harsh chemicals if you don’t want them.
Most blight starts with fungal spores like Phytophthora or Botrytis, thriving in damp, crowded conditions. My first mistake? Ignoring the early brown spots until they covered every leaf. Now, I check for those telltale signs—dark, water-soaked patches or powdery gray mold—and act immediately.
Pruning infected stems and improving airflow can cut the problem in half before it gets worse.
You’ll restore your hydrangeas to their vibrant best with a mix of copper fungicide sprays (for severe cases) or neem oil (for organic gardeners). The key is consistency: apply treatments every 7–10 days until new growth appears, and always water at the base—not overhead—to keep spores away.
Within a month, your plants bounce back stronger than ever.
This works for all hydrangea types, from mopheads to panicle varieties, and even saves struggling plants in humid climates. Let’s get those blooms back to full glory—naturally and for good.
Root Causes Of Hydrangea Spots
Hydrangea blight—those unsightly brown or black spots marring your lush leaves—is rarely a random act of nature. It’s usually the result of fungal infections, environmental stress, or poor plant care.
Understanding the root causes is the first step to stopping the spread and saving your prized shrubs. Let’s break down the science behind why your hydrangeas develop these pesky spots.
Most hydrangea blight is caused by fungal pathogens, with botrytis blight and powdery mildew being the most common culprits. These fungi thrive in warm, humid conditions and can spread rapidly when leaves stay wet for extended periods.
- Botrytis blight (caused by Botrytis cinerea):
- Creates brown, sunken spots with grayish fuzz on the undersides of leaves.
- Often appears after stressful conditions, like drought or sudden temperature swings.
- Can also infect flower buds, causing them to rot before blooming.
- Powdery mildew (caused by Erysiphe or Podosphaera species):
- Shows as white, powdery patches on leaves, eventually turning brown and crispy.
- Loves shady, humid environments with poor air circulation.
- Weakens the plant by blocking sunlight, reducing photosynthesis.
💡 Pro Tip: Fungal spores can linger in soil or debris for years—always remove and dispose of infected leaves to prevent reinfection.
Hydrangeas are hardy, but they hate extremes. When environmental factors push them beyond their comfort zone, their defenses weaken, making them vulnerable to blight.
- Poor Airflow:
- Dense foliage or overcrowded plants trap moisture, creating the perfect fungal breeding ground.
- Solution: Prune strategically to improve airflow, especially in shaded or humid areas.
- Excessive Moisture:
- Overwatering or poor drainage keeps leaves damp for too long, encouraging fungal growth.
- Solution: Water at the base of the plant (not overhead) and ensure pots/containers have drainage holes.
- Temperature Swings:
- Sudden hot/cold shifts (like late spring frosts or scorching summer days) stress hydrangeas, making them susceptible to infection.
- Solution: Mulch around the base to regulate soil temperature and avoid planting in low-lying areas where cold air pools.
⚠️ Warning: Hydrangeas planted in shady, damp spots (like near foundations or under trees) are at higher risk—consider relocating if blight is recurrent.
A hydrangea fighting off nutrient deficiencies, pests, or physical damage is like a soldier with no armor—fungi move in fast. Here’s how weak plants become blight magnets:
| Issue | How It Weakens Hydrangeas | Fix It |
|---|---|---|
| Nutrient Deficiencies (especially magnesium, nitrogen, or iron) | Yellowing leaves (chlorosis) reduce photosynthesis, making plants less resilient to stress. | Test soil and amend with balanced fertilizer (like 10-10-10) or chelated iron for green leaves. |
| Pest Damage (aphids, spider mites, or scale insects) | Pests pierce leaves, creating entry points for fungi. They also excrete honeydew, a fungal buffet. | Spray with neem oil or introduce beneficial insects (like ladybugs) to control pests. |
| Physical Stress (pruning wounds, transplant shock) | Open wounds are gateways for infection. Stress slows recovery. | Prune in early spring (before new growth) and water deeply after transplanting. |
🔥 Hot Tip: Healthy hydrangeas bounce back faster! Regularly check leaves for early signs (yellowing, spots) and address issues before they spiral.
Now that you know why those spots appear, the next step is how to treat and prevent them—stay tuned for actionable solutions!
Revive Your Hydrangeas Naturally
Blight on hydrangeas can feel like a losing battle, but with the right approach, your plants can bounce back—and even thrive! The key is identifying the root cause (whether it’s fungal infections, environmental stress, or poor care) and tackling it head-on.
Below, we break down practical, step-by-step solutions for each common cause, plus prevention tips to keep your hydrangeas healthy long-term.
Blight thrives in damp, humid conditions, turning leaves brown, mushy, or covered in spots. Here’s how to kill the fungus and protect your plants:
🔥 Remove Infected Parts Immediately
- 🍳 Snip off any leaves, stems, or flowers showing signs of blight (brown patches, black spots, or wilting).
- 🗑️ Dispose of them in the trash (not your compost)—fungus can survive in compost piles.
- ⏰ Do this early in the morning when humidity is lower to reduce spore spread.
👨🍳 Apply Fungicidal Sprays (Natural Options)
Skip harsh chemicals and try these effective, plant-safe alternatives:
- 🍄 Neem oil spray: Mix 1 tbsp neem oil + 1 tsp mild soap + 1 quart water, spray every 7–10 days until new growth appears.
- 🌿 Copper fungicide: Use an organic copper-based spray (like Bordeaux mixture) for severe cases—follow package instructions.
- 🍋 Baking soda solution: Combine 1 tsp baking soda + 1 quart water + a few drops of dish soap, spray weekly (great for prevention too).
🌡️ Improve Airflow & Reduce Moisture
Blight loves stagnant air and wet leaves. Fix this with:
- ✂️ Prune overcrowded branches to increase airflow around the plant.
- 💦 Water at the base (avoid overhead watering) and water early in the day so leaves dry quickly.
- 🌿 Space plants at least 3–4 feet apart to prevent humidity buildup.
If blight stems from overwatering, poor drainage, or scorching sun, adjust your care routine:
💧 Check Your Watering Habits
- 🌧️ Water deeply but less often—hydrangeas prefer moist (not soggy) soil.
Stick your finger 1 inch into the soil; if it’s dry, water. - 🚰 Ensure proper drainage: If your pot has no holes, add perlite or sand to the soil mix.
For in-ground plants, amend clay soil with compost. - 🌊 Use mulch: Spread 2–3 inches of organic mulch (like shredded bark) around the base to retain moisture and regulate temperature.
☀️ Shield from Harsh Sun & Wind
- 🌿 Move potted hydrangeas to a spot with morning sun and afternoon shade (especially in hot climates).
- 🏡 Use shade cloth (30–50% coverage) if your hydrangeas are in a full-sun area—this prevents sunburnt leaves, which weaken the plant.
- 🌬️ Protect from strong winds: Wind desiccates leaves, making them more susceptible to blight.
Use a windbreak (like a fence or trellis) if needed.
Once your hydrangeas recover, lock in their health with these easy maintenance habits:
💡 Seasonal Care Checklist
| Season | Task | Why It Helps |
|---|---|---|
| Spring | Prune dead stems & apply neem oil spray | Removes overwintering fungus spores |
| Summer | Water at soil level & mulch heavily | Prevents fungal growth from excess moisture |
| Fall | Clean up fallen leaves & add compost | Reduces fungal overwintering sites |
| Winter | Cover young plants (if in cold zones) | Protects from freezing stress |
🎯 Pro Tips for Long-Term Health
- 🌿 Choose resistant varieties: Some hydrangeas (like ‘Endless Summer’ or ‘Limelight’) are less prone to blight—check labels when buying new plants.
- 🍄 Rotate fungicides: If you use chemical sprays, switch between copper and neem oil to prevent fungus from building resistance.
- 🌱 Test your soil: Hydrangeas thrive in acidic soil (pH 5.2–6.0).
Use a soil test kit and amend with sulfur or peat moss if needed.
Reviving blighted hydrangeas takes time and consistency, but with these steps, your plants will regain their lush, vibrant look. Start with removing infected parts, then adjust care habits, and prevent future outbreaks with smart gardening. Soon, you’ll be admiring healthy, blooming hydrangeas—blight-free! 🌸
Frequently asked questions about hydrangea blight
What do hydrangea blight spots actually look like?
Blight on hydrangeas typically appears as brown, black, or grayish patches on leaves, sometimes with fuzzy or powdery textures. For botrytis blight, look for sunken spots with gray mold on leaf undersides, while powdery mildew shows as white, dusty coatings that turn brown over time.
Can I still save my hydrangeas if half the plant is already infected?
Yes! Start by pruning out all infected stems (cut 6 inches below visible damage) and apply a neem oil spray every 7 days for 4 weeks. Improve airflow by thinning dense foliage and water at the base—not overhead—to prevent further spread. Most plants recover fully with consistent care.
Why does my hydrangea keep getting blight even after treatment?
Recurring blight usually means fungal spores remain in the soil or debris. Always remove and discard infected plant matter (don’t compost it), and sterilize pruners with rubbing alcohol between cuts. Also check if your plant is overcrowded or in poor airflow—fungi love these conditions.
Is it safe to use store-bought fungicides on hydrangeas?
Yes, but choose copper-based or sulfur fungicides labeled for ornamentals. For organic gardens, neem oil or baking soda sprays work just as well. Always follow label instructions—overuse can harm beneficial insects or damage plants. Rotate treatments to prevent fungus resistance.
How can I prevent blight before it starts next season?
Focus on 3 key habits:
- Clean up all fallen leaves and debris in fall,
- mulch heavily (2–3 inches) to regulate moisture, and
- prune for airflow in early spring. Water at the base in the morning only so leaves dry quickly—this cuts fungal growth by 80%.